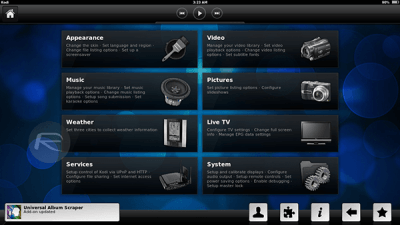
Kodi can be run from a lot of devices. There is no single best device to run Kodi from. Some of devices, you might already know about, are Android TV boxes along with more branded ones like Amazon Fire TV sticks.
And while these aren’t the best options available, they have proven themselves to work really well with Kodi.
The problem though is that you have to spend a significant amount of money in order to buy these devices.
The Amazon Fire TV stick will cost you around $40 straight and if you thought you could get away with a decent Android TV box, then you thought wrong because you can’t get one without shelling out at least $100 bucks.
We’ll give you the benefit of the doubt and not assume that these amounts will break your bank. But it would still mean that you spent money on something that you could have gotten for free.
There is another option that doesn’t cost as much. If you have the will and the energy and like to play around with your machine then you can easily set up Kodi.
You can even get it up and running from a USB stick and that’s what we are going to teach you today.
Pro Tip: Most experts recommend that you should use a VPN service with Kodi. While there are many VPN services out there in the market, right now, we recommend because it is the most versatile and the most complete of all VPN services.
To sign up for IPVanish you can go to the
Moreover it is also compatible with Kodi and all Kodi add-ons. It is also pretty secure, just in case you were wondering.
Many Kodi users among the Kodi community use IPVanish to guard their privacy and protect their identity.
So how to go about installing a Kodi on a USB stick and then running content from it.
There are two options.
Table of Contents
Option 1
Run Kodi from a Kodi-based operating system. Boot that Kodi-based operating system from a USB stick.
Option 2
Download and then install (after that run) a portable version of Kodi on a USB stick. This option is only available for users who are on Windows rather than a Mac.
To be honest, both methods work pretty smoothly. It’s all about your tastes and preferences. Both methods make use of a Linux-based application.
Do take note that both of these options are not compatible with a smart TV. If you want to try out these methods on any computer machine then make sure that computer machine has a computer BIOS.
How To Turn Kodi-OS From Bootable USB Drive
We already told you that you could run Kodi from your machine’s installed operating system so why would you want to run Kodi from a USB drive?
Good question.
The answer is easy to understand really.
Speed.
When you run Kodi from a Kodi based operating system, you get a lot of speed. Running it from Windows if fine too but as they say, speed thrills (let’s leave out the “but kills” part for this case).
If you run Kodi from a Kodi based operating system then you will also be using less resources from your computer’s overall potential.
There are two Kodi based operating system that we think are worth your time.
These are,
- KodiBuntu
- OpenElec
What’s the difference between the two? Speed.
OpenElec is quicker than KodiBuntu, though both are pretty quick when compared to Windows.
But here is the twist. KodiBuntu’s support is great. It is actually part of the larger Linux ecosystem. With OpenElec, you can only use Kodi.
In order to run OpenElec or KodiBuntu as smoothly as possible, we’ll have to make some preparations. These are,
- To save time, a lot of it, make sure you’re using Kodi USB stick with a computer machine that supports both USB 3.0 standard and USB 3.0 drive. Otherwise, you’re Kodi experience will not be fun.
- Make sure your USB is the right size. You’ll need 2GB for KodiBuntu and 256MB for OpenElec.
For KodiBuntu
You’ll have to create a bootable KodiBuntu USB drive as your first step. To accomplish that you’ll have to download the official, and the latest, version of KodiBuntu from the official website. To do that go here.
When downloading make sure you select the right version. Check if you want to 32-bit or 64-bit one. Google it if you don’t know what that means.
When you have downloaded the right version, you’ll need another piece of software to prepare your USB drive.
For Windows
If you’re running Windows then you’ll need to download Linux Live USB Creator. This is one piece of software which will give you no troubles.
Simply downloaded it and run it. Linux Live USB Creator is extremely easy to use because it’s interface is simple has been neatly sectioned for easy navigation.
When you have installed Linux Live USB Creator, then you need to run it. When you’re facing its interface, you will need to first,
- Select your specific USB drive
- Then select the appropriate image file. This is the KodiBuntu ISO image which should be present on your machine because we told you to download it earlier in the article.
- We recommend that you set persistence to 2000MB. Of course, the size you choose here is relative to the size of your USB. If you don’t know what persistence is then know that it is just the amount of storage that is allocated to stuff like programs, settings and other files. If you choose to have some space reserved for persistence then you will be able to store your sessions on your USB drive. That means you won’t have to start from a fresh installation on a reboot. This is for KodiBunto.
- Now you should go ahead and check the box that says “format the key in FAT32 (this will erase your data!!). Do we really need to explain things here? The check will ensure everything present on your USB stick gets removed. Make sure that your USB is only used for the KodiBunto operating system and do not store anything else on it.
- Hit the icon that is the shape of lightning and you should be able to start the process of installation.
When the process of installation is complete, make sure that you restart your computer.
After the computer reboots, or rather during it, enter your machine’s BIOS settings. Make sure the USB stick if plugged into your machine.
Now since there are a lot of models and versions to take care of so this step is a more about understanding rather than just following the steps.
You will need to alter the boot order. In other words, you have to make your machine boot from the newly prepared USB drive rather than the hard disk. More specifically, your USB stick should be at a higher priority than your hard drive.
If you do this right, your machine will be able to boot from the USB drive and you’ll have no problems running KodiBuntu.
For Mac
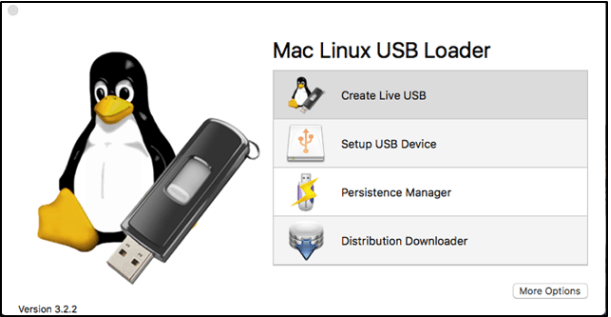
The first thing you should do is download Mac Linux USB Loader. This is start you off pretty nicely.
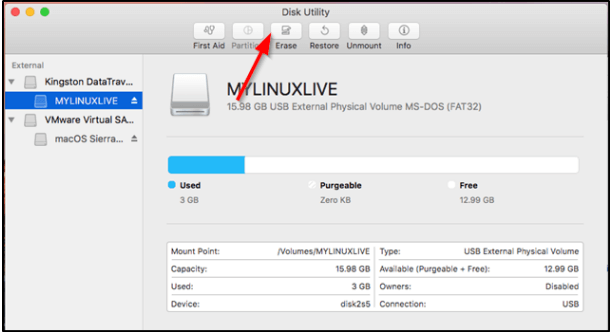
When you have downloaded the file from the official website, simply run the Disk Utility application that is present on your Mac.
Then simply choose the USB drive that you want to use in order to install KodiBuntu and select Erase that is written at the top of your screen (it’s one of the buttons).
After that ensure that the setting for your Format is set to MS-DOS (FAT). Moreover, the Scheme option should be set to Master Boot Record.
It will immensely help you if you name your drive appropriately. When you have done that, hit Erase.
After that is done, simply open the newly installed Mac Linux USB Loader and choose the option that says Create Live USB .
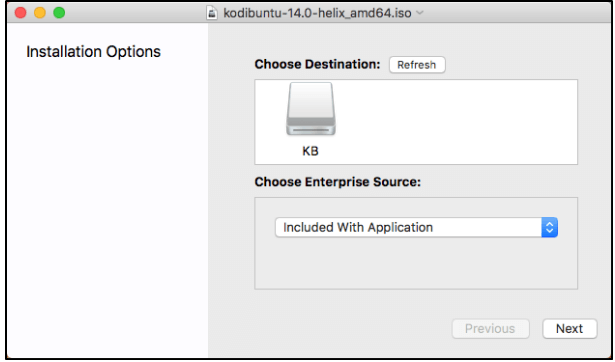
After that choose the relevant drive. This drive should be the one where you want to install KodiBuntu.
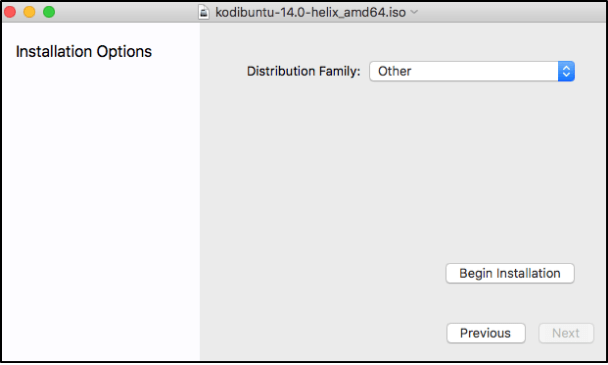
Then click Next. Follow the on-screen instructions and choose Other in the Distribution Family option.
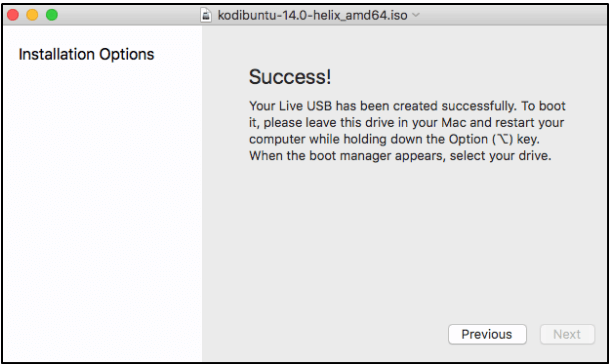
Then simply hit Begin Installation if you are sure you want to begin the process of installation. When the installation process is finished, you should be able to see a message that greets you (rather well) . This coincidentally also indicates that the installation process was a success.
As is the norm, now you should go ahead and restart your computer machine. During the reboot, enter your BIOS settings and make sure the USB stick is connected to your machine.
Again, the next step will depend on the model and type of your machine.
But, all you need to do here is to change the order of boot. In other words, boot order needs to be changed so that your computer machine, Mac, boots from the USB stick rather than the traditional hard drive.
When you’ve done that you’ll be able to launch straight into KodiBuntu.
For OpenElec
Go to the official OpenElec website and download the latest and most appropriate version for your machine. If you are unsure about what to do here simply select the one that says x86 generic stable. This should be sufficient.
For Windows
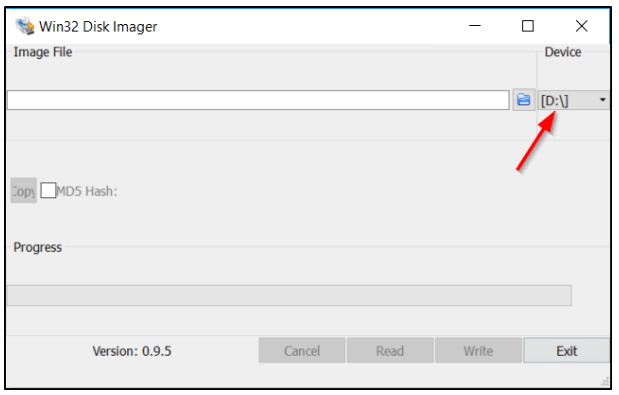
Then use the Win32 Disk Imager to create a USB drive for OpenElec that is bootable. First download the Win32 Disk Imager and then run the software application.
When presented with the appropriate windows, choose the relevant drive to install the new operating system, OpenElec, on.
Now you need to simply extract the download OpenElec file that should have been downloaded from the previous steps. You’ll need to use the correct software for extraction such as Winrar. Go here to download that from the official website.
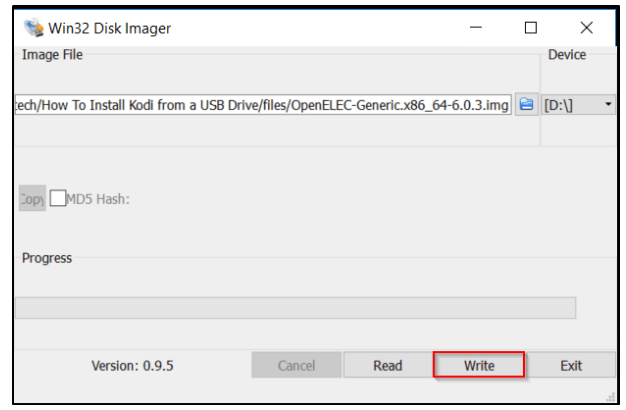
The extraction process will give you an .IMG file. You will need to use this .IMG file with Win 32 Disk Imager.
Now, choose Write and wait.
Once again, when the process of installation is completed you will be required to restart your computer machine and when it does restart you’ll need to enter the BIOS settings.
From the BIOS settings you will need to change the boot order. This will cause your machine to boot from the USB stick rather than the conventional hard disk drive.
When you have done that, your machine should directly boot into OpenElec.
For Mac
On Mac OS, the process is exactly the same as it was with KodiBuntu. You can refer to the part where we teach you how to run KodiBuntu on a Mac with a Mac Linux USB Loader above.
Again, the process will work for OpenElec as it worked for KodiBuntu. Just replace the world KodiBuntu with OpenElec in your mind and you should be all set.
How To Run Portable Version of Kodi From A USB Drive.
The second option, that we talked about way back in the beginning of this guide, was to install Kodi using a portable installation process.
This method is only relevant to users who run their machines on Windows. Macs are not allowed here.
So to create a portable Windows installation, you will need to download the proper installation file from here.
You will only be able to use this portable installation of WIndows but since most of the Windows present on planet earth run Windows, you should not have a problem in finding one.
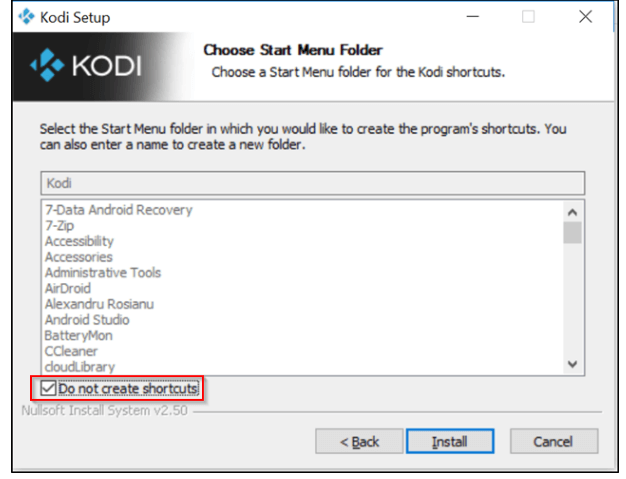
When you have downloaded the relevant file all you need to do is run the executable file and then change the Destination Folder to the root directory of the USB drive in which you want to install Kodi for Windows.
Then hit Do not create shortcuts. This step though short, must be performed.
Then simply hit Install button to begin the process. Now this next step is really important so pay attention.
You must not run Kodi after the process of installation has finished.
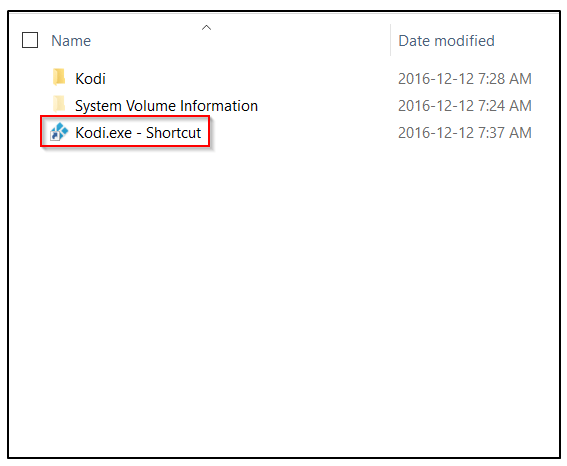
You must create a shortcut to Kodi.exe. You can do that by performing a right click on the Kodi.exe file that is present in the Kodi installation folder on your computer’s drive.
After right-clicking, choose the option of Create shortcut. Then simply move this shortcut file to the root directory of your Kodi USB stick.
Only a few short steps left now so keep calm and continue.
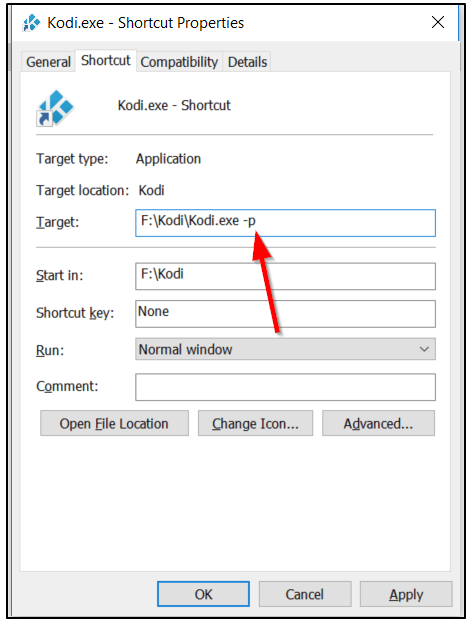
Right-click on the newly created Kodi.exe shortcut and then go to Properties tab. After that, in the Target field, add “-p” where the text of the field ends. Don’t forget to add a space between the end of the line of text and “-p”.
What does it do?
It ensures that your Kodi folder is configured correctly on your USB stick to store vital files like scripts, plugins, user data and skins. That way your copy of Kodi installation will be a genuinely portable one.
When you have completed the last step, your Kodi installation should be complete and you should have not troubles in running Kodi from the .exe file that is present on your USB drive.
Remember, this only works for Windows.
And make sure your USB stick is plugged right into your computer machine when you are using Kodi from the USB stick.
We’re assuming you already know that you need to keep the USB connected to the computer machine at all times during this whole process.
And just for information’s sake, also know that any file that is necessary to run Kodi from USB stick on Windows is stored on the USB stick itself.
No other piece of software or hardware is needed.
In order to get every feature and addon possible on kodi and to not get sued if you accidentally watch something pirated, you need a VPN. You can find the 5 best VPN’s for Kodi here.
We here at securitygladiators.com ensure that the information provided is aboslutely correct. However, that does not mean that we support or encourage people to engage in activities which might lead to any kind of copyright violation. Always take into account the law, the risks and potential victims before downloading something that is not legal. That holds true for streaming content without prior permission from producers as well.





I have an MXQ android box which is on version 4.4.2 I stupidly unistalled the Kodi system on this box and I can’t get it back as when trying to do so it throws me out at the google stage. Is it possible to download kodi to a usb and then transfer it over to the mxq box please. I am not particularly well up in computer jargon so any advice would be appreciated in laymans terms. Thanks
Hi Elaine,
Thank you for the comment.
We think this https://www.youtube.com/watch?time_continue=170&v=31nDPA6GEEY should do the trick.
It is very simple and easy to follow.
Let us know if it works out for you.
If not, then we can provide another solution.