The thing we now know as the Internet Protocol has dominated user messages over the online world (the internet) as well as Local Area Network management systems.
But that would not come as a surprise to the people who designed the Internet Protocol.
From the beginning, its design meant that it would introduce a new kind of thinking as far as the design of communications systems was concerned.
The Internet Protocol is different from proprietary systems.
Its design enables it to work flawlessly even in situations where no one seems to have the overall control of a given network path.
It is because of such scenarios that issues such as packet loss have taken so much more importance than before.
The sender of any message has to rely on the reliability and competence of a rather long chain of intermediaries in order to get his/her message across the internet.
Table of Contents
The Probability of Packet Loss
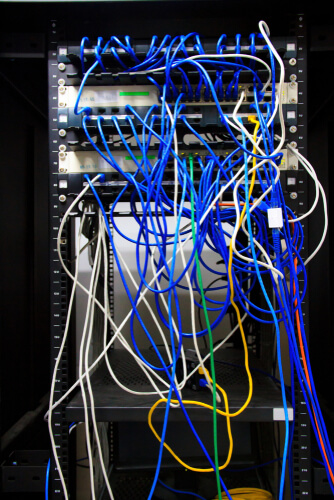
Users should not have a hard time in realizing the fact that packet loss is very unlikely on wired, private networks.
However, it is highly probable when it comes to those long distance (Wifi or wired) internet connections.
The Internet Protocol-related philosophy that is now used to pass any and all data packets across any given network or networks enables each involved router the ability to make the decision on where and how a given data packet should be moved to the next one.
In other words, the computer sending the data packets over a network doesn’t have any control over the data packet route once it is out in the online world.
As mentioned before, the sending computer doesn’t really have any other choice but to rely on individual routers to make all the important, and otherwise, routing decisions.
That means that each given access point on any given route should maintain a complete database of all the preferable and good directions for the packet’s eventual final destination.
As the reader can probably tell, this is what some call a disconnected strategy.
And it works for the majority of the time.
With that said, it is also true that a given router has no way to know in real-time if the next router that is present further down the pipe has been overloaded or not.
The router also cannot tell if the other routers are defective instantaneously.
Of course, all routers come with the feature of periodically informing the neighboring devices around them of the status conditions.
Any problem that occurs at a given point has the potential to ripple through the entire route and force neighboring routers to perform all sorts of recalculations.
If a given router in the chain experiences a traffic block, it notifies every other router that is on the internet.
This causes each and every router to recalibrate the existing paths so that data packets don’t have to take the path on which the troubled router is present.
As one can imagine, the information has to pass through a rather long chain of routers.
Sometimes, it can take time in order to properly propagate.
At other times, a router may find success in calculating the best possible path for a data packet and will send that packet directly through a route that is blocked.
When the time comes for the packet to approach the defective block, each and every router that is closest to the problematic route would already have all the information that is needed to know about the fault.
The routers in the vicinity would then reroute the given data packet so that it goes around the defective neighboring router.
The rerouting activity can sometimes overload alternative/neighboring routers.
There is also the possibility that the defect on a given router may prevent the router from sending any kind of status notifications.
If that happens, then the packet would go through the defective router regardless of the fact that the router is not working.
To simplify, readers should understand that the further a given data packet has to traverse the world of the internet, the more number of routers it would have to pass through.
Following from that, the more number of routers the data packet has to pass through, the more chances it has to pass through a potential point of operation failure.
With that, the likelihood of a given data packet getting dropped also increases.
Top reasons for data packet loss

We cannot stress enough on the fact that the health of any given router that is present on the path that a data packet has to take plays a major part in any potential packet loss.
Let’s discuss some of the major categories of router issues.
- Overloaded routers
- A great number of links
- Defective routers
Defective routers
Readers who have any familiarity with electronic equipment and/or computers would know that there are a lot of different and separate operating factors involved in the proper working of a given computerized hardware.
Because of that, the chances of something eventually breaking or going wrong are fairly decent.
In other words, users should not have unrealistic expectations when it comes to routers.
Each and every router that is present on the internet will, once in a while, break down.
No machine, or otherwise, can work in a perfect manner for each second of its operating life.
That’s where the problem starts.
Whenever a router sends a data packet to another router that is troubled, the data packet won’t have the chance of going any further towards its final destination.
As mentioned before, sometimes the troubled router’s software has a bug and that causes the router to not forward the data packet.
Other times, the problem lies with the hardware that is involved with transferring the data packet from one place to another.
Moreover, the other thing users need to keep in mind is that, sometimes the problem may be of a permanent nature.
Other times, it could come in the form of a short-term router error.
A few times, it may just be nothing more than just a blip.
As alluded to before as well, each and every router that is connected to the defected router (the device) would eventually notice the router’s problem.
Then, these “normal” router would simply stop sending any data packets in the direction of the faulty router.
With that said, it is also true that even a delay worth a few seconds would cause, possibly, hundreds of data packets to get lost.
Some will get lost when they reach the faulty router.
Others will go into oblivion while traveling to the faulty router.
Overloaded routers
One specific aspect that many users fail to take into account is the throughput capacity of a given network equipment.
Each device has one.
There is no rule that manages to specify a minimum throughput capacity for a given router that is currently operating in the online world of the internet.
A lot of routers have the ability to handle a ton of traffic.
Some routers don’t want to or can’t handle any traffic.
However, in each and every case, the given router runs, what some call, a buffering system.
This is what allows a given router to deal with a sudden and quick surge in traffic demand.
Routers can manage that increased traffic even if the level of traffic exceeds what the router’s processor can handle in terms of speed.
Simply put, if a given router has to deal with a given amount of traffic that exceeds its processing speed, it will make use of the buffer system and fill it up.
However, if the traffic reaches such high levels that even the buffer system doesn’t have any space then any subsequent data packet that will arrive at that given router would not go through normal processing.
Hence, that data packet would get lost.
Of course, this situation doesn’t go on for a long period of time.

Why?
Because all the working upstream routers that are actually sending data packets to the router that is overloaded also happen to send, what are called, querying packets.
Upstream routers do that almost every 60 seconds.
If the abnormal router does not answer those querying packets, then the upstream router (or the requesting router) would stop the process of sending any more data packets to the faulty/overloaded router.
Upstream routers that working in good condition would create new instances which would, in turn, use a new route to send the traffic to its final destination.
After a while, the overloaded or busy router would finally have some more buffer space for more traffic.
At that point, it would send an availability notice to upstream and its neighboring routers.
Upon receiving the notice, these routers would start to send traffic towards the router that sent the availability notice so that it performs its duties in traffic flow.
A large number of hops
Someone has to send those data packets to their final destination.
That’s why networks have software in place to carry out that task.
Now, even though it probably has a tiny influence on the actual journey of any given data packet, users can benefit from every inch of improvement.
In other words, if the network software is not working as it is supposed to, it can cause a negative impact on packet transfer.
The sender computer has at its disposal one main option.
And that main option is the path that the sender computer wants the data packet to take in terms of the number of hoops.
Simply put, the sender computer can put a maximum limit on the number of hoops the packet can go through before reaching the final destination.
This is what the community calls TTL or Time to live.
It is a mechanism, of sorts, that is present in the Internet Protocol header of a given data packet.
Now, the term Time to Live might give the user the impression that it is a mechanism that specifies the maximum amount of time a given data packet can travel.
But that would be incorrect.
Instead of specifying the time, the TTL mechanism only contains a number.
This number represents the absolute maximum number of properly functioning routers that the data packet has the facility of passing through before reaching its final destination.
Now, the way it works is that each time a given data packet passes through a given router, the TTL number reduces by one.
Whenever a given router receives a particular data packet that comes with a TTL value of zero, the router simply proceeds to drop the data packet.
If we limit ourselves, for a moment, to just normal circumstances, then it makes sense that the TTL value should remain forever.
In other words, it should not expire.
With that said, if, somehow, the data packet is rerouted so that it goes around a given defective router rather than through it, then the data packet may have to pass through a really high number of routers or points.
In such an unusual circumstance, the packet may expire.
At times the TTL may experience an issue that is completely fixed without any taking up too much time and thereby only allowing a packet or data to get lost in a given stream.
As mentioned before, if a particular router keeps on making trouble for data packets, in the sense that it is malfunctioning, then other routers approaching the malfunctioning router will not hesitate to calculate a much better and efficient route for the packet to go through.
In such a scenario, only a handful of data packets would get dropped because of problems with TTL.
However, the rest of the data packets would safely go through to their final destination via a more efficient and newly organized route.
How to detect packet loss
There are two very common network programs that online users mainly use to identify data packet loss.
One network program is Traceroute.
The other network program is Ping.

Both Traceroute and Ping represent messaging procedures which come built-in into the, previously mentioned, standard IP/TCP protocol.
The community calls this protocol as ICMP or Internet Control Message Protocol.
Think of these utilities as command line utilities.
And hence, some users find it pretty difficult to properly read them.
With that said, we have little doubt that a veteran network administrator should not have any trouble in interpreting their results.
The other fortunate part about the whole thing is that users don’t really have to endure low-quality result presentation.
Not anymore.
Why?
Because there are now many Graphical Unit Interface-based front-end available.
These incorporate the standard Traceroute and Ping tools.
Users who want to take advantage of a free Traceroute and Ping utility that also has a pretty user-friendly interface should definitely give a look to ManageEngine DNS/Traceroute/Ping Lookup utility.
There are also other utilities so feel free to try them all till you come to the one you like the most.
The two other utilities that we think deserves a mention here are the Visual Traceroute from Ipswitch and Traceroute NG from SolarWinds.
With everything positive said about these utilities, there are also some downsides.
For example, the Traceroute and Ping have this one inherent downside that they only have the capability of identifying ongoing route failure and packet loss.
In other words, they cannot analyze the what’s and why’s of a transfer that reached the completion stage.
Moreover, they also can’t prevent or fix the defects which caused the data packet to get lost.
Users who would like to find a real solution to problems such as packet loss will first have to understand some terms and concepts regarding communication protocols.
Connectionless and Connection communications
What readers need to know here is that the previously-mentioned Internet Protocol is actually nothing but a part of a full suite of networking do’s and don’t, in other words, guidelines, that the community calls TCP/IP.
Where did they come up with a name like that for this stack?
Well, according to most, the name has its origins dating back to two standard documents.
These two standard documents are the Transmission Control Protocol and the Internet Protocol.
With that said, there are a several number of other protocols which are actually part of the same group.
Think of it as a bundle.
This bundle also comes with other systems that we haven’t mentioned so far.
One of them is the UDP or User Datagram Protocol.
As far as transport management is concerned, the two top options are UDP and TCP.
What’s the difference between the two?
Well, TCP helps to establish all the settings for a given connection before the actual data transfer happens.
On the other hand, UDP makes no effort to establish any session between any two given computers who are about to communicate.
That is why some refer to the UDP system as the connectionless system.
In that context, the actual effect of data packet loss on a given data transmission instance would differ a lot based on whether UDP or TCP is managing the transmission.
TCP or Transmission Control Protocol
Data packets, as a whole, have a total of two headers.
The Internet Protocol header has its residence in the data packet’s outermost layer.
What many readers would not know is that inside that layer is where the TCP header sites.
Remember, this inner layer is still a bit outside the actual payload.
In Transmission Control Protocol terminology, any unit of given data that is being processed is never referred as a data packet.
Instead, the TCP protocol calls it a segment.
In other words, the TCP takes the responsibility of breaking all the streams of moving data into smaller chunks which are ready for transmission.
Once it has been assured that the header has indeed been added, the TCP-called segment goes through further processing before becoming a packet via the IP, or Internet Protocol, implementation.
The Transmission Control Protocol function that exists in the device that is going to receive the packet only receives the packet with the packet’s IP header completely stripped off.
After reading the information in the Transmission Control Protocol header, the recipient device behaves accordingly.
For more simplicity, the majority of the tasks that the TCP protocol performs are actually explained right in the protocol’s name.
They are neatly summed up as “transmission control.”
Some of the responsibilities that TCP has to carry out include segmentation of streams of data and reassembling of those streams of data.
As one might imagine, these involve the TCP sequencing each given segment so that it is able to take a stream of data and reassemble it correctly.
For the purposes of putting the stream back into its original form again, the program that has to receive the stream must make sure that all of the stream’s segments have arrived at the correct location.
Such a process is bound to cause packet loss.
And inevitably, this process accounts for most of the data packet losses.
When TCP wants to assemble the given stream of data, it has to assemble the stream’s segments in the correct order.
Such a task requires a bit of buffering.
The buffering bit comes with an added benefit of smoothing out the rough and irregular rate at which the packets arrive at the receiving program.
When TCP governs a data transmission task, it makes sure that the process stays safe from the negative consequences of data packet loss.
With TCP at the top, each packet that makes it way to the arrival destination gets an acknowledgment.
In a situation where the sender computer does not register or receive the sent acknowledgment for a given data packet, then the sender computer sends the data packet one more time.
All the while, the receiver computer is responsible for holding each and every single packet that has arrived which is part of the stream of the data.
The receiver computer holds all of that data in a buffer.
If it finds that a given segment is actually missing from the data that it has received, then it does not send any acknowledgment of receiving the data to the sender computer.
When the sender computer does not receive the acknowledgment, it starts the process of waiting.
It keeps waiting until the acknowledgment arrives.
Only after that does the sender computer forward the complete data stream directly to the data’s destination application.
UDP or User Datagram Protocol
As mentioned before, the only real alternative to the TCP option is the UDP option.
Compared to TCP, the UDP is essentially a lightweight but important transport protocol.
By that, we mean it doesn’t really come with any procedures for session establishment.
Because of that, it doesn’t have any control procedures either.
Some may find it hard to believe but for much time (probably in the decades) after options such as TCP/IP came about and were defined, no one had any strong motivation to use the UDP option.
In fact, the vast majority of programs that were based on the internet only employed TCP.
And for good reason.
TCP represented the only protocol that made use of data verification and control procedures.
With that said, if we are talking about the past couple of decades or so, the UDP option has managed to find a sudden surge of adoption.
In other words, it has found a purpose.
Now, the UDP option can boast about serving several high-tech internet-enabled applications all over the world.
Just like in the case of the TCP option, the UDP option also has an IP packet inside which sits the data unit.
Switching to the terminology that UDP uses, that data packet is a reference to a new term called datagram.
Only after referring to the data packet with that term does UDP allow it go ahead to the Internet Protocol program.
The other thing users need to know about UDP is that, with this option, certain data integrity checks and session-establishment procedures aren’t within the realm of possibility.
With that said, UDP makes it possible for anyone to specify a particular port number.
The UDP header makes sure to specify the destination and originating port addresses.
Our research shows that one of the biggest reasons why UDP suddenly rose to stardom is because of the advent of, what we now know as, high-speed broadband internet.
With a faster internet connection, UDP differentiated itself from the TCP option by not having any delays in transmission.
Because of that, interactive internet-enabled applications such as video streaming, video conferencing, VoIP all came into existence when developers started to make use of UDP instead of the older option TCP.
Besides, many elements that originally belonged to the TCP option have actually gone away.
In simpler terms, other more modern procedures have replaced them.
To take an example, let’s discuss the Session Initiation Protocol.
This is what provides different session functions such as session establishment along with session ending.
Many video systems replicate these functions with the internet-enabled applications.
The overall character of voice and video programs is to do the best that they can when it comes to receiving the arriving data and then delivering it to the application.
By “best”, we mean that programs want to do that in the minimum amount of time.
Readers don’t need us to tell them that there is a very significant need of checking whether the arriving packets have come in the right order.
Other needs include the ability to check if packets are undamaged and are coming in at a consistent and regular rate.
Of course, the need to check if the packets have arrived in the first place is also there.
All of these needs, according to some, are more important than the need to check the arriving data’s integrity.
UDP vs TCP
So which one is better?
Our research shows that if one gives due consideration to the actual operating procedures of UDP and TCP, the solution that is easiest to follow, as far as avoiding loss of data packets over a given internet connection, is the one that makes use of TCP instead of the newer UDP.
The only unfortunate part about the whole situation is that the transport procedures of the majority of the internet-enabled application are actually embedded in the related programs themselves.
The only exception to such applications are the networking software applications which are actually a specialist application.
That means that the end-user would rarely get an opportunity to select his/her preferred transport option that he/she wants to use with a given application or program.
Our research shows that programs and applications that successfully employ UDP actually make a great sacrifice of not ensuring absolute data integrity in favor of more speed.
Perhaps that is the reason why service impairments such as low quality of calls (due to loss of packets) are pretty much frequent occurrences when it comes to video and voice applications which are available to users who have an internet connection.
In reality, these “service impairments” have become so common that the majority of online consumers have, sort of, gotten used to them.
These impairments come in the form of robotic quirks and short gaps in VoIP conversations along with pixelated frames, jumps and pauses in streams of live video.
Loss of packets that occurs over the internet
If we are only talking about data packet losses that occur due to the congestion or failure of internet routers, no one really has a straightforward remedy for it.
What we really mean to say is that there is a definite lack of choice when it comes to the user selecting UDP or TCP for a transfer.
With that said, users have the option of using an old trick in order to enforce the transmission control protocol on apparent UDP communications.
The converse isn’t true, however.
Users can’t really switch a given UDP program to act like a TCP system.
Nevertheless, there is always the option of wrapping up UDP data packets in the Transmission Control Protocol (TCP) procedures.
One application that is particularly helpful in this regard is a VPN service.
VPN services have the ability to establish a safe and secure link between two specific computers.
One of the two computers is actually the server of the related VPN service.
Most of the time, the secure link that the VPN service provides to its users is called a VPN tunnel.
The majority of VPN service providers, the good ones anyway, make use of TCP procedures.
One other thing that we should definitely mention here is that once a VPN service has successfully created a tunnel, all of the user’s traffic and the recipient’s traffic (in other words, the information that is exchanged between the two computers) goes through that tunnel.
As a result of that, both the TCP and UDP transfers have the protection of TCP procedures.
There are other VPN service providers that allow users to switch the VPN tunnel (that the VPN service has created) to NOT run over TCP but over UDP.
But, users need to keep in mind that as far as the application itself is concerned, the maintenance of the VPN tunnel that the server and the VPN client has created, only emulates TCP protection even if the application itself has an option that the user has set to UDP port.
Another thing that users should take note of is that the actual path that exits between the VPN server itself and the final destination of the data is not actually enclosed in the VPN tunnel.
Nevertheless, there are a total of two major and effective strategies that users can utilize in order to eliminate or at least reduce losses related to data packets during the final stages of the packet’s journey.
Decrease the amount UDP exposure to data packet loss
One of the easiest ways in which users can get as-close-to-perfect-as-possible TCP coverage for their various UDP transfers is the method of choosing a good VPN server.
What is a good VPN server?
A good VPN server is a server that is physically the closest VPN server to the related remote computer that the user has connected to.
Large VPN service providers offer VPN servers in a multiple number of cities when it comes to countries such as the United Kingdom, Germany and/or the United States of America.
In simpler terms, users should choose a location that is as close to the actual source of the video stream or call as possible.
Bring UDP exposure to data packet loss down to zero
At every point of connection, VPN services allocate each of their clients an IP address that is temporary.
The user continues to have this new IP address wherever he/she goes on the internet until and unless the user ends the session and begins a new one.
The majority of the VPN service providers in the market today, assign users a new IP address each and every time they connect to the VPN service.
However, there are those VPN service providers as well that only offer static IP addresses.
These VPN services are more experience.
Some feel that the fact the user has a single static IP address each and every time the user connects to the VPN service is something that is worth to pay more for.
Any VPN service that offers users a static IP address basically allows users to make use of the IP address (that the VPN service allocated to the user) rather than their own real IP address.
Hence, whenever a user makes a connection with another internet-enabled device over the internet, that device would first form a connection with the VPN server where the user’s very own static IP address is, in reality, registered.
This makes sure that the route from the client (that is the user) to the VPN server (provided by the VPN service) is always under the protection of an encrypted tunnel.
Static IP addresses are especially helpful for users who tend to own a multiple number of sites.
Of course the user,first, has to make the decision of actually using TCP procedures so that they cover all of the user’s site communications.
Such users can simply buy individual static IP addresses from a given VPN service provider for each of their sites.
When the user has made sure that all of the sites are properly connected to to the chosen VPN service, then all of the outgoing messages from those sites would get full protection but only as far as the chosen VPN’s server.
If the user somehow finds a way to address those messages to a VPN-allocated remote address, then even after leaving the VPN server from the sender’s side, the messages will have the protection of an encrypted tunnel for the rest of their journey from the sender’s VPN server to the final destination of the messages.
This is what some have called the double VPN method.
Using this method, users have the opportunity to apply TCP procedures to the whole length of their connection.
Moreover, using the double VPN connection feature and other services that automatically avoid packet loss, users can cover all of their communications over UDP.
Private networks and packet losses
As mentioned at the beginning of this guide, the risk of any data packet loss on any given private network is minimal when compared to data that a user may want to transfer via the internet.
With that said, a private network isn’t immune to packet loss.
Some packet loss may or may not occur from time to time.
If a user has a problem with his/her network equipment then that can potentially increase the packet loss rate to dangerous levels.
Users who want to eliminate or reduce packet loss on their LAN have one big advantage over users who want to do the same over the internet.
That advantage is the fact that the user himself/herself controls all of the available links that exist on the network.
Moreover, the user also controls all of the related equipment which helps to process the data transfers.
One bullet-proof way to prevent any type of data loss within the user’s network is definitely to keep reasonable tabs on the actual health of all the related network equipment.
The fortunate aspect of this problem is that, users can available some extremely effective network monitoring software/system.
What Are Network Monitoring Software/Systems?
Let’s discuss some of the best network monitoring software/systems that are available in the market today.
- Nagios XI
- Paessler PRTG
- ManageEngine OpManager
- Ipswitch WhatsUp Gold
- SolarWinds NPM (Network Performance Monitor)
The first thing that users need to know is that these are just software applications that assist in identifying the equipment that is responsible for all the packet loss.
These applications also enable users to have access to continuous monitoring of devices to stop potential packet loss wherever there is an opportunity to do so.
SolarWinds NPM or Network Performance Monitor
The new SolarWinds NPM does a good job of including an auto-discovery function.
This function helps users to map their entire local network.
To set up this feature, users have to do nothing.
Why?
Because SolarWinds NPM enables this feature automatically.
Moreover, the feature recurs on a permanent basis.
In other words, any kind of changes that may happen in the user’s network will automatically register in the tool’s output.
As alluded to just now, the auto discovery feature helps users to populate a complete list of devices that are connected to the user’s network.
In the process of doing so, it also generates an entire network map.
The official SolarWinds NPM tracks all wireless devices and their performance.
It can even track VM systems.
This tool has no problems in picking up SNMP (Simple Network Management Protocol) messages.
These are messages that produce reports on all sorts of warning conditions that may occur in each and every network device.
Users have the option of setting a capacity level for warnings as to when the tool should spot routers and move ahead to switching actions when one is nearing capacity.
What users should also understand is that if they take action quickly in such situations then they can really boost their chances of decreasing packet loss.
Tools such as SolarWinds keep users informed of any equipment that is reaching overcapacity levels.
The tool comes with a management console.
It includes another utility by the name of NetPath.
This utility shows the user all the links that are crossed by all the paths that exist in the user’s network.
The utility makes use of data to create its graphics.
And in order to have more accuracy in its results, in continually updates and then shows the user all the troubled links with the color red.
This way users can easily identify which problems need their immediate attention.
The NetPath utility shows each given switch and router that is present in the route as an individual node in the path.
Users are free to hover their mouse cursor over a given node and the NetPath utility gladly shows them the packet loss and latency statistics for that specific node.
The official SolarWinds NPM can also extend its metrics to a much larger range by including nodes on the wider world of the internet.
This Network Performance Monitor even has the ability to see inside individual networks of various service providers such as Amazon and Microsoft.
Then it can study those systems and report on the present nodes within them.
If there is one thing that the NetPath utility does really well then it is the visibility that it gives to various problems resulting in packet loss.
It enables users to waste as little time as possible in finding out the cause of the packet loss problem.
SolarWinds NPM SNMP controller module enables users to adjust all the related settings on a remote basis for each given device on the network.
This, in turn, allows users to quickly resolve any kind of packet loss issues that may be present on the local network.
Users who are in the business of running their own voice system over a give data network, they would do well to consider another product from SolarWinds in the form of SolarWinds VNQM or VoIP and NQM (Network Quality Manager).
What does this tool do?
Its particular focus is one all the important network conditions that enable successful and high-quality VoIP delivery.
As mentioned before in this guide many times, packet loss has become a huge problem with all sorts of VoIP services.
The VoIP and Network Quality Manager module has the capability to hone in on that specific metric: the packet loss metric.
This SolarWinds system also includes a neat visualization module.
The visualization module helps users to see all the paths that the VoIP follows.
Just like the NetPath utility, this module also displays the health of each given node via different statuses made possible by color codes.
The SolarWinds VNQM tool actually performs the function of extending the VoIP network quality management to multiple sites.
In the end, it is able to cover the user’s entire Wide Area Network or WAN.
The other great thing about both the products that we have mentioned above is that both come from SolarWinds (obvious!) and both make use of the same platform to run.
Hence, users can integrate them together if they want to.
All the infrastructure for SolarWinds monitoring systems operates on the official Windows Server.
Sometimes SolarWinds does offer discounts and free trials on all its tools so watch out for those.
Ipswitch WhatsUp Gold
The product is actually called WhatsUp Gold.
And its developer company is Ipswitch.
This tool has the ability to monitor the user’s network for all devices.
After scanning the devices, it produces warnings of possible erroneous conditions.
These conditions include device CPU and memory exhaustion.
The WhatsUp Gold Network Monitoring Software from Ipswitch uses SNMP to manage alerts.
Furthermore, it keeps the user wary of failure and capacity problems.
Both these problems can ultimately cause packet losses.
The WhatsUp Gold software from Ipswitch comes with a cool feature for network discovery.
This feature collects each and every piece of data for its monitor to show the user some useful information.
Just like NetPath from SolarWinds, this product also has the ability to update the topology of any given LAN on a continuous basis.
In other words, the WhatsUp Gold from Ipswitch can detect inventory relocations, removals as well as additions.
It manages to create a complete device list with the help of its discovery process and also build up a decent network map.
It gathers all the data at the Network and Data Link layers and then compiles them to create the aforementioned map.
The map, just like before, displays all the devices that are in trouble with the color code red.
WhatsUp Gold’s network links map can extend out to wireless devices, virtual environments as well as to the Cloud.
This is great coverage.
The WhatsUp Gold utility from Ipswitch also takes care of performance metrics such as packet loss.
It shows that directly in the complete device list we discussed before.
Moreover, it also shows that information on the network map.
Similar to SolarWinds NPM and VNQM, the WhatsUp Gold from Ipswitch also comes with a dashboard.
It provides complete access to both historical and live data.
The dashboard can also perform analysis and come up with trends of traffic demands.
It can also raise live alerts when it detects that a situation has met certain conditions based on an existing set of rules.
Users have the option of setting their own custom conditions and alerts.
Furthermore, they can also send out these alerts to other team members, if there are any, via methods such as Slack notifications, SMS messages and of course, email messages.
Just like SolarWinds NPM, the WhatsUp Gold from Ipswitch easily installs on a given Windows Server.
Sometimes, Ipswitch offers trial periods as well as discounts.
So watch out for that.
ManageEngine OpManager
Of all the products we have mentioned on this list, none offers a dashboard as sophisticated as OpManager.
It shows the user everything.
Does it do a good job of crowding all the information that the user may or may not want to see without overwhelming the user?
Well, we think it does.
But users are free to make up their own mind.
Besides, users have the option of customizing the dashboard and even create various different versions of the dashboard for different members of the team.
When users try to install the ManageEngine OpManager, it starts the usual way.
But it ends the installation process with the very important phase of network discovery.
This phase allows OpManager to populate the database that OpManager system makes use of.
Using the data, OpManager’s monitor builds up a reasonable graphical representation of the user’s network.
It can extend that representation to wireless equipment as well as WANs.
Users who have virtual environments should know that the OpManager network discovery feature has the ability to map both the physical and virtual elements of their system.
The ManageEngine OpManager NMS (network monitoring system) makes use of Simple Network Management Protocol, SNMP, to continue its processes involved with monitoring the actual health status of any and all Internet-enabled devices present on the given network.
This product’s Simple Network Management Protocol system provides all device agents the ability to send traps.
What are the traps?
Traps are simply alert messages.
The present controller mechanism shows all these alert messages on the user’s dashboard right after they are received.
Users also have the option of setting the mechanism to only issue notification via SMS or email.
The OpManager monitoring system also assists users to prevent any kind of emergency-level performance condition which may potentially cause data packet losses.
ManageEngine OpManager comes with an alert logging mechanism which enables users to find the easiest method to not only detect packet loss issues but also resolve them.
As one would expect, one of the major alert conditions that this logging system offers is the packet loss condition.
Users can tie such an alert to an individual device on the network.
When the user clicks on a given notification, the ManageEngine OpManager dashboard helps the user to make his/her way to the page where each and every piece of information about that device is present.
The OpManager makes use of different visual formats to display various performance metrics.
This actually enables users to have a quick and easy way to not only check which one of the conditions actually caused an increase in the amount of packet loss but also a solution to it.
There is always a chance that each and every aspect of a given router’s performance is working as it is supposed to and not generating any problems.
For such a case, users can easily click through the device in order to read the relevant logs related to configuration changes.
If the user finds that the data packet loss increased and it coordinated with a particular configuration change, then he/she should try and roll back all the settings of the given network device to a state where none of those changes went into effect.
This would allow the user a good opportunity to see if the rolling back of configuration changes resolved the device problem.
In short, ManageEngine OpManager provides users with every piece of information that they might need in order to resolve and prevent data packet losses with the help of nothing but a few mouse clicks.
ManageEngine OpManager is compatible with Linux and Windows and the installation process is simple enough for users to not face any problems.
There is also a free trial available for a period of 30 days.
Paessler PRTG
One of the biggest players in the network monitoring application market is Paessler.
The company makes use of all its experience and expertise and puts it into a single product called PRTG.
Some have called PRTG the killer product in the networking monitoring application business.
The company has a rather interesting pricing model when it comes to offering its networking monitoring product.
What we mean to say is that, the price of the product changes based on the count of sensors that the user wants to use.
But, what are these “sensors”?
The way Paessler PRTG determines it, a sensor is a device or network condition.
It can also be a hardware feature.
Most of the time, users have to employ around three sensors in order to resolve and/or prevent data packet loss.
The first of these sensors is the Ping sensor.
This sensor is responsible for calculating the data packet loss rate for every network device.
The second sensor is related to Quality of Service.
It is the responsibility of this sensor to check on data packet loss that may occur over a given link in the user’s network.
And finally, the third sensor is known as Cisco IP SLA.
It is the responsibility of this sensor to collect data from all the equipment that is present on a given Cisco network.
PRTG has a number of system monitoring features which go through various ongoing routines in order to avoid conditions which may initiate data packet loss.
Users who want to get started on reducing their data packet loss should first assure the fact that no hardware failures and/or software bugs are able to cripple the device network.
It is for this reason that networking management products such as PRTG make use of SNMP (Simple Network Management Protocol) agents in order to monitor each and every piece of hardware that is connected to the concerned network no a constant basis for any error conditions.
Some experts are of the opinion that users should set each network device’s alert levels right at the device’s processing capacity.
Then they should marry that condition to PRTG’s live monitoring feature which keeps a check on the given network’s total throughput rate for each link.
If traffic starts to build up in a given area of the user’s network then that may give rise to overloading in the closeby router and/or switch.
That, in turn, would result in the loss of data packets.
The Paessler PRTG network monitoring system also has the ability to monitor performance metrics for applications as well.
If a single application is generating too much traffic, the monitor system will pick up the sudden spike and will offer users options to prevent any network overload.
Users can block the application on a temporary basis to stabilize the network traffic.
Moreover, users also have the option of tracking the traffic’s source directly back to a particular endpoint which may exist on the user’s network.
After identifying the endpoint, users can then block the source in order to stay clear of any network overloading.
PRTG comes with a dashboard that offers great options when it comes to visualization of data.
These visualization options include histograms, graphs, charts, and dials with color codes.
PRTG dashboard also comes with impressive mapping features.
It provides users with physical layout views of both WANs and LAN.
With WANs, PRTG has the ability to form a real-world map.
There is also a Map Editor.
It enables users to their custom network representations.
Users can select what type of layer they want the map to display and whether they want the map to include identification marks of endpoints, applications, and protocols.
Just like all the other products we have mentioned on this list, the Paessler PRTG comes with a monitoring feature that extends far into the Cloud.
It enables users to monitor not just wireless devices but also remote sites and virtual environments.
Users have the option of installing PRTG on operating systems such as Windows.
They can also opt in to access the whole PRTG system via a Cloud-based service over the internet.
As far as free trials go, Paessler comes with a 30-day official free trial.
Nagios XI
Perhaps the only open-source and free network management program on this list is Nagios Core.
There is one big problem with Nagios Core though.
It doesn’t come with any user interface.
Users who want to have access to the full GUI and all its controls will have to dish out some cash for the Nagios XI system.
Pretty much similar to all the options we have mentioned before on this very list, this network management software (Nagios XI) also has the ability to discover all types of devices that have connected to the user’s network.
After discovering all these devices, it makes a list of them and displays them via the dashboard.
Nagios XI is also a pretty good network management software when it comes to generating a detailed map of the user’s network.
There are several ongoing status checks which prevent potential opportunities for packet losses.
In doing so, they also avoid problems that provoke performance hits.
Nagios XI makes use of the company’s proprietary Nagios Core 4 to check all statuses.
The Nagios Core 4 is more of a monitoring system rather than a Simple Network Management Protocol.
With that said, users have the option of using plug-ins in order to extend Nagios’ functionality.
There is a decent library present which comes with plug-ins that add a Simple Network Management Protocol-driven network monitoring system to Nagios XI.
The dashboard includes many types of statuses including,
- Memory utilization
- CPU activity
- Rates of traffic throughput
As before, users can set various alert levels on the attributes that we have mentioned above so that they have the facility to get an appropriate amount of warning messages to block network devices getting overloaded.
Another module is Configuration Management.
It has the ability to take a look at each given device on the user’s network and checks the setup of it.
Then it proceeds to log that information.
What type of information does the log record?
Well, it records all the changes that the user may have made to default configuration settings.
Users can instantly roll back all the settings if they find out that a new setting has actually increased data packet loss and therefore, impacted performance negatively.
In fact, users can do that for each given device and revert its settings to an earlier one.
As mentioned at the top as well, the official Nagios XI dashboard comes with fairly attractive visualization options such as,
- Dials
- Charts
- Graphs
All are color-coded.
Users also have the option of customizing their dashboard and creating various versions of individual members of different teams.
They can also customize it so that it is easy for a non-technical manager to understand what is shown and hence help them keep informed about the network in question.
The complete Nagios XI network management package does a good job of including all the relevant widgets that a team would need to assemble a custom version of the default dashboard.
In other words, there are drag-and-drop user interfaces available to customize the look and feel of the dashboard.
The Nagios XI system also comes with the option of producing standard reports.
But users can, and probably should, build their own customized output.
As alluded to before as well, Nagios XI first records and then stores various performance data as well.
Using that data, users have the opportunity to operate the analysis tools the interface offers in order to replay all the previous traffic events but under different and varied scenarios.
In fact, the system comes with various capacity handling features which can help users to spot potential points of overloading.
If users can spot these earlier then they can take actionable steps to stop further packet loss.
The current version of Nagios Xi has the ability to cover,
- Traditional Local Area Networks (wired and otherwise)
- Wireless systems
- Remote sites
- Cloud services
- Virtual systems
The only problem here is that, users will have to use either RHEL or CentOS Linux in order to install this monitor.
We are aware of the fact that the majority of online consumers don’t have access to such operating systems.
For such users, we recommend that they get themselves Hyper-V or VMware machines in order to install Nagios XI system.
As far as free trials go, the Nagios XI comes with an official free trial that lasts up to 60 days.
Concluding considerations regarding packet loss

By now, most of our readers would understand that there is nothing they or anyone else can do to reach that point where they have such a great network infrastructure (or their company does) that they are able to achieve exactly zero data packet loss.
That is simply not possible.
What is possible is to come to terms with the fact that there will always be some performance drag.
That’s a part of what happens when one tries to make connections between computer machines over the internet.
With wired local networks, one can get away with minimal packet loss.
But not with connections over the internet.
However, understanding all the reasons why do these data packet losses happen is the key to minimizing them and keep one’s network safe, efficient and healthy.
The more one reads about it, the easier it comes to manage this task.
One of the first steps that users can take in order to prevent system overloading and equipment failure is to install a network management monitor application.
Such applications enable users to stop packet losses before they escalate to a point of critical impact.
What readers also need to realize is that, packet losses can easily cause one’s business real money.
How?
Because packet losses lead to extra and unnecessary traffic.
Users and organizations who don’t give sufficient time to packet loss management end up compensating for the packet losses with more internet bandwidth and extra (mostly expensive) infrastructure.
If such users only tune their system a bit differently, they can bypass all those costs.
The other thing that we would like to mention here is that, when the user takes steps to remedy increase packet loss and hence prevent unforeseen traffic buildup, the user actually does himself/herself a favor by performing his/her job well.
We won’t deny the fact that the tools that we have mentioned on this list aren’t exactly cheap.
But, with long-term use, they can more than pay for their initial investment demands.
These tools can help the user to increase productivity and thus lower the existing bandwidth requirements.
The one fortunate aspect of all the tools that we have mentioned in our list is that they all come with official free trials.
So the user is free to first try them and then pay their subscription fees.
We recommend that users should start off by trying all of them to see which of these tools gives them the best features and opportunities to stop data packet losses.
Now we turn to the users to ask them if they have experience unnecessary and overwhelming levels of data packet losses which may have affected their overall network performance.
We would also like to know if users find issues such as overloading and traffic congestion happening frequently on their own network.
Moreover, users should also take this opportunity to let us know about how they monitor their own network and how do they prevent data packet loss.
To ask us any further questions, don’t be hesitant to use the comments area below and let us know your experience with data packet losses and what you have done to try and avoid them.
We’re sure that with proper feedback, we would be able to help the community even better than before.