The most obvious factor that affects GPU performance is cooling. Without proper cooling, even mid-range GPUs cannot perform at adequate levels. Another factor is whether the system has Open GL and 3D support. Almost all GPUs now support OpenGL and 3D and these standards affect performance on platforms such as Unix, Mac and Windows. A lesser-known factor that affects GPU performance is RAM. Most GPUs come with some dedicated RAM and the speed of this GPU-specific RAM affects performance. If the user wants to do anything other than editing a Word Document then the GPU must have a lot of RAM. The resolution of the user’s screen also affects GPU Performance. The higher the resolution, the more powerful the GPU must be for the same performance. For this reason, a 2160p screen will require a GPU with at least 8GB of RAM. Finally, a GPU’s interface type may also affect performance levels. Early GPUs had PCI and AGP interfaces but modern GPUs rely on 16x PCI-e Version 3. For the end-user, factors that affect GPU performance include memory bandwidth, memory clock rate, available memory, size of memory bus and GPU clock speed.
Now, let’s take a look at how users can increase GPU performance. The top 16 ways to increase GPU performance are given below:
- Overclocking the CPU
- Clean Your PC
- Hard Disk Defragmentation
- Overclocking the Graphics Card
- Adjust Power Settings
- Use An SSD
- Stop using the Nvidia Streaming Service.
- Turn off anti-aliasing and V-Sync.
- Graphics Card Drivers Should Be Updated
- Consider using Game Boost Software.
- Windows 10 and Direct X should be updated.
- Increase Your Power Limit
- Create a Custom Fan Curve
- Improve The Airflow
- Improve the Cooling (Desktop Only)
- Other PC Components Should Be Updated
Table of Contents
1. Overclocking the CPU
Overclocking the CPU is one of the more popular ways to increase CPU performance and as a result, increase GPU performance. Similar to GPU overclocking (which will be touched upon a little later) CPU overclocking is about increasing the CPU’s clock rate. Once the clock rate goes up, the CPU is able to perform more operations for a given period of time.
To get started, first check if the motherboard and CPU actually support overclocking. Just search for the make and model of both and check. A supported CPU can be overclocked via the BIOS. Before that though, it is important to run some benchmarks to check if the overclocking is eventually going to increase GPU performance. So run the Intel Extreme Tuning Utility (for other manufacturers a different software may be better) and run some tests and note down the benchmark score. Another popular stress test or benchmarking tool is Prime95 or Cinebench.
Once complete, go to the BIOS screen (depending on the make and model of the motherboard, this can be achieved by pressing either the F10 key or the F2 key or the DELETE key on reboot) and search for the setting labeled CPU Core Ratio (every BIOS has a different set of steps to get to this setting depending on the manufacturer). Once the setting is found, increase CPU Core Ratio (slowly and only adjust CPU Core Ratio without changing other values). To give an example, if the CPU Core Ratio is at 43, increase to 44. Save the changes and reboot the machine. Run the same benchmark as before and check if performance has improved.
The next step is to change the supplied voltage to the CPU. Most of the time, the Supplied Voltage setting is near the CPU Core Ratio. Some BIOS have this option labeled as CPU Vcore and/or CPU Voltage. In supplying the CPU with more power the CPU is better able to support more increases in CPU Core Ratio levels. Again, increase the CPU Voltage value very slowly as the temperature can shoot up quickly and the system can become unstable if too many values are changed too drastically. Just like before, keep mixing and matching different values until the system remains stable and the CPU starts to score more on various benchmarking tests.
Note:
Some motherboards of Advanced CPU Core Settings can enable overclocking automatically. So check if the motherboard supports this.
Apart from the above-mentioned two options, look for a multiplier option as well. Keep increasing it slowly to increase performance. Keep an eye on the temperature of the PC after adjusting any settings just to be safe.
If after overclocking, there is a black screen shown on the monitor then reset the BIOS settings. That can be done by accessing the Reset CMOS or Clear CMOS setting. If the machine becomes so unstable that the BIOS is not available then open up the PC case and take out the motherboard’s battery for 10 seconds. That will reset the settings and solve the black screen problem.
2. Clean Your PC

Cleaning the PC can improve GPU performance in less-than-obvious ways. If the PC is dirty then the hardware installed will not be able to dissipate the heat produced within efficiently. That may cause thermal throttling where the CPU and GPU are not able to perform at a high level for long. If the PC remains dirty then the system may automatically reduce the power supply to different components to stop overheating and malfunctioning.
How to clean your PC?
Cleaning a PC means exactly that. But exactly how should a PC be cleaned properly?
Very carefully clean the PC externally and then remove any dirt buildup on hardware components including the GPU, CPU, RAM, casing and fans. Check if the air intakes are clean and do not have any obstructions. The best tool to clean a PC is a can of compressed air. Compressed air cans are great for blowing into any hard-to-reach corners of the PC to remove dust. On that note, replacing the thermal paste under the CPU cooler is another way to increase the overall performance of the gaming machine/ GPU.
3. Hard Disk Defragmentation
Hard Disk defragmentation simply means consolidating all the fragmented files on a given hard drive. Whenever some data is written on a disk, files tend to become fragmented. New files need contiguous space for proper storage. Modern storage algorithms have the ability to break a file into pieces for storage. But that leads to fragmentation which can decrease GPU performance.
Mac and Linux users do not have to worry much about fragmentation. For Windows users, the process to defragment data is fairly easy.
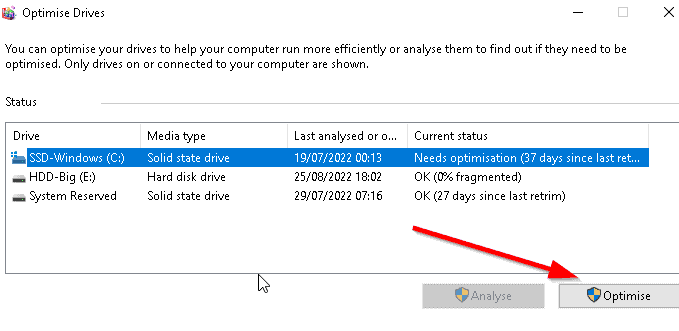
Simply click the Start button and then search for Disk Defragmenter. Alternatively, users can click the Windows button (or the start button), go to the Control Panel and then to System and Security. From there, click on Administrative Tools and then enable Defragmentation on the hard drive. Then click on Analyze Disk and then Defragment Disk.
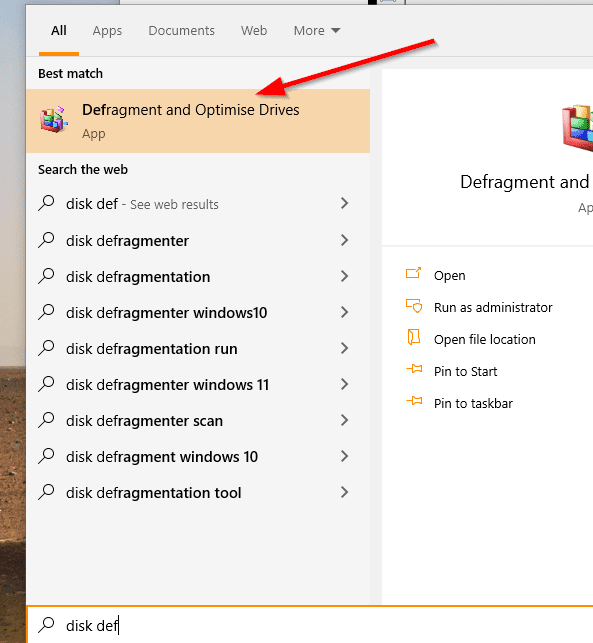
Windows also provides users with an option to automatically launch defragmenter applications on a schedule. There is also a Configure Schedule option that allows the user to select a time and data to run the defragmenter in the background and even when the machine is in sleep mode.
4. Overclocking the Graphics Card
Overclocking the GPU is one of the most popular techniques to increase GPU performance. Overclocking the GPU is essentially changing the default settings of the GPU through various applications to increase its working/ clocking speed. As with the CPU, it is essential to do this slowly so that the system stays stable and the hardware remains within acceptable temperature limits.

Two tools are required to overclock any GPU. One is an application to overclock the GPU and the second is an application to test if the GPU has indeed been overclocked. MSI Afterburner is one of the most known applications to modify GPU settings. Guru3D is another tool for people who like to have options.
The testing tool can either be Furmark or 3Dmark to benchmark the overclocked GPU. Assuming the overclocking application has been installed correctly (such as MSI Afterburner), the application should show a clock speed labeled as GPU Clock. Apart from the GPU clock, there might also be other statistics such as the memory clock and the temperature of the hardware (users should make sure the hardware temperature remains below 90 C). Adjusting the available sliders should overclock the GPU. To benchmark, run the stress-test application like 3DMARK and launch the test. Save numbers such as temp, performance, FPS and clock speed.

New users should overclock GPU chips very slowly. More specifically, the best practice is to increase the clock rate by no more than 5% and then run the test. Such a low increment should allow for plenty of time to check temperatures and system stability. GPU clock is one thing, but GPU memory also needs to be tweaked. For GPU memory, the safe limit for overclocking increments is 10 percent. If the system does not crash (with and without the game running) then overclocking has been successful.
After the core GPU clock and GPU memory have been overclocked, tested, tweaked, fine-tuned and stabilized, now is the time to overclock the power supply to the GPY. MSI Afterburner provides two two options for this, labeled as Temperature Limit and Power Limit.
Always spend a bit of time tweaking and fine tuning the available tools to get the best outcome and keep the hardware safe from overheating and/or malfunctioning.
5. Adjust the Power Settings
GPU performance can also be improved by simply allowing for more power. Adjusting power settings on a device usually means increasing the power supply by clicking the battery icon displayed in the system tray. Or (as some devices label the option) adjusting the power mode Best Performance rather than Best Battery Life or Optimized Power Consumption. Keep in mind that setting the device on best performance mode will heat up the laptop or desktop and will also increase electricity bills at the end of the month.
Most desktop and laptop machines show a battery icon in the bottom right corner of the screen. As mentioned before, applications like MSI Afterburner also provide options to increase the Power Limit. As always, make sure the settings are changed slowly and the system keeps stable. Users should also keep in mind the capability of the power supply installed in the PC case.
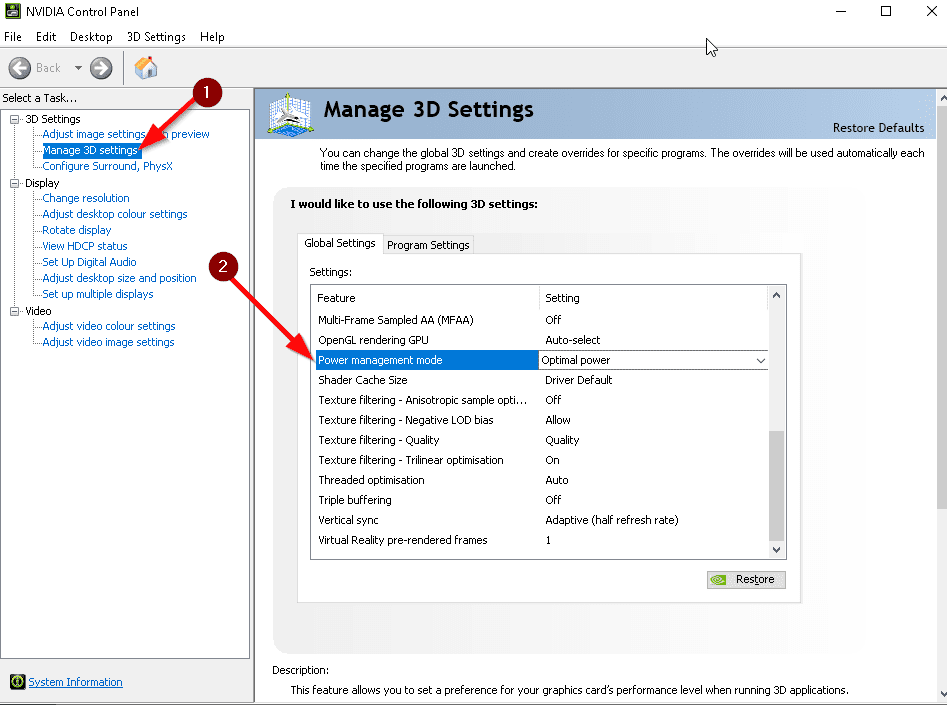
Alternatively, users with NVIDIA GPU cards can open up the NVIDIA Control Panel and change the power management mode from Adaptive to Maximum Performance.
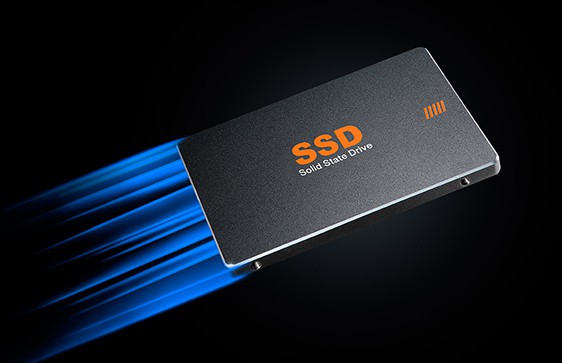
6. Use An SSD
Another popular way to increase GPU performance indirectly is to use an SSD. The term SSD stands for Solid State Drive. Similar to a traditional Hard Drive, the SSD is a storage device. However, SSDs are much faster than old hard disk drives as the operations are flash-based.
Using an SSD is all about buying the best one (SAMSUNG is generally considered the best SSD manufacturer along with CORSAIR) and then replacing the HDD with the newly-purchased SSD.
This is important:
Before installing an SSD, turn off the PC and unplug all sources of power. Make sure there is no built-up static charge around as that can ruin hardware (use a static mat) then use a manual to open up the PC case.Modern SSD drives usually work with SATA cables. The latest version is SATA3 for both cables and drives to ensure maximum performance. Before moving to the actual steps, some users may require an adapter that converts a 2.5 inch SSD into a 3.5 inch drive to fit into the HDD bay slot.
If the PC was built recently there is a good chance that the PC already has an SSD or at least SSD 2.5 inch slot. Once the HDD bay slot is found (and adjusted for either 2.5 inch or 3.5 inch with an adapter), consult the manual on how to unscrew the right openings. Some PC cases are built in a way that the user only has to slide the SSD into the drive bay and then secure the drive with 2 screws on each side (for a total of four).

The next step is to use a SATA Power Cable and SATA data cable to power up the SSD drive. Any modern power supply should have a multiple number of SATA cables coming out. Just pick one and connect to the SSD. The SATA Data cable should be nearby as well and is usually smaller than the power cable. Next, plug the other end of the SATA data cable into the proper slot on the motherboard.
Once all the data has been moved from other drives to the new drive, GPU performance should increase.
7. Stop using the Nvidia Streaming Service
Nvidia streaming service is a process run by modern NVIDIA cards on Windows machines to assist Nvidia Shield users and others in gaming and streaming. In total, depending on the model of the GPU, there may be three processes, namely the Streamer User Agent, Streamer Network Service and Streamer Service. With new drivers comes new features, of which the NVIDIA streaming service is just one. However, the Nvidia Streaming Service can sometimes reduce GPU performance. Disabling this service may help the overall cause.
To disable NVIDIA, open the Windows Task Manager by pressing the combination of Ctrl + Shift + Esc and then scroll till all the processes starting with the letter N appear. From there, select the Nvidia Streaming Service processes and stop each one.
The NVIDIA streaming service only comes in handy when used in conjunction with the NVIDIA Shield gaming device. To permanently stop Nvidia Streaming Services, press the Windows Key and then input services.msc. Then click on Nvidia Streamer Service from the shown window and then press the Stop button. NVIDIA may show a warning message in which case it may be necessary to confirm the disabling process. Going into the Properties section of Nvidia Streaming Service should also show a Startup Type option. Make sure the option is set to disabled.
8. Turn off anti-aliasing and V-Sync
Anti-Aliasing is a technique that computers use to smooth out certain pixels (usually the edges of objects, environment and character models) in video games (and images) to improve graphics. Most games create realistic looking graphics by aligning and stacking square pixels. Sometimes this can cause jagged images. Anti-aliasing removes such jagged edges and/or images.
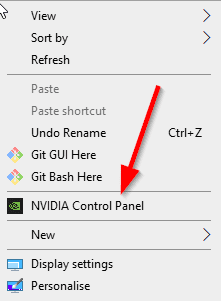
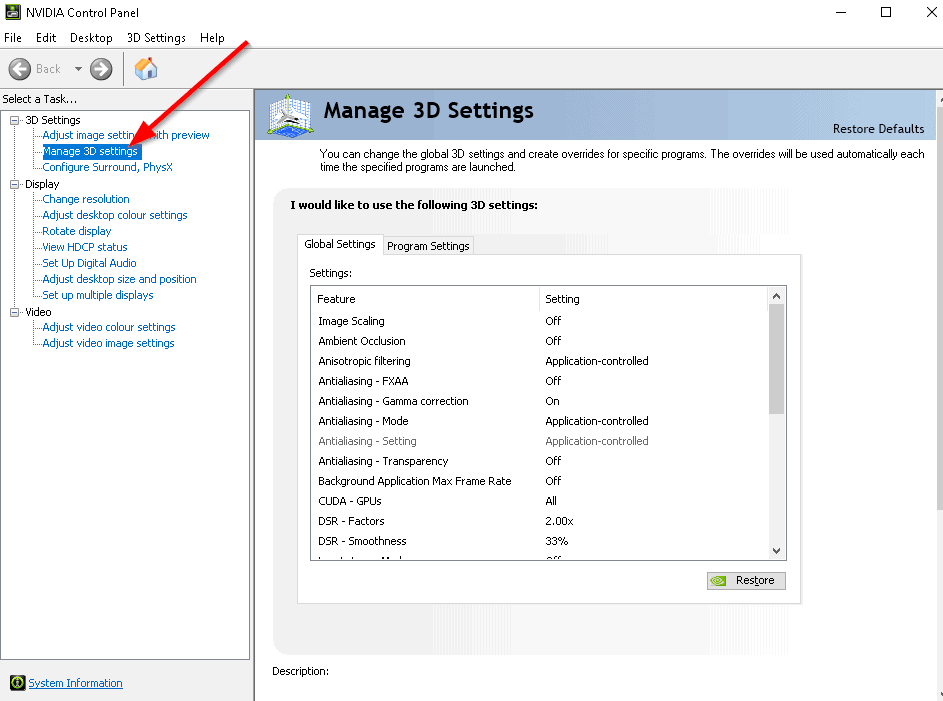
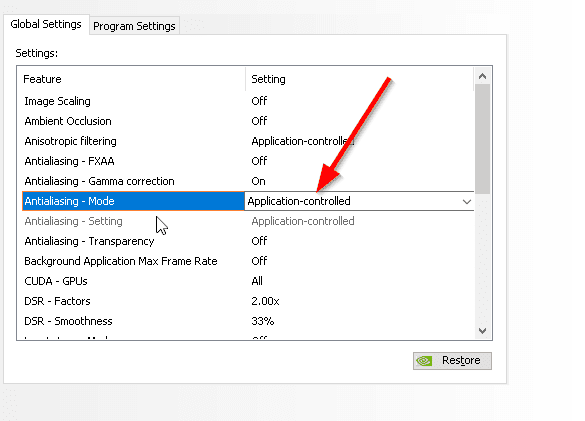
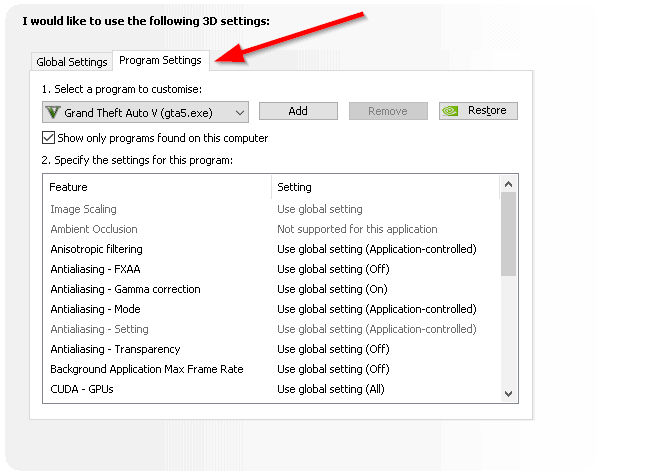
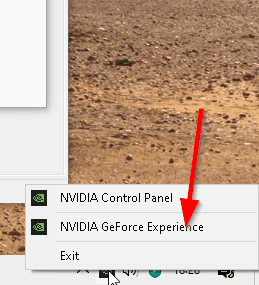
Each graphic card manufacturer will have a different set of steps to disable anti-aliasing. To take an example, Nvidia GPU cards come with the NVIDIA Control Panel. The NVIDIA Control Panel can be opened by performing a right-click anywhere on the desktop and then clicking on the NVIDIA Control Panel option from the context menu. Once the NVIDIA Control Panel has opened, go to Manage 3D Settings (an option available on the left side of the Control Panel) and then take a look at Global Settings (among other tabs). Search for the option Antialiasing Mode. If the current value says Application Controlled then change to Off. After that, go to the Program Settings tab. Select a program or add a new program that should not have antialiasing. This option is especially helpful when users only want certain games or programs to not have the antialiasing option ON. Once all steps have been completed, click Apply and close the application.
Another option that can increase GPU performance is V-Sync. V-Sync essentially allows the GPU to match GPU processor output frames with the monitor’s refresh rate so that syncing issues can be resolved. In general, V-Sync can get rid of screen tearing. However, V-Sync also causes input problems and can affect frame rates.
To disable V-Sync (for NVIDIA GPUs), open the NVIDIA Control Panel and go to Manage 3D Settings. From there click on Global Settings and then search for the Vertical Sync option from the list of options. Change the value of the option to Off.
For AMD GPUs, FreeSync must be disabled in order to fully disable V-Sync. Assuming users have already installed the Radeon Software on Windows, open up AMD Radeon Settings by performing a right-click anywhere on the desktop and then select AMD Radeon Settings. From the new window, click on Display and then find the option that says AMD FreeSync. Normally, the option will have the value ON. Change to OFF.
9. Graphics Card Drivers Update
Most gamers do not realize that graphic cards work with drivers as well. Keeping drivers updated all the time can improve GPU performance. GPU drivers refer to software that manages all communication between applications/games and the operating system (mostly Windows) and the GPU component.
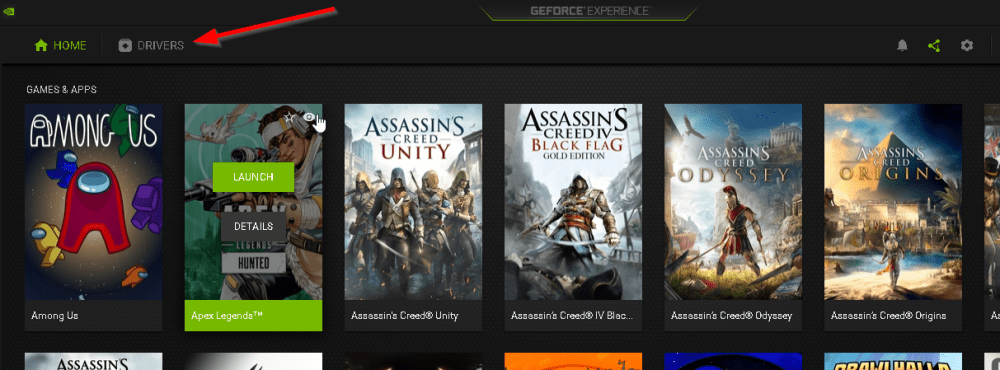
The great thing about keeping graphic card drivers updated is that both NVIDIA and AMD make the whole process streamlined via NVIDIA GeForce Experience App and AMD Radeon Software. Most of the time, the apps mentioned above will automatically show a notification when new drivers become available. Other times, users only have to launch the above-mentioned applications and click the update button. The update button is available in the lower left corner of the Radeon Software window in the case of AMD cards. For NVIDIA, users first need to launch the GeForce Experience App (not NVIDIA Control Panel) and then click on the tab that says Drivers and then click on Check for Updates.
10. Consider using Game Boost Software
Game Boost Software are applications that come with features that can stop all non-essential apps and processes running in the background. While the user is gaming, such a software can boost GPU performance by freeing up GPU resources such as VRAM.

To use Game Boost Software, users first have to make sure that the developers of the software are legitimate and that the software isn’t just adware or other malicious software. Razer Game Booster is a popular game boost software from a reputed organization. To download it go to the official website of Razer Cortex (the name of the Game Boost Software), then download and install on Windows. Razer Cortex jumps into action without any user input once the user launches a game.
For the more wary users, no, Razer Cortex does not overclock hardware and does not require the user to launch a game from Razer Cortex. Users can launch games normally and Razer Cortex will take care of everything else from there.
11. Windows 10 and Direct X Update
Keeping the operating system up to date is one of the most conservative ways to increase GPU performance. Hence, keeping Windows 10 and especially DirectX updates can increase GPU performance.
The Windows 10 (and 11) Update is simply a service that first downloads and then installs patches and updates (both security and features) on the Windows machine. Similar to GPU drivers, all the modern versions of Windows push notifications automatically once updates become available and streamline the whole process. Usually an update icon in the bottom right corner of the screen. Windows 10, in particular, updates the operating system automatically by default though users do have the option to disable auto-update.
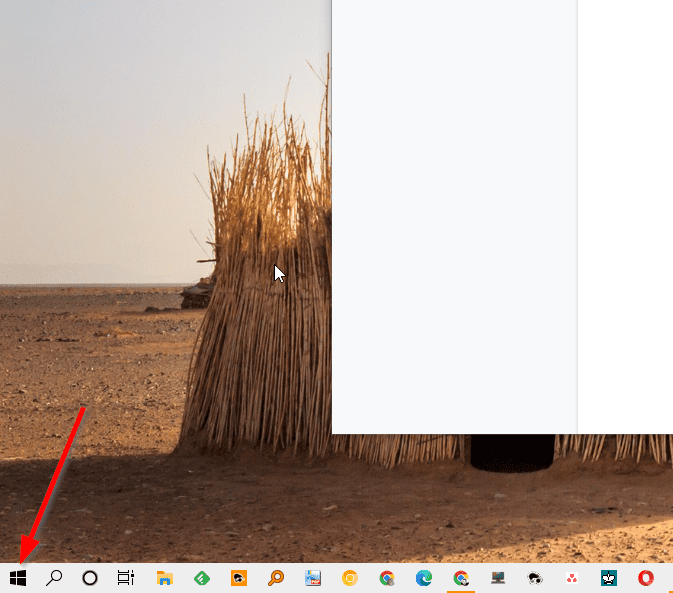
To manually update Windows, first click on the Windows Logo icon in the bottom left corner of the screen. From there, click on the Gear icon, which brings up the settings menu. Now, simply click the Update and Security. From the next screen, look at the left-sided panel and locate the Windows Update option. Then click on Check For Updates on the right side of the screen.
Note:
GPU performance may also increase if the Direct X version on the system is up to date. DirectX represents a whole series of APIs (or Application Programming Interfaces) that allow developers to access the user’s hardware components including the memory, sound card and GPU.To update directX, go through the previous process of Windows Update. Keep in mind that, despite what some websites claim, there is no official stand-alone package that can update DirectX on a given system anymore. The safest way to update DirectX is via Windows Update.
12. Increase Your Power Limit
In short, the GPU Power Limit represents a feature which enables the end-user to manage the power flow to the GPU unit. As mentioned previously, increased power usually means increased GPU performance. It is important to note, however, that increasing the power limit of a GPU is somewhat different from overclocking GPUs.
It is important to observe for heat build up before increasing the Power Limit as more power tends to make components hotter. Users can increase the GPU Power Limit via MSI Afterburner by simply launching the application, finding the Power Limit option and increasing the value of the option by making small increments to keep the system stable.

The obvious thing users need to keep in mind is that each graphic card manufacturer will have a different way to increase the power limit on a given GPU unit. The most popular ones are from NVIDIA and AMD.
To increase the power limit with NVIDIA GPU, open up the terminal and type the command ‘nvidia-smi dmon’ (without the quotes) and then input the command ‘nvidia-smi -q | grep ‘Power Limit” (without the outer quotes). To increase the SW Power Cap, input the command ‘nvidia-smi -pl xxx’ (without quotes) and replace xxx with a value in watts.
Another way to increase the power limit is by flashing the PC (the one with the GPU) with another bios with tools such as NVFlash on the GPU. There is also the PCB (printed circuit board) modding method. Such methods are, however, very difficult to implement properly for beginners. Hence, those not willing to take significant risks for only a modest GPU performance boost should probably avoid both these techniques.
Note:
With NVFlash, users first have to find a bios that matches the GPU’s pcb. Sometimes the PCB method can even involve soldering a resistor. PCB modding requires advanced cooling mechanisms to be put in place so that the GPU remains cool even when drawing somewhat unsafe amounts of power from the power supply.13. Create a Custom Fan Curve
The fan curve represents a graph which shows the machine’s fan performance. In the context of a gaming PC and increased GPU performance, the fan curve simply refers to the fan settings that maximize the cooling effect for certain temperatures as far as the fan, or the GPU is concerned. Fan settings are sometimes not set at the right values.
To change fan settings and create a custom fan curve, again, different applications must be installed depending on the graphics card used. For AMD GPU cards, the OverDrive facility is needed. After installing the AMD Overdrive, launch the application, give all the appropriate permissions (which show up on the screen in the form of prompts) and accept the terms of the agreement.
Once the AMD Overdrive window appears, click the option Enable Manual Fan Control. Adjusting the value for Fan Control requires the user to interact with a slider. Slide to the preferred power level which will increase fan speed and hence cool other components more quickly. The lowest fan speed is about 20 percent of maximum speed and the highest setting is 100 percent (which means the fan will run at maximum speed at all times). After adjusting the fan control settings, hit the Apply button, press OK to save settings and then close the AMD Overdrive app.
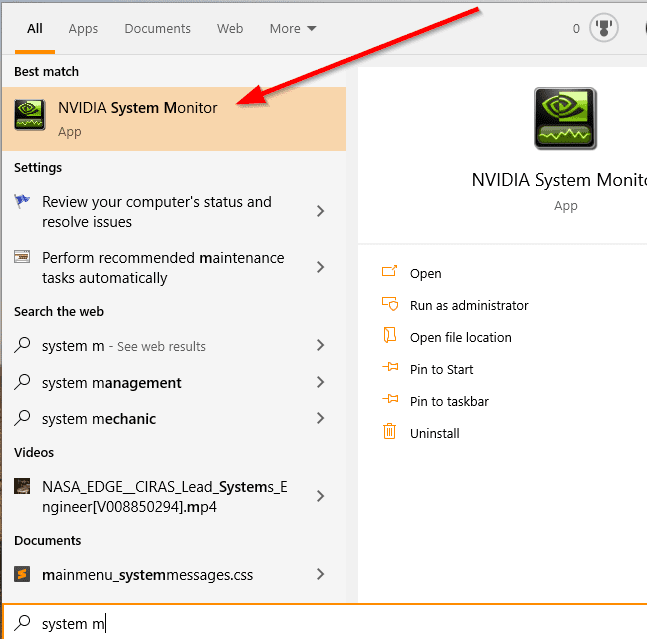
NVIDIA GPU owners first have to go to the official website of the NVIDIA Drivers Download page and then select (from a list of drop down menu items) the make and model of the GPU card installed on the machine. Then download the drivers and complete the installation process to then reboot the device. Once rebooted, users should be able to find the NVIDIA System Monitor program via Start and All Programs (and NVIDIA Corporation folder). Once launched, an icon should appear in the bottom right corner of the screen.
Users looking to create custom fan curves need to right-click the System Monitor icon and then click on Device Settings. Then choose Select a Task and then Create Profiles. From there click on GPU and then on Cooling and select a value (anything between 100 and 0). After applying and saving the new settings, close the app.

For more control, choose SpeedFan (or MSI Afterburner). Speedfan is offered by Almico. Go to the official website and download SpeedFan. After downloading and installing SpeedFan, launch the app and go to the Dashboard and then find the option that says Configure. On the new page, click on Advanced and then click on Chip. From the menu that shows, find entries ending in ISA and beginning with IT. Also keep a lookout for entries with ‘PWM Mode’. Most of such settings are in the Property field. Use SmartGuardian to select PWM entries and then click on the Value field. Open the available dropdown menu near the bottom once the SmartGuardian entries are clicked. Then change all SmartGuardian entries to Software Controlled. Go back to the main page and record the numerical values of each shown fan. Change the values of different fans to 0 one at a time to know which fan is which. Then go to the Fan Speed section. Click on Add and then click on the new controller. Use the dropdown button to select a given fan. At this moment, the application should show a graph which shows the temperatures and the speed of the fan corresponding to those temperatures. Adjust the valueUsers are free to change the values as desired.
Pro Tip:
A pro tip is to try and avoid setting the speed of the fan below 20 percent at any given temperature because that would lead to overheating. Moreover, any chosen speed has to ensure that the temperature of different components does not go over 80 C.14. Improve The Airflow
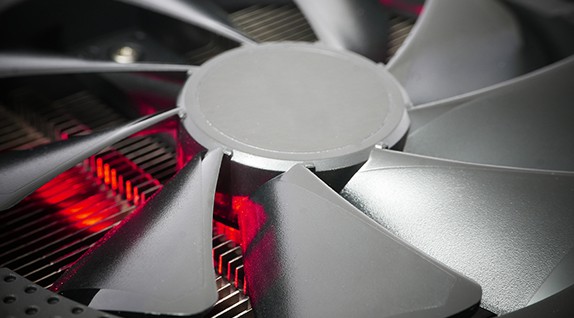
Improving the airflow means the PC is able to push the hot air out of the PC case rapidly, enabling better overall performance. Once the temperature of the GPU goes down, other techniques to increase GPU performance can be used (which would have been otherwise impossible because of overheating issues).
There are lots of ways to improve airflow. The four most important points to note here are the PC cabinet, the case fans, the CPU cooler, the motherboard and the GPU fan. All the fans must work efficiently to improve airflow.

Keeping space inside the PC cabinet is a good way to ensure good airflow even without tweaking the fans. Generally, the more expensive the PC case or cabinet, the better the airflow. Secondly, ensure that the case fans are pushing hot air out of the PC case. Sometimes bad hardware placement can block airflow paths. Spending some money on the CPU cooler is another great way to keep the temperature of the whole cabinet down which can ultimately improve GPU performance.
Some modern motherboards also come with cooling technologies that can not only keep the motherboard cool but all the attached components as well. Expensive GPUs do come with multiple and high quality fans that can easily improve airflow. If the currently installed GPU doesn’t have one, there are third part companies that provide custom fans to improve airflow.
Fan placement is something each given individual has to manage well. Generally fans can be placed at the front to suck in cool air. Similarly, fans can be placed at the back and the roof of the PC case to push out hot air. Increasing the number of fans in any of the three given positions is likely to lower GPU temperatures and improve performance.
A do-it-yourself experiment is to check GPU temperatures when a video game has been running for 10 to 15 minutes. And then compare that temperature to when the PC case is fully opened. A huge difference in the two temperature readings generally indicates that the casing is obstructing airflow. There is a specific class of PC Casings that does not support fans at the front of the PC case. Such cases are not conducive to good airflow.
Some obvious tips to improve airflow include removing anything above the PC case which may block airflow, making sure the PSU is installed correctly, installing the properly-sized fans at all concerned places and making sure the exhaust fans on the top of the PC case (if there are any) are not interfering with the CPU or GPU coolers.
15. Improve the Cooling (Desktop Only)
Improving cooling means to keep the temperature of the desktop machine at an acceptable level even when under heavy load. To keep the desktop computer cool, first, keep the environment of the PC case in consideration. If the air has a lot of dirt then keeping the PC case open will actually reduce cooling. A lot of people keep PC cases open to allow for more airflow but that tip only works if the user can make sure there isn’t much dirt around to get into the PC case.
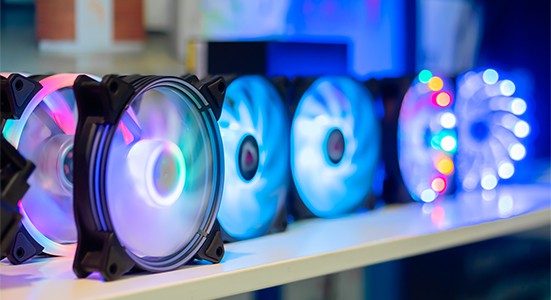
Cleaning all the fans inside the desktop computer is another way to keep the PC cool and indirectly increase GPU performance. Fans do stop working because of wiring issues or too much wear and tear. But a lot of the time fans stop working or slow down because of dirt. Removing dirt from all fans (at the front of the case, back of the case, roof of the case (if present), on the CPU and on the GPU) doesn’t have to be difficult either.
Pro Tip:
Usually, powering down the desktop and opening the case enables adequate cleaning with compressed air. A pro tip is to disconnect the PC case from all wires, take the case outside (away from the sun though) and clean the case there rather than inside the room which will only allow the dirt to come back in via the intake fans later.Moving the desktop machine to a place that is less hot or cleaner is another way to improve cleaning. As mentioned before, upgrading the CPU and GPU fan is another way to cool the entire machine and increase GPU performance. Replacing the power supply with another model that supports bigger and faster fans can improve cooling as well.
Another less popular option is a water cooling kit. The water cooling method will obviously apply to high-end gaming machines that generate a lot of heat. Water is a great carrier of heat and is able to improve the overall cooling effect to a great degree. Finally, if all other techniques haven’t helped to improve cooling, use a phase change unit. Using a phase change unit is, however, recommended for experts only. Phase change units act like a freezer for the machine’s CPU and can cost as much as $2000 (and more if an enterprise-level solution is required).
16. Update Other PC Components
Upgrading other PC components such as the CPU, RAM, power supply, SSD and others can increase GPU performance. GPU performance isn’t just related to the GPU potential. Sometimes, if the PC in question does not have the right combination and balance of components, bottlenecks can arise. The GPU needs an equally powerful (if not more powerful) CPU to give the highest level of performance possible. Similarly, with insufficient RAM, a GPU may not be able to hit higher benchmark numbers.

To get started, spend some time researching the current CPUs, RAMs, power supplies (for more power) and SSDs (for more speed) and then upgrade each component as necessary. There are many websites on the internet that guide users on getting the CPU, GPU, Power Supply, SSD and RAM balance right.
Of course, in the end, other components may or may not affect GPU performance based on activity. If the sole aim is higher benchmark scores then the CPU and RAM may not matter that much. But when GPU performance when playing video games is the primary focus, a high-performing CPU and RAM definitely matter.
How to increase GPU performance without overclocking?
GPU performance can be increased without overclocking. From the methods mentioned in the previous section, many do not require the user to overclock the GPU for increased performance. Users can overclock other components such as the CPU and RAM for increased GPU performance. However, to avoid overclocking any component, reducing the screen resolution should be the first step to increase GPU performance.
Modern games usually run at 1440p and can go as high as 8K depending on the user’s hardware and monitor. But a higher screen resolution doesn’t always translate into a better user experience or gaming experience. Most of the time, the improvements are minimal. An easy way to improve GPU performance is to reduce the overall resolution to 1080p. All operating systems and video games allow options to reduce screen solution in the settings menu and reduce the number of pixels the GPU has to work on.

Tips such as using third-party PC performance-boosting software and changing the power settings on Windows to high performance instead of optimized battery life have already been mentioned. But modern operating systems like Windows (along with third-party applications) offer a Game Mode setting as well. The game mode settings can automate the best GPU settings for high performance, though the PC will consume more power.
Changing the video settings in a video game to a lower level can also increase GPU performance and hence increase FPS. Options that do not affect the overall experience that much if turned off include VSync, Shadows, and anti-aliasing.
Upgrading the SSD, RAM and CPU can obviously help (so can a new GPU), as can uninstalling all unnecessary programs and applications. Disabling Windows features such as Prefetch and SysMain (SuperFetch) can also help.
Will a graphics card improve pc performance?

Yes, a graphic card will improve PC performance, however this depends on exactly what is meant by PC performance. Any application or activity that requires graphics or loading of textures will see a significant performance boost with the addition of a graphics card.
A very popular example is that of video games. Graphics cards will significantly improve PC performance when gaming. In fact, without a graphics card, a PC cannot perform well on any popular video game made today.
Another way to define PC performance is video streaming. Fortunately, graphics cards can drastically improve PC performance when tasks such as video editing, streaming (from sites like YouTube), faster video playback, and streaming multiple HD videos simultaneously, need to be carried out. A graphics card can also help with compressing and processing video files.
GPUs also help load Windows and application animations quickly and much more smoothly. Finally, more than a few modern GPU models come with dedicated memory which can free up the PC’s memory and improve performance. Graphic cards have a faster memory than the memory users install via memory sticks on memory slots on the motherboard.
