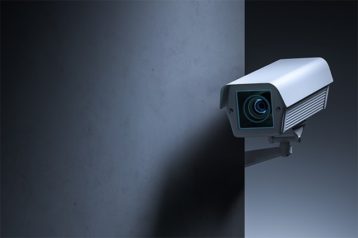
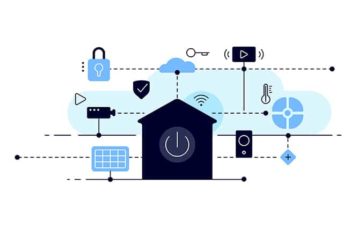
The usefulness of a security camera, especially as a security measure, cannot be overstated. A security camera aids in crime prevention and serves as a warning to criminals. It is easy to investigate a crime after it has occurred, and it is uncomplicated for law enforcement officials to apprehend the perpetrators. Security cameras also safeguard people from property theft or damage. The awareness of security cameras makes it impossible for thieves to get away with any illegal behavior because the security equipment would reveal the perpetrator before or during the crime.
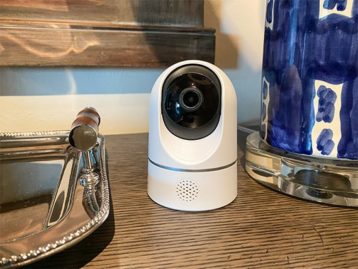
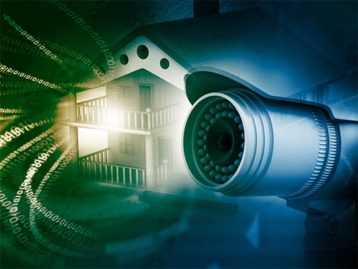
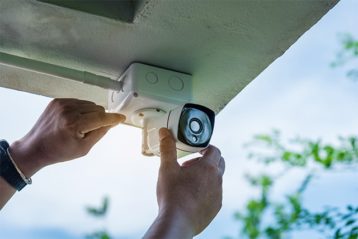
A security camera is ideal for vital community spots, particularly houses. A home security camera system is a fantastic tool for security solutions and may serve as a warning to criminals and a recovery tool for law enforcement. Security cameras can improve home security by allowing users to monitor their homes from anywhere, whether on a smartphone or a computer and receive fast notifications if anything unexpected happens.
However, the finest outdoor home security camera to utilize in 2023 will determine how acquainted people are with these security solutions. Therefore, the best outdoor home security cameras are discussed below.
- Wyze Cam V3
- Google Nest Cam Outdoor
- EufyCam 2 Pro Wireless
- Arlo Pro 3
- Deep Sentinel Starter 3-Cam Kit
- Arlo Essential Spotlight Camera
- Blink Outdoor
- Lorex 2K Wire-Free, Battery-Operated Security System
- Reolink Argus 2
- Ring Stick Up Cam Battery
Table of Contents
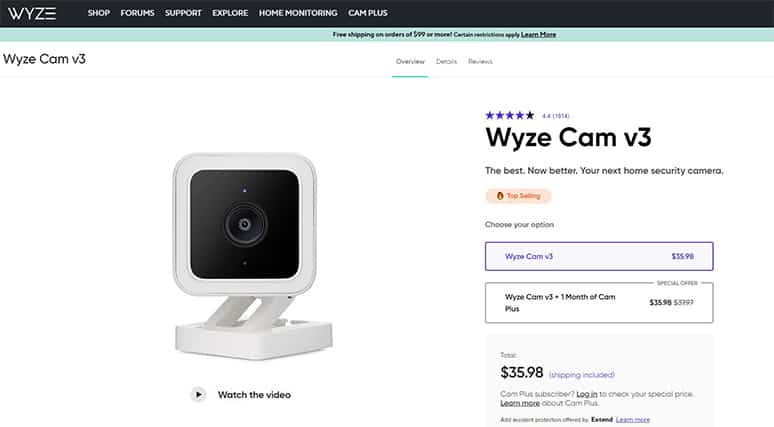
1. Wyze Cam V3
The Wyze Cam V3 is a budget-friendly home security camera created by Wyze. Wyze Cam V3 connects directly to the user’s WiFi router, although the camera only supports 2.4 GHz networks. The V3 is powered by a USB cable and does not require batteries. Like Wyze Cam V1, V2 and Pan, the camera connects to a wireless network to relay data from the camera to the user’s device. The V3 is water-resistant, making it suited for both indoor and outdoor use.
Some of the highlights of the Wyze Cam V3 are listed below.
- IP65 weather resistance for indoor and outdoor home security.
- Mini siren.
- Versatile mounting.
- Brighter night vision.
- Invisible IR LEDs.
- Crisp HD image.
- Starlight CMOS sensor.
- Cloud and local storage.
- Real two-way talk.
- 24/7 continuous recording.
The Wyze Cam V3 is one of the most feature-rich home security cameras currently available. In addition to high-quality 1080p video, the V3 has color night vision, local and cloud storage, intelligent motion detection and voice control. Wyze Cam V3 connects to other Wyze devices such as door locks, smart lamps and sensors, as well as IFTTT plug-ins that allow it to connect to a wide range of third-party devices.
The Wyze Cam V3 improves on the V2 in terms of performance. It has a Starlight sensor for color night vision, a 130° field of view and the camera shoots 1080p video at 20 frames per second (FPS). The V2, on the other hand, has a 110° field of view, black-and-white night vision and shoots video at 15 FPS. When Wyze Cam V3 detects motion or sound, V3 records a 12-second clip and saves it for free in the cloud for 14 days, although there is a five-minute cooldown period between occurrences during which the camera will not record.
V3 supports Alexa and Google Assistant voice commands and can connect to third-party smart home gadgets using IFTTT applets. Users may also set up rules for the camera to work with other Wyze devices like smart light bulbs, motion sensors and door locks.
Ceilings, bookshelves, porch eaves and any magnetic metal surface are all possible mounting surfaces for this compact mini cam. This security solution can be used as a pet camera, babysitter monitor or normal outdoor security camera. In addition, the Wyze Cam V3 comes with AI features that are worth three times its price of under $40. The Wyze cam V3 can also tell if a smoke alarm or carbon monoxide detector is sounding. Package, vehicle and sound detection are all significantly easier with Cam Plus Person Detection.
The V3 camera can be set up using these basic steps.

- On your smartphone or tablet, install the Wyze app.
- Join a 2.4 GHz WiFi network using your device.
- Remove all plastic and packing materials from the Wyze Cam V3 box.
- Using the provided USB cable and power adapter, connect the camera to a power source.
- When the camera is turned on, the status light turns solid red. The camera is ready for setup when the light starts flashing.
Wyze Cam V3 is the most recent version of Wyze Cam and it comes with many features that help consumers gain peace of mind. The following are a few of the benefits of Wyze Cam V3.
- Economical.
- Local storage and cloud storage are both available for free.
- Detection of motion, people and sounds.
- Works both inside and outside.
- Night vision in color.
- Support for Amazon Alexa, Google Assistant and IFTTT.
- Integrated siren.
- Versatile mounting options.
Following the download, using Wyze Cam V3 is simple. However, to set up the Wyze Cam V3, follow these simple steps after downloading the app.
- Tap Home on the Wyze app, then the + sign in the top left corner.
- Click “Add device.”
- Click Cameras then Wyze Cam v3.
- Tap Next on the app with the camera plugged into an outlet.
- Remove the camera’s base and click SETUP once under the camera. “Ready to connect” will appear.
- Check the box next to “I heard ‘Ready to connect’” in the app.
- Click Next.
- Enter the network password for the 2.4 GHz WiFi network and click Next.
- To validate that the password was entered correctly, tap the icon in the password field.
- Use the Wyze app to scan the QR code.
- Hold your camera up to your phone’s screen, which should be showing the QR code. “QR code scanned, please wait,” it will read, followed by “Setup done.”
- Check the box next to “I heard ‘QR code scanner’” in the app.
- Click “Next.”
- The next step is to give the device a name. Use the text form to give your Wyze Cam V3 a name or choose from a list of suggestions.
- When you are finished, tap Finish.
- Tap Share Device if you want to share your device.
- If you do not want to share the device, tap Maybe later.
Despite the camera’s ease of setup, there are some drawbacks that consumers should be aware of. The downsides of Wyze Can V3 are given below.
- Not compatible with HomeKit.
- Subscription is required for some features. Wyze Cam video recordings, for example, have a maximum length of 12 seconds and a five-minute cooldown interval between each video session.
The Wyze Cam V3 is comparable to other Wyze Cam devices. However, it has certain unique features. These are some of Wyze Cam V3’s distinctive features.

- CMOS sensor with Starlight for excellent viewing in low light.
- Better indoor infrared lighting using a dual IR light system.
- Add-ons, such as the Spotlight Kit, are available.
- WiFi communication is possible without a base station.
- The camera is wired rather than wireless or battery-powered.
- IP65 weather-resistant, designed for both indoor and outdoor use.
- Better color night vision with only a slight amount of light.
Note:
The signal strength of the security camera is important to stay connected while monitoring every activity. In the Wyze app, users can check the signal strength. Check the three bars next to the Wyze Cam Outdoor by tapping to open the Base Station. The maximum range between the camera and the base station in an open field can be 300 feet. However, if there are several walls, doors or other structures between each device, the optimal range is reduced.2. Google Nest Cam Outdoor
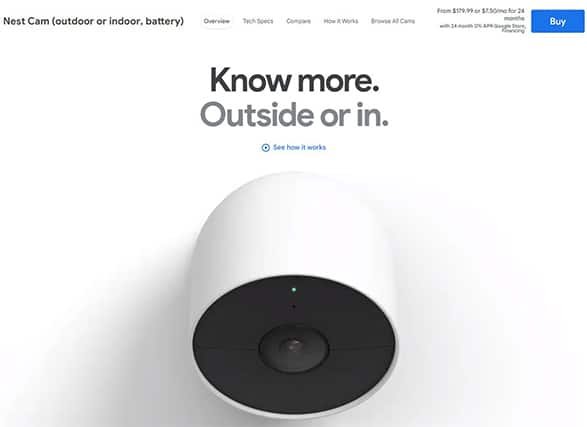
The Google Nest Cam Outdoor is a home security camera that features sharp 1080p video and night vision. This Google outdoor security camera with motion detection alerts in a sleek, waterproof casing makes it simple to monitor outside of the house. The Google Nest Cam Outdoor is equivalent to the indoor variant, except the Nest Cam Outdoor comes with a soft white weatherproof casing that is 3 inches deep and 2.8 inches in diameter.
Some of the features of the Google Nest Cam Outdoor are outlined below.
- Weatherproof.
- Easy to install.
- 24/7 live video.
- Clear night vision.
- Three-hour snapshot history.
- Rechargeable battery.
- Long power cable.
- Clear sound and motion detection.
- Two-way audio.
- Email notifications.
- Compatible with other connected devices.
The outdoor Nest Cam has the same camera as the interior Nest Cam. The camera has a 130° field of vision and a 3 megapixel 1080p camera. A dual-band 802.11n radio and Bluetooth Low Energy (BLE) provide wireless connectivity, and there is a built-in speaker and microphone for two-way audio communication. This camera employs motion and audio sensors to trigger recordings and delivers push notifications and email warnings, just like the indoor model.

Google Nest Cam Outdoor records video 24/7, even when there is no motion. The outdoor camera also includes a 30-day free trial subscription to Nest Aware, allowing users to view recorded video in the cloud. A 10 foot USB power cable and a 15 foot weatherproof power cord are included with the camera. On one end of the weatherproof power cord is a two-prong plug and on the other is a USB Type A connector. Along with the package, users will find an installation guide and mounting screws.
The price of the Google Nest Cam Outdoor is $199. The Nest Aware free trial keeps video recording on 24/7 and users can always rewind events. After the trial period expires, users will no longer have access to the 24/7 video record and will only be able to view the three hour video session. Nest Aware plans start at $100 per year and include 10 days of video history that users can share with friends, while $300 offers users a 30 day video history.
Before mounting the security camera, users must have downloaded the Nest Cam app. Users can follow the steps below to install the Google Nest Cam Outdoor.

- Decide on a spot to install the camera.
- Move to the target destination with your device or tablet and see if there is a WiFi signal on your device. This step is critical in determining whether or not there is a signal in that specific location.
- Install the camera in a shady area, such as an eave or overhang. Direct sunlight can cause scowl and raise the camera’s temperature above the recommended 104°F (40°C).
- Many of the necessary items for installation are included in the box, such as a mounting magnet, a camera wall plate, an adapter wall plate, cable clips to secure your cable, wall screws and wall anchors for hard surfaces.
- A Phillips screwdriver and a drill with a 3/32” bit are required to install the wall plate and cable clips.
- You will also need a 7/32” masonry drill bit and a hammer if you are going to use the wall anchors.
- The total length of the power cable for the Google Nest Cam Outdoor is 25 feet (7.5 m). You will need to plug it in so it can stream video and send alerts 24/7. You have the option of using an outdoor outlet or an adapter.
- Now it is time to mount the camera, protect the power cable and adapter and install everything you need to install.
- Remove the sticker after wiping away any dust or dirt with a soft lint-free cloth.
- You can customize the cable and clips to match your decor. Do not paint the camera as this will degrade effectiveness and invalidate the warranty.
The Google Nest Cam Outdoor is unique and comes with many important functions. The following are some of the benefits of the Google Nest Cam Outdoor.
- High-quality video footage.
- Two-way loudspeaker system.
- Customizable notifications.
- Compatible with smart home gadgets.
- Weatherproof.
It is important to download the Nest Cam app before starting the mounting process. Follow this guide to set up and use the security camera.
- Download the Nest app from the Google Play Store or the Apple App Store.
- Set up the Google Nest Cam Outdoor with the Nest app.
- Use the QR code to add the camera to the app by following the instructions on the Nest app.
- You must create an account if you are a new user of the Nest app. Then press “Add.” Scan the QR code on the back of the camera. You can also type the digits at the top of the QR code instead of scanning it by tapping “Continue.” Then, to finish the setup and installation, follow the app’s instructions.
- After that, add the camera to the Home app. Users can add the Google Nest Cam Outdoor to their home in the Home app after setting it up in the Nest app. This will allow users to control the camera and other compatible connected devices such as a smart bulb or a Google speaker from one location.
The Google Nest Cam Outdoor has a few features that manufacturers might improve for a better user experience. These are some of the Google Nest Cam Outdoor’s drawbacks.
- Expensive.
- Certain functions require a subscription.
- It is necessary to have access to electricity outside.
- Notifications can be overwhelming.
Despite a few drawbacks, this outdoor security camera has many unique features that will entice consumers. The following are some of the defining characteristics.
- Easy installation.
- Wireless.
- Cloud recording.
- Self-monitoring on users’ devices.
- Weatherproof accessories.
- High-quality video.
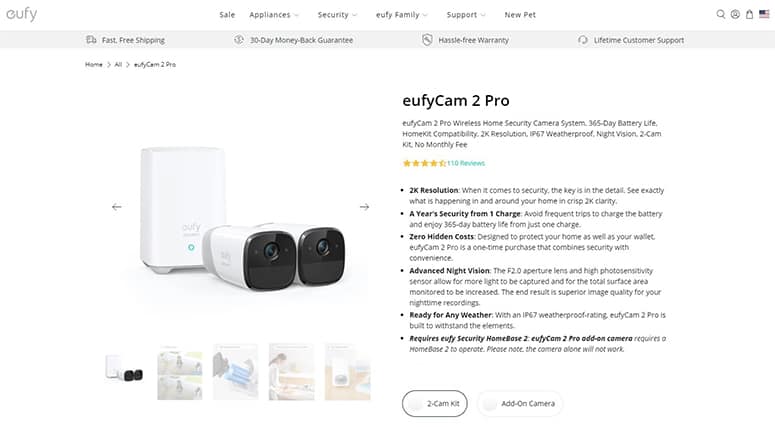
3. EufyCam 2 Pro Wireless
The footage captured by the EufyCam 2 Pro Wireless is stored safely, so even if the camera is stolen the video is still safe. The EufyCam 2 Pro has a unique communication technique that is more energy-efficient than ordinary WiFi, allowing the wireless camera to operate for 365 days without recharging. Users of the EufyCam 2 Pro Wireless Home Security Camera System can see events in and around the home in crisp 2K resolution. EufyCam 2 Pro works without the use of any connections or wires. The following components are included in the EufyCam package: EufyCam 2 Pro, HomeBase 2, mount, micro USB charging cable, AC power adapter, ethernet cable and User Manual.
These are some of the highlights of the EufyCam 2 Pro Wireless features listed below.
- 100% wireless.
- Human detection.
- Military-grade encryption.
- Repeater mode.
- One-time purchase.
- Weatherproof.
- Advanced night vision.
- Smart integration with other smart devices.
- IP67 weatherproof.
- 365 day battery life.
- Real-time response.
EufyCam is a one-time-purchase camera that protects both the house and the wallet of the owner. EufyCam is a user-friendly and secure webcam. The F2.0 aperture lens and high photosensitivity sensor capture more light and expand the overall surface area of the monitoring area. For nighttime recordings, the outcome is excellent image quality. EufyCam’s built-in smart technology eliminates false alarms and easily distinguishes people from objects. Users may access footage by logging into their accounts thanks to EufyCam’s excellent security, which includes encrypted data and footage.
The EufyCam 2 Pro is available as a single camera or as part of a two-pack that includes two cameras and the Eufy HomeBase 2. However, it is impossible to use the EufyCam 2 Pro without a HomeBase. The HomeBase 2 is a base that connects cameras, saves footage and acts as a WiFi repeater to improve the camera’s WiFi signal.
EufyCam can be tailored to meet the needs and expectations of users. Users can save even more battery life by limiting notifications to only those that are most necessary, scheduling camera recording and selecting a specific model. Users have the ability to customize the camera’s settings by turning off the motion detection feature, modifying the motion sensitivity, setting detection zones or choosing to record only when the camera detects a human.
The price of the EufyCam 2 Pro Wireless is $149.99 on Amazon. Users can install this camera by following these steps.
- Start charging the cameras by plugging in the Homebase.
- Connect the Homebase to your network using either the provided ethernet cable or by connecting to the WiFi network.
- Install the app, create an account on Eufy and log in.
- In the app, add your Homebase and connect your cameras to it.
- The next step is to physically mount the cameras after they have been installed. Examine your home to find the ideal spot. It is crucial for the camera to be mounted between 7 and 10 feet high.
- Mark and drill the holes for the camera’s installation. You can find the drill size specification in Eufy’s installation guide.
- Attach the camera to the mount once it has been installed.
- Before attaching the mount to the base, screw the camera side of the mount onto the camera.
- Using the app, you may adjust the camera and see a live image from the camera.
- Finally, carefully tighten the installation screws with a pair of pliers.
The advantages of the EufyCam 2 Pro Wireless are numerous and they highlight the security tool’s effectiveness. The following are some of the benefits of the EufyCam 2 Pro Wireless.
- No monthly fee.
- Advanced night vision.
- Provision for WiFi signal.
- Smart image enhancement.
- Human detection.
- Activity zones.
- Real-time response.
- Smart integration.
- Available two-camera kit.
- Easy access to videos anytime, anywhere.
- Compatibility with smart devices.
Users can follow these steps to set up the EufyCam.
- Charge the battery.
- Connect the HomeBase.
- Download the Eufy app.
- Set up the HomeBase.
- Add the cameras.
- Choose a recording mode.
- Set motion detection.
Some of the downsides of the EufyCam 2 Pro Wireless are listed below.
- At night, the images can be blurry.
- Expensive.
- The camera quality could be improved.
- Motion recording can start late.
The EufyCam 2 Pro Wireless’ strength is of tremendous value to users. Some of the distinct advantages are described below.
- 365 day battery life.
- Supports Apple’s HomeKit Secure Video.
- Smart image enhancement.
- HomeBase functions as a WiFi repeater.
- Loud siren.
- Encrypted video.
Note:
The signal strength of the EufyCam 2 Pro Wireless is determined by the router used by the user. However, the EufyCam uses the HomeBase which functions as a WiFi repeater to boost the camera signal to boost the signal strength.4. Arlo Pro 3
The Arlo Pro 3 is a battery-powered outdoor home security camera with excellent performance, design and functionality. Although this camera is pricey, it is simple to set up and provides a crisp 2K video resolution. Smart notifications, color night vision, a motion-activated spotlight, an embedded siren and other security features are included with the Arlo Pro 3.

The following are some of the features of the Arlo Pro 3 camera.
- Excellent video quality in 2K HDR.
- Wireless.
- Built-in illumination.
- Smart motion detection.
- Supports Alexa, Google Assistant and IFTTT.
- Simple to set up.
- Viewing angle of 160°.
- Night vision in color.
- Battery life is six months.
- Camera with a weather-resistant construction.
- 30 day recording history.
- Magnetic mount.
Two waterproof cameras, a smart hub (required), two mounts (one magnetic, one screw-in), a magnetic charging cable, a USB charging adapter, mounting hardware, a LAN cable and quick-start instructions are included in the Arlo Pro 3. The camera is 3.5” tall by 2.0” wide by 3.0” deep and features a black front with a white surround.
The rechargeable battery pack should last three to six months between charges, depending on usage and weather conditions (batteries drain faster in low-temperature climates). The time it takes to fully charge the battery through the camera is 3.5 hours, whereas it takes 2.9 hours to charge using the charger accessory. The smart alerts do an excellent job of identifying people, cars and animals. Also, push and email alerts received after a motion or sound occurrence are very effective. The two-way audio is clear on both ends and the siren is loud enough to deter intruders.
Arlo Pro 3 is a wire-free, weather-resistant camera that works with Alexa and Google Assistant. Arlo also comes with three months of Arlo Smart Service and 30 days of continuous cloud recordings. The Arlo Pro 3 is not cheap at $275 on Amazon.
To install the Arlo Pro 3, users can follow the quick and easy steps listed below.
- Fasten the mounting screw into a wall or ceiling.
- To determine how far to screw into the wall or ceiling, use the plastic stopper as a guide.
- Snap the magnetic mount around the screw and stopper.
- Use the indoor wall mount to secure your camera.
- Set the camera to the angle you want it to see from.
Some of the benefits of the Arlo Pro 3 are listed below.
- The camera has a built-in siren.
- For local storage, there is a USB drive in the hub.
- Alexa, Google Assistant and Siri are all supported.
- Excellent video quality in 2K HDR.
- Wireless.
- Built-in illumination.
- Intelligent motion detection.
- Night vision in color.
- Easy to set up.
- Advanced object detection.
Users can use the Arlo Pro 3 by following these steps.

- Set up the camera by connecting the internet cable from your router to the camera and plugging the camera into the power adapter.
- Download the Arlo app on your device and create an Arlo account if you are a new user or login to the Arlo system as an existing user.
- Ensure your phone is connected to your home network. From the Arlo account, select the Arlo Pro 3.
- Name your Arlo SmartHub.
- Insert the Arlo battery and the SmartHub will automatically detect the camera and ask you for the serial ID of your camera.
- The next thing is to look for a good location and mount the camera.
- When the camera is mounted, select “Continue” on the app. The app will then prompt you to select the camera you want to set up with the Arlo Smart Service.
- Finally, press “Finish.”
With all of the Arlo Pro 3’s wonderful features and benefits, a few flaws need to be addressed. The following are some of the downsides.
- Users who want cloud storage must pay $3 per month for the Arlo Smart plan.
- Expensive.
- Requires the use of a hub.
- Users can only access some features through a subscription.
The Arlo Pro 3 is a security camera with certain distinguishing characteristics that make it one of the top home security cameras for 2023. Some of this camera’s unique features are listed below.
- Unique style.
- Works with Apple Watch.
- Spotlight that is always on.
- Zoom in on objects for a clearer image.
- Easy installation.
- Six month battery life.
- Access to video on smartphones.
- Wireless.
- Smart integration.
Position the camera a maximum of 300 feet from the SmartHub to keep the Arlo Pro 3 in range. Each wall, ceiling or other significant impediments between the camera and the SmartHub reduces the maximum line-of-sight range.
5. Deep Sentinel Starter 3-Cam Kit
Deep Sentinel is the first security camera firm that offers round-the-clock monitoring by properly trained security guards who will respond if they notice suspicious activity on a user’s property. Three outdoor wireless cameras, a smart hub, four battery packs (one extra), installation tools and a yard sign are included in the Deep Sentinel 3-Cam Kit. The Deep Sentinel accessories include high-capacity, extreme-temperature batteries, a solar charging kit and a WiFi range extender.
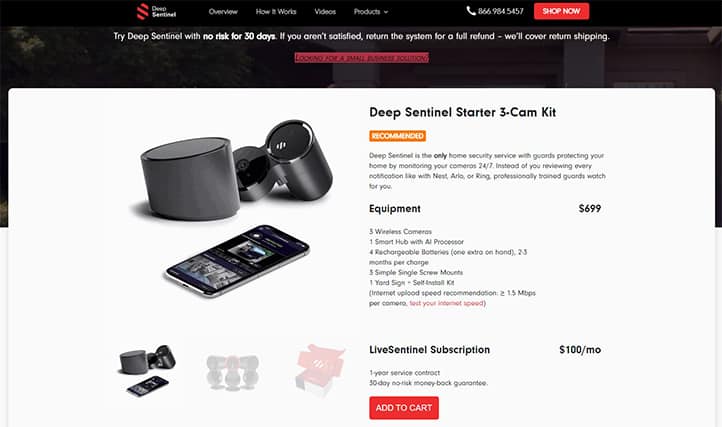
The wireless cameras are housed in a waterproof gunmetal plastic housing with an IP65 rating. Sentinel has a wireless range of 100 feet to the Hub, can record 1080p video and has a 130° field of view. When the AI hub identifies a potential security threat, the security equipment also has a 104 dB siren and a built-in LED light ring that spins red. Deep Sentinel is unique and highly effective because of the diverse components that improve the security cameras’ integrity.
A few of the unique aspects of the Deep Sentinel cameras are listed below.
- Solar option.
- Installation is simple.
- Battery-powered camera.
- Responsive real-time monitoring.
- Excellent AI technology with high-quality video and audio.
- A loud built-in siren.
- Alternatives for power over ethernet.

The wireless cameras are housed in a waterproof gunmetal plastic housing with an IP65 rating. The security cameras have a wireless range of 100 feet to the Hub, record video in 1080p and have a 130° field of vision. There is also a built-in 104 dB siren and a red LED light ring that spins when the AI hub senses a potential security threat. The camera is powered by a rechargeable battery pack that can last up to nine months before charging.
Deep Sentinel offers a range of multi-featured security systems. Users can choose from a single camera for their front door to a six-camera beginner bundle. The Starter 3-Cam Kit, which costs $699 and includes one Hub, three wireless cameras, three camera mounts, and four rechargeable batteries, is the most popular Deep Sentinel bundle. Each system is intended to aid users in monitoring their home 24 hours a day, seven days a week with the support of a security professional. Deep Sentinel’s live monitoring service is not free and demands a one-year commitment. A single-camera system will cost $60 per month to monitor with an extra $20 charge for each additional camera.
The benefits of the Deep Sentinel Starter 3-Cam Starter Kit are listed below.
- Easy to install.
- Battery-powered cameras.
- Responsive real-time monitoring.
- High-definition video and audio.
- Excellent AI technology.
- Loud siren.
- Cloud and local storage.
- Prompt notifications to users.
The Deep Sentinel Starter 3-Cam Kit is easy to use. However, users can follow these steps to get started.

- Download the Deep Sentinel app. Deep Sentinel is a mobile app that is accessible for both iOS and Android devices.
- Consider the distances between the Deep Sentinel cameras and the Hub before you commence.
- Connect the camera hub to the WiFi router.
- Connect the camera by inserting the Deep Sentinel battery into the camera.
- Press the power button to power on the camera.
- Choose a location and mount the camera.
- Rotate the camera until you achieve the desired recording angle.
- Test the functionality of the camera by using the app.
The downsides of the Deep Sentinel Starter 3-Cam Kit are listed below.
- Monitoring is costly.
- It is not compatible with other smart gadgets.
- Equipment can be costly.
- WiFi internet access instead of cellular.
- The shortest service contract is for one year.
As a home security camera set, the Deep Sentinel Starter 3-Cam Kit is loaded with distinctive features. The unique sides of the Deep Sentinel Starter 3-Cam kit are outlined below.

- Pricing transparency.
- Excellent customer service.
- Security monitoring in real-time.
- Installation is simple.
- Extremely quick response time of about 20 seconds.
- HD video in 1080p.
- AI analysis on-site.
- A built-in battery charger is included in the Hub.
- Features that protect your privacy.
6. Arlo Essential Spotlight Camera
The Arlo Essential Spotlight Camera is a wireless outdoor security camera with 1080p resolution, color night vision, a built-in siren, a spotlight and built-in WiFi. The camera works without a hub, is simple to set up and produces clear video. The Essential Spotlight Camera resembles the Arlo Pro cameras and other Arlo outdoor cameras. The Essential Spotlight Camera has a glossy white IP65 weather-resistant housing with a glossy black interface and measures 3.0” tall by 2.0” wide by 3.5” deep.
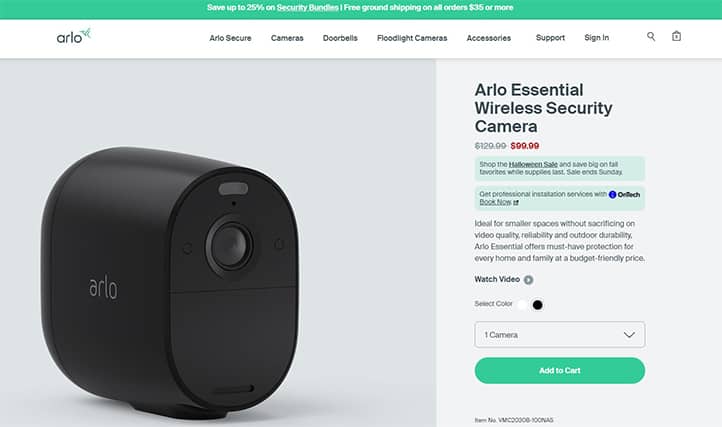
The camera contains a 2.4 GHz WiFi radio, a motion sensor, an LED spotlight, a siren, a status LED, a microphone, a speaker and two infrared LEDs for black-and-white night vision. When the spotlight is turned on, the camera illuminates to provide a high-quality color image.
The Arlo Essential Spotlight Camera is distinct from the Arlo outdoor cameras in the following ways.
- Two-way audio.
- Cloud storage.
- Night vision in color.
- Voice commands.
- Sharp 1080p video.
- Supports IFTTT applets.
- Intelligent motion alerts.
- The tool does not require a hub.
- Monthly subscription at a low cost.
- Scares intruders with a built-in siren.
- Capture clear images in full high definition.
- Multiple power sources.
A rechargeable lithium-ion battery powers the Essential Spotlight Camera and lasts up to six months between charges. The camera does not need a hub to connect to users’ networks because it has a built-in WiFi radio. Users can, however, choose to pair the camera with an Arlo hub to extend WiFi coverage and use local storage if the hub has a USB port. The Arlo Essential Spotlight Camera is available for $99.99.
These are the easy steps to set up the Arlo Essential Spotlight Cam. Users must choose a location with good WiFi signal strength.
- Place the screw mount where you want your camera to be mounted on the wall or ceiling.
- Mark the placement of the three holes from the mount on the wall or ceiling.
- Remove the wall-mounted screw mount.
- Drill three holes on the wall with a 15/64” (6mm) drill bit.
- Reinstall the screw mount on the wall, aligning it with the three holes on the wall.
- Use a Phillips head screwdriver to insert a screw into each hole while holding the wall plate over the three holes.
- Screw the Essential wire-free camera into the screw mount in a clockwise direction.
- Tighten the camera in position by turning the thumbscrew and grip clockwise.
The Arlo Essential Spotlight Cam’s advantages are comparable to those of the Arlo Pro. There are, nevertheless, certain notable variances that are evident. The advantages of the Arlo Essential Spotlight Cam are outlined below.
- The Essential Spotlight security cameras provide improved installation options with a fast, wireless setup to obtain the optimal camera view.
- With clear, two-way communication users can reply promptly to visitors, and the device may be used as a baby monitor with video and audio, a nanny cam or a pet camera.
- 100% wireless design.
- Arlo works in unison with the user’s smart home. The Arlo Essential Spotlight Camera is compatible with Amazon Alexa, Google Assistant, Apple HomeKit and Samsung SmartThings.
- Arlo offers year-round protection with a weather-resistant outdoor camera. The wireless camera has been approved and tested to resist the worst environments, including heat, cold, rain and sun.
- With the new, smarter alerts users can receive notifications from their home security cameras for people, cars and packages, allowing them to take immediate action such as sounding the alarm or dialing emergency services.
To use the Arlo Essential Spotlight Cam, complete the following steps.

- Download the app on your device. Create an Arlo account if you are a new user or log in to the Arlo system as an existing user.
- Ensure your phone is connected to your home network. From the Arlo account, select the Arlo Essential Spotlight Cam.
- Name your Arlo SmartHub.
- Insert the Arlo battery and the SmartHub will automatically detect the camera and ask you for the serial ID of your camera.
- The next thing is to look for a good location and mount the camera.
- When the camera is mounted, select “Continue” in the app. The app will then prompt you to select the camera you want to set up.
- Finally, press “Finish.”
The Arlo Essential Spotlight Camera also has certain drawbacks that indicate flaws and areas for improvement. Here are some of the Arlo Essential Spotlight Camera’s drawbacks.
- Configuration can be difficult.
- Hardware can be hard to set up.
- Setting up several accounts is difficult.
- A subscription is required for recorded video and other features.
- The battery is not easily removable.
Despite the downsides, the Arlo Essential Spotlight Camera has some unique sides that encourage users to buy the security camera. The unique features of the Arlo Essential Spotlight Camera are listed below.
- 1080p footage is crisp and clear.
- Color night vision.
- Voice control.
- Supports IFTTT applets.
- Motion sensors with intelligent alerts.
- The tool does not require a hub.
- Versatile mounting options.
- Rechargeable battery with a long life span.
- Installation is simple.
Note:
The amount of bars in the Arlo app indicates how well a user’s WiFi signal is performing. Ensure your cameras have three or four bars of signal strength in the region where they will be installed. When signal strength is one or two bars, the cameras can work but they may wander out of range at times due to environmental variations.7. Blink Outdoor
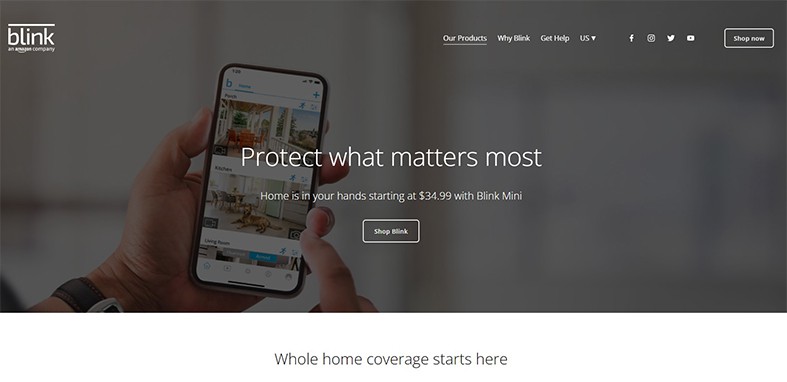
The Blink Outdoor is a weatherproof 1080p security camera with motion detection, cloud and local storage, Alexa voice control and third-party smart device connectivity. The Outdoor is a high-definition security camera with infrared night vision that monitors the user’s home day and night. The camera is black and has an IP65 weather-resistance rating. The Blink Outdoor is powered by two AA batteries that give the camera a two-year battery life. The batteries can easily be replaced by removing the camera’s back screw and removing the cover.
The Blink Outdoor camera records 1080p footage at 30 frames per second and has video motion detection. The Blink Outdoor features a 110° field of view, an infrared LED for black-and-white night video, a speaker and microphone for two-way audio and a temperature sensor. When the camera is activated and night vision is enabled, a pair of status LEDs on the enclosure’s front illuminate. The Blink Outdoor camera set includes a Blink Outdoor camera, mounting hardware, Sync Module 2, a camera tool, a USB cable, a power adapter and four AA Energizer batteries.
Here are the highlights of the features of the Blink Outdoor.
- Two year battery life.
- Two-way audio.
- 1080p footage is crisp and clear.
- Compatible with Alexa and IFTTT.
- Storage on-site and in the cloud.
- Long battery life.
- Installation is simple.
- Video quality is excellent.
- Motion detection sensitivity.
The Blink Outdoor works with the Blink app which is available for Android, Fire OS and iOS. The Blink Home Monitor app allows users to define motion zones and receive motion detection alerts on their phones. Users can subscribe to one of Blink’s Cloud Storage options if they choose to store video in the cloud. The Basic plan is $3 per month or $30 per year and includes 60 days of rolling storage for one camera. Blink’s Photo Capture feature, which has the camera take a still image every hour, is also included in this plan.
With a single camera set, the Blink Outdoor costs $99.99. Blink also offers multi-camera systems with up to five cameras where each additional camera costs $89.99. It is important to know how to install and set up the camera. The Blink Outdoor camera can be set up using these basic steps.
- Tap the plus symbol in the top right corner of the Blink app’s home screen.
- Select the Blink small camera from the menu. The “Scan QR Code” screen appears, and your camera may ask for permission to scan the QR code. Scanning can be used to automatically enter the serial number. You can also manually enter the number. After the device has been identified, it requires a system.
- Give your system a name in the text entry field if you want to add the camera to a new system. To proceed with adding the camera to an existing system, press the system name.
- After you have clicked “Next,” wait for one light to flash blue and the other to be solid green after connecting the camera. Then touch “Discover device” which brings up a connection request.
- Tap “Join” then select your WiFi network from the pop-up menu. If you are adding the camera to an existing system, make sure you connect the camera to the same WiFi network as your other devices.
- The Camera Added screen appears when the Blink servers are ready. To finish adjusting the settings and return to the app’s home screen, tap “Done.”
Some of the benefits of using the Blink Outdoor camera include the following.
- Users can create customizable motion detection and privacy zones.
- Two-way audio enables users to communicate from anywhere.
- Batteries last for up to two years.
- Blink Outdoor makes home monitoring simple.
- Works with Alexa.
- Easy to set up and use.
After downloading the app, the next step is to install the Blink Outdoor camera. To do so, complete the following steps.
- Remove the rear of the Blink Outdoor camera with the camera tool that came with the packaging. Remove the case backing. After that, replace the two AA batteries and replace the camera’s case backing.
- Remember to keep the Blink Outdoor camera base within 100 feet of the WiFi router.
- Finally, snap the camera into the mount and adjust the angle for the best viewing experience.
The Blink Home app is simple to use and has a lot of features. Users do not need to consult an instruction manual to figure out how to use the application. The main issue with the Home app is that while live streaming, users must keep pressing the screen every 30 seconds.
These are some downsides of the Blink Outdoor camera which are listed below.
- Requires the use of a hub.
- Not compatible with Apple HomeKit or Google Assistant.
- No built-in alarms.
- There is only one infrared sensor on the Blink Outdoor camera.
- A short distance must be maintained between the camera and the router.

The unique features of the Blink Outdoor are highlighted below.
- Sharp 1080p video.
- Compatible with Alexa and IFTTT.
- Local and cloud storage.
- Good battery life.
- Easy to install.
- Motion detection sensitivity.
- Real-time communication.
For optimal performance in viewing live video, uploading motion clips and video quality, the Blink system relies on strong signal strength. To minimize performance concerns, the Sync Module and each camera must both have three bars of connectivity. Navigate to the Blink app home screen and tap the symbol to see the signal strength. This will bring up the Sync Module menu, which will display the signal strength.
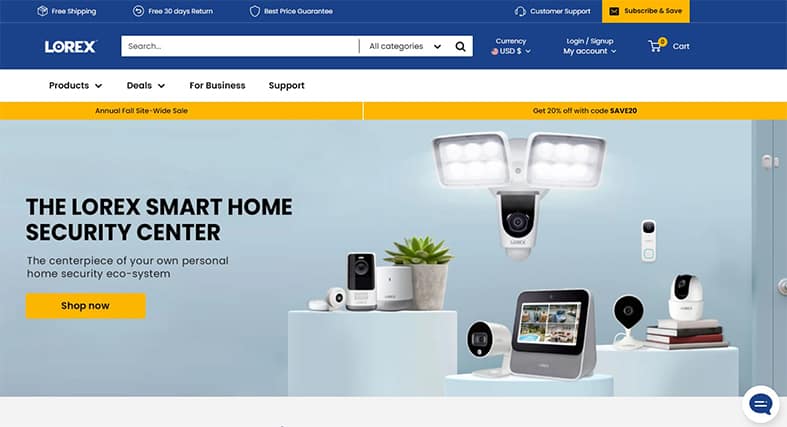
8. Lorex 2K Wire-Free, Battery-Operated Security System
The Lorex 2K Wire-Free, Battery-Operated Security System includes two battery-powered cameras that provide crisp footage, color night vision and intelligent motion detection. The Lorex 2K Wire-Free Security System is a two-camera system that users can utilize indoors and out. These waterproof, battery-powered cameras are wireless and simple to set up, with capabilities like color night vision, human detection, local video storage and warning lights and sirens to deter intruders. Lorex 2K produces crisp 2K video and works with Amazon Alexa and Google Assistant voice commands, but lacks HomeKit and IFTTT applet functionality.
Some of the features of the Lorex 2K Security System are summarized below.
- Easy installation.
- Sharp 2K video.
- Color night vision.
- Built-in person detection.
- Local video storage.
- Alexa and Google voice support.
- IP65 weather-resistant.
- Remote activated alarm.
- High-efficiency video compression.
- Smart deterrence.

The Lorex 2K Wire-Free has a hub that allows users to connect up to six cameras to their home network. The system includes two USB power adapters, two USB power cords, two camera battery packs, two mounting brackets, a LAN cable, a 32 GB microSD card and a quick start guide, in addition to the cameras and the Hub. The Hub is a little white and silver cylinder that stands 3.7” tall and 3.6”wide and is exclusively used inside. On the front of the Hub is a status LED that has different connotations. When the LED is solid green, everything is connected and working well; when the LED blinks green, the Hub is ready to connect to the network; when the signal blinks purple, the Hub is ready to pair with the cameras; when there is a red signal, the Hub has lost its internet connection.
The white IP65 weatherproof cameras have a shiny black front and a silver frame. The cameras are 4.3” tall by 2.4” wide by 2.3” deep and can be placed on a flat surface or mounted to a wall with the accompanying brackets. Each camera has a top-mounted motion-activated LED light and a bottom-mounted speaker for two-way communication. Lorex’s Smart Deterrence feature, which includes these components as well as a built-in siren, is designed to frighten away any unwelcome intruders.
The Lorex 2K Wire-Free is somewhat expensive at $349.99. Before using and setting up the system, make sure the batteries are fully charged. The Lorex 2K Wire-Free camera can be set up using these basic steps.
- To loosen and angle the camera, turn the adjustment ring counterclockwise.
- Install the antenna and slide the battery pack into the camera’s bottom. When the power pack is properly inserted, a beep will sound.
Follow this guide to install the Lorex 2K Wire-Free camera system.
- Install the mounting bracket in the chosen location.
- Make holes in the mounting bracket with a drill.
- Drill holes in the indicated location with the provided drill bit.
- Secure the bracket with the given mounting screws using the included screwdriver.
- Align the mounting plate slots on the camera with the tabs on the mounting bracket. To secure in position, push in and slide down.
- Tighten the security screw with the screwdriver after inserting it through the bolts on the camera’s top and the mounting bracket.
- Using the screwdriver, tighten the pre-installed locking screw. Loosen the locking screw to remove the power pack in the future.
- Set the camera to the appropriate angle. Tighten the adjustment ring in a clockwise direction.
Some of the benefits of using the Lorex 2K Wire-Free Security System are listed below.
- Even with restricted or overexposed lighting, each camera can record 2K QHD video, resulting in brilliant picture quality and greater clarity. Users can enjoy a more expansive view thanks to the ultra-wide 140° field of view.
- The camera’s rechargeable, long-lasting lithium battery and wire-free design allow customers to install the camera virtually anywhere.
- Even while in use, batteries can be removed and charged independently by connecting to a power source.
- The Lorex Home app gives customers direct access to camera footage stored on the Lorex Home Hub, allowing them to see live video, change system settings and replay recorded motion events, among other things.
Setting up these cameras is very simple. Users can add cameras, hit the pairing button, then tap “Next” when the Hub’s LED starts blinking blue. Click “Next” after the camera LED has flashed green. The camera and the Hub will connect instantly. Name the camera and then repeat the process to set up another camera. When you have finished adding all of the cameras, tap “Complete” to finish pairing then place each camera in its location.
Some of the downsides of the Lorex 2K Wire-Free Camera are mentioned below.
- Expensive.
- Requires the use of a hub.
- Not compatible with HomeKit or IFTTT.
The following are some of the unique features of the Lorex home security camera system.

- Easy installation.
- Sharp 2K video.
- Color night vision.
- Person detection.
- Local video storage.
- Alexa and Google voice support.
- 140° field of view.
- Active deterrence with motion-activated LED light.
- Built-in siren.
- Built-in microphone and speaker for two-way communication.
- Long-lasting lithium battery.
This is important:
The Hub and 2K cameras require WiFi to function. The maximum distance is determined by a variety of factors, including WiFi interference. Other devices that also affect WiFi like walls, ceilings, brick and other large obstructions can diminish wireless signal strength. Therefore, the cameras must be close to the Hub during the setup process.9. Reolink Argus 2
The Reolink Argus 2 is a battery-powered DIY security camera that is simple to set up even for those with no installation experience. The Reolink Argus 2’s simplicity allows users to view live video feeds from smartphones. The camera’s battery can be charged by a solar panel. The Argus 2 resembles the first Argus camera in appearance. The pill-shaped white and black container has an IP65 waterproof rating and is 4.6” tall by 2.5” wide by 2.3” deep. The camera features a built-in magnet that makes it simple to attach to the metal mounting base and to remove when the battery needs to be recharged.
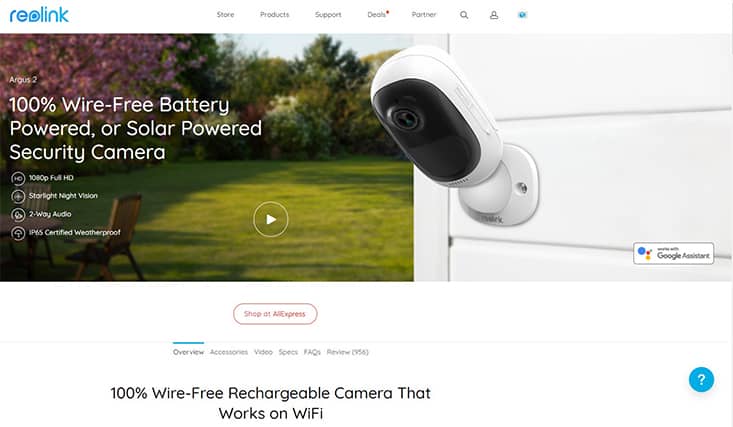
The Reolink Argus 2 is powered by a rechargeable lithium-ion battery that can last up to six months without charging. Remove the entire camera or simply the quick-release battery pack to charge the battery. Connect the battery to a USB power source to charge it. Another option is to buy a weather-resistant solar charging panel to ensure that the security camera has a constant power supply.
These are the highlights of the features of the Reolink Argus 2 security camera.
- Easy installation.
- Customizable alarms.
- Picture quality options.
- Motion sensor options.
- Photo and video saving and sharing.
- 100% wire-free over WiFi.
- Moveable to anywhere, both outdoors and indoors.
- Rechargeable battery.
- Solar powered.
- Starlight night vision.
- 1080p full HD.
- PIR motion sensor.
- Intelligent alerts.
- IP65 certified 2eatherproof.
- 130° wide viewing angle.
- Live video viewing.
- Innovative installation design.
The Sony Starlight CMOS sensor in the Argus 2 shoots 1080p video at 15 frames per second. TheArgus features a 130° field of view and uses seven infrared LEDs to provide extremely fine black-and-white night-vision footage out to 33 feet. The camera contains a two-way audio speaker and microphone and a passive infrared (PIR) motion sensor but no sound detection. According to the manufacturer, this security camera also features an internal siren with an estimated output of 70 to 80 decibels.

For a more permanent mounting solution, the Reolink comes with both a magnetic and a screw-in mounting base. A white rubber coating provides additional weather protection. The camera package also includes a USB charging cable, setup instructions and mounting screws. The Reolink mobile app for Android and iOS smartphones allows users to view live and recorded video footage. An 802.11n (2.4 GHz) radio provides connectivity for the Reolink Argus 2.
The Reolink Argus 2 is available for $84.99. Since a micro SD card is not included with the camera package, customers will need to purchase one to use local storage. In addition, basic cloud storage for video recordings is free, but Reolink offers a variety of subscriptions for consumers that require more cloud storage. There is a payment plan of $10.49 per month for a 100 GB storage space, which supports 30 cameras. Another plan is $6.99 per month for a 50 GB storage space, which supports ten cameras. Also, there is a plan that costs $3.49 per month for 10 GB, which supports five cameras, and the free plan, which supports only one camera.
Users can follow these steps to install the Reolink Argus 2.
- Ensure the Reolink app has been set up.
- Mount the camera on the wall or ceiling, ensuring that it is between 7 and 10 feet from the floor.
- Pre-drill holes using the included mount holding template.
- Screw the camera base directly into the wall.
- Adjust the camera angle. Test the live view of the camera with the Reolink Argus app.
The benefits of using the Reolink Argus 2 are listed below.

- Free rolling seven-day cloud storage.
- End-to-end encryption is used to securely upload event videos to an SD card or Reolink cloud-free live streaming and to replay cloud video from the previous seven days.
- Smart Home devices are compatible with Argus 2. With a single voice command, users can access the live video feed.
- Smart PIR motion detection with WiFi remote control. The Reolink camera immediately records event video and sends out push notifications, email alerts and sound alarms when motion is detected.
- Instant playback.
- Micro SD cards can be used with the Argus 2, allowing users to store files locally and expand the wireless security camera’s storage capacity to 64 GB. The Reolink software allows users to replay recorded videos without having to pay any further subscription costs.
- Starlight night vision. The Argus 2 offers 1080p full HD high-resolution images, and recordings are crystal clear and sharp even at night.
Users can set up the Reolink Argus 2 camera by following these steps.
- The first step is for the user to install the app on their smartphone.
- To begin configuration, press the symbol in the top right corner.
- Scan the QR code on the camera’s back.
- To continue, create a login password and then click “Next.”
- To proceed to the next screen, give the camera a name, then click “Next.”
- To conclude the initialization procedure, read the tips and click “Use Now.”
The Reolink Argus 2 has some downsides which are listed below.
- Not compatible with other smart home devices.
- SD card not included.
- Low volume siren.
- No optical zoom.
The following are the unique features of the Reolink Argus 2.
- Affordable.
- Sharp 1080p video.
- Completely wireless.
- Weatherproof.
- Local storage.
- Free basic cloud storage option.
- No contracts.
- Two-year limited warranty.
- Easy installation.
- Weather-resistant.
Only 2.4 GHz WiFi is supported by the Reolink Argus 2. Multiple factors such as other WiFi networks nearby, distance from the router, barriers in the way, router transmission power and so on might interfere with the WiFi signal strength of the wireless cameras. Ensure that the wireless signal has at least two bars. A single bar signal is insufficient for establishing a solid connection. Users can confirm the signal level by launching the Reolink app and checking the WiFi signal strength.
10. Ring Stick Up Cam Battery
The Ring Stick Up Cam Battery is a wireless indoor/outdoor security camera that records motion-triggered footage and saves it to the cloud. The security device features 1080p video, Amazon Alexa voice commands and a large field of view. This is a feature-rich security camera that can be used both indoors and outdoors and is relatively simple to set up.

The Ring Stick Up Camera is available in black or white and has an IPX5 waterproof standard. The camera is 4.9” tall with the stand and is 2.3” wide. The stand can be installed on a wall or ceiling and can be adjusted for the best viewing angle. The battery is readily removed by squeezing the silver tab and is estimated to last anywhere from six to twelve months between recharges, depending on usage. To recharge the battery, remove the battery and charge it for several hours with the accompanying USB charging cord until the LED turns from red and green to just green.
These are the highlights of the features of the Ring Stick Up Cam Battery.
- Guaranteed software security.
- Removable battery pack.
- Motion-activated notifications.
- Color night vision.
- Easy installation.
- Two-way communication.
- HD video.
- Completely wire-free.
- Sharp 1080p video.
- Compatible with Alexa voice commands and IFTTT.
- No hub required.
- Built-in siren.
The Ring Stick Up Camera has a 115° field of vision and records video in 1080p. This security camera connects to the network using 802.11n (2.4 GHz) WiFi and does not require a hub, unlike many other home security cameras. Video-based motion detection and two-way audio are available thanks to a built-in microphone and speaker. Four infrared LEDs provide up to 30 feet of black-and-white night footage.
The Ring Stick Up offers clever platform integrations as well. Since Amazon owns Ring, it is no surprise that the Ring Stick Up Camera Battery supports Amazon Alexa voice commands. Users can command Alexa to play the camera’s footage or examine prior footage completely hands-free. The Ring Stick Up Camera Battery is also compatible with Google Assistant, making it a wonderful choice whether you are an Amazon or Google user.
The Ring Stick Up Camera Battery costs $99.99 for a single camera and is also available in two, three and four-packs. The wired version ($99.99), which uses a standard three-prong power connection, and the new-for-the-third-generation solar-powered version ($139.99) round out an outstanding collection of options for this category of low-cost smart cameras.
The procedure for installing a Ring Stick Up Camera Battery is straightforward. To install a Ring Stick Up Camera Battery, follow these steps.

- Before physically placing the Ring Stick Up Camera, set it up via the Ring app.
- Charge the battery. Plug the included battery into a USB port with the accompanying cable or any other micro USB cable you have on hand to ensure it is completely charged.
- Select a desired location for the camera.
- You have the option of mounting the Ring Stick Up Camera on a table or anywhere you prefer. To mount the camera on a table or shelf, follow these steps. Place your Stick Up Camera on a table or shelf with the rubber pad on the bottom of the base and the cover snapped on.
- To install the Stick Up Camera on a wall, push the rubber pad into the top of the base and flip the base to the back.
- Drive the screws.
- Attach the battery cover.
- Tighten the screw, and then the Ring Stick Up Camera is installed.
The benefits of the Ring Stick Up Camera are listed below.
- By connecting one or more Stick Up Cameras to other Ring devices in the Ring app, users can keep an eye on their entire home.
- The Ring Stick Up Camera Battery is simple to set up by adding the battery pack and connecting to WiFi.
- The Ring Stick Up Camera’s compatibility with Alexa makes it easy to use.
- Mounting bracket with many uses.
- The Ring Stick Up Camera allows users to see, hear and speak to people from any location.
Setting up the Ring Stick Up Camera Battery is not difficult. Following these steps makes using the Ring Stick Up Camera simple.
- Fully charge the battery.
- Download the Ring app. Go to the Apple App Store or the Google Play Store to get the Ring app. Search for “Ring” on your smartphone, then download and install the Ring app. Visit Ring’s website for another way to download.
- Create a new account or log in to an existing one. It is critical to create an account if you are a new Ring user. Click “Create account” after opening the Ring app. To establish a new account, follow the in-app instructions. Simply launch the Ring app as an existing user.
- Click “Set up a device.”
- Scan the QR code or MAC ID barcode on the Ring device with your smartphone’s camera.
- Choose a specific location. If you are setting up a Ring device for the first time, your phone will notify you that the Ring app wants to use the phone’s location services to identify your location. Allow the app to use your location to fill in the address. An existing user merely needs to choose a location from the drop-down menu.
- Select “Indoors” or “Outdoors” depending on where you want the Stick Up Camera installed.
- To differentiate the Stick Up Camera Battery from other Ring devices on your account, give it a unique name.
- With the flat metal catch towards the rear of your Stick Up Camera, insert the battery.
- Wait for the setup mode on your Stick Up Camera to begin. To go to the next step, tap “The Light is Flashing” in your Ring app when the light on the front of the Stick Up Camera starts flashing blue.
- Make a connection with the Ring device. For iOS users, when the Ring app invites you to join the Ring WiFi network, click “Join.” For Android users, your device should join the Ring WiFi network immediately.
- Connect your Stick Up Camera Battery to your wireless network.
- Configure your Stick Up Camera’s motion zones after it has completed its update and setup, then click “Live View” to test your camera.
These are the downsides of the Ring Stick Up Camera Battery listed below.
- Expensive.
- A cloud subscription is required for recorded video.
- Charging time might be too long.
- There is not a pan/tilt feature.
- There are occasional connectivity issues.
Unique features of the Ring Stick Up Camera Battery include the following.

- Real-time notifications.
- Live view.
- Completely wire-free.
- Sharp 1080p video.
- Easy installation.
- Compatible with Alexa voice commands and IFTTT.
- Motion detection.
- Hub is not required.
- Built-in siren.
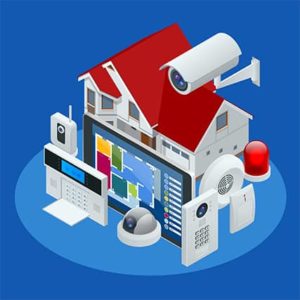
How Important Are Security Cameras for the Home?
Home security cameras allow homeowners to watch their home from nearly any location at any time. The benefits of utilizing a home security camera are numerous. Nevertheless, the following are some of the benefits of using a home security camera.
- Scares off criminals: A security system protects people, helps reduce crime and can make an environment a safer place for everyone. In addition, home security cameras can record any theft incident and can aid in the capture of the criminal and the return of stolen property.
- Notifies in the event of an emergency: Aside from criminals stealing or vandalizing property, there may be other unexpected emergencies in the home like a fire. Users may be able to detect any unusual activity in the house with the help of a dependable security system.
- Eases crime detection for police: In the event of a break in, the security cameras will have captured the event in high-definition. Police can use this footage to apprehend the perpetrator and reclaim any stolen property.
- Allows for continuous 24/7 home monitoring: One of the most significant advantages of having a monitored home security system is constantly monitoring the home. Some home security systems provide round-the-clock monitoring, track any critical events that occur even when everyone is away and dispatch emergency services if needed.
- Improves peace of mind: The most important benefit is the sense of security and comfort that a security camera system provides. Aside from being safeguarded, users will benefit from the confidence of feeling safe, which will help them be more productive, healthy and focused.
How to Choose the Best Security Cameras
Home security is critical and every home should be security conscious, which necessitates the purchase of a reliable home security camera. The security options available, particularly at home, can be daunting because there are a few crucial features to look for that will meet the user’s needs. These are some of the important things to consider when choosing the best security cameras.

- Range: The camera’s field of view describes how wide its field of vision is. The range can be from 110° to roughly 180°, which is significant variance. However, consider the region that has to be monitored as well as the location of the camera when deciding whether 180° or 110° is required.
- Price: The cost of security cameras varies according to their features. The cost of a single wireless camera can range from $25 to $399. The number of cameras to be used is determined by the size of the user’s property, which also determines the overall price of the system. The average cost of a comprehensive home security system ranges from $200 to $2,500. Users can also choose cameras with DIY installation to save money.
- Two-way talk feature: The advantage of a two-way communication feature is that it allows people to hear what is going on around the camera and speak with people close by. This can range from utilizing a smartphone or tablet to confront attackers remotely to soothing agitated pets.
- Wireless or wired: Wired devices communicate by cable rather than across the air. Wired security cameras send a more stable and secure video signal, but they are more expensive. Installing wired security cameras involves either hiring a professional installer or purchasing the cable and installing it yourself. Users may install wireless cameras almost anywhere because they do not require new cable installation or the mending of existing cable runs.
- Indoor or outdoor: Indoor and outdoor surroundings differ not only in terms of lighting but also in terms of other important factors like the weather. While the inside environment is usually managed through heating, air conditioning and humidity control, the outdoors are different. Users cannot use many indoor cameras outside. However, users can use many outdoor cameras both inside and outside.
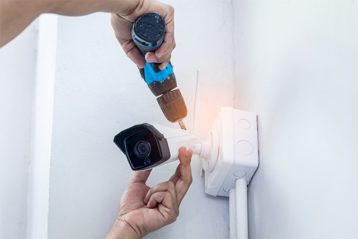
How to Set Up a Wireless Security Camera
Wireless cameras are easier to install than wired systems since they require less equipment. Learning how to install a security camera is a fairly simple process. Users can install a wireless camera by following these steps.
- Plan your home security camera installation locations, although you can modify your home security camera installation placement later if any errors are discovered.
- Select the height that best meets your security requirements. Higher angles normally provide a wider monitoring range. Therefore, users should position the equipment at the highest point possible to cover the target area.
- Place the mounting bracket against the wall in the desired spot and use a pencil to mark the screw holes.
- Use a drill bit that is slightly smaller than the bracket’s screws to drill holes in the wall.
- Place the mounting bracket against the wall, align the screw holes with the holes in the wall, and secure the bracket with screws.
- Insert the batteries and plug the camera into the bracket.
What Is the Cost To Set Up a Security Camera System Outdoors?
The cost of installing security cameras varies depending on the number, type and location of the security cameras. A single-unit camera system can be purchased and installed for roughly $150 on the low end. Installing four outdoor security cameras for your home can cost anywhere from $999 to $1,999, including installation. The labor cost of installing security cameras ranges from $80 to $200 per camera. This price is dependent on whether the camera is wireless or wired, as well as if it is a CCTV or IP camera.
Do Security Cameras Need WiFi?
Yes, security cameras need WiFi. WiFi is a wireless networking technology that provides high-speed internet access through radio waves. Although to utilize a security camera, users do not need to be connected to the internet. To get the most out of the cameras, users need to link the cameras to the internet. The purpose of connecting a security camera to the internet is to allow for continuous remote monitoring of the camera from any location.
How Far Can a Wireless Security Camera Transmit?
In an open area, a wireless security camera may transmit at a range of 250 to 500 feet. The range of a security camera in a closed area, such as inside a house, is 100 to 165 feet. The range of a wireless camera’s signal varies based on the surfaces it must pass through. Since impediments might cause signal degradation, it is essential to have a clear line of sight between the camera and the WiFi router. As may be clear from the WiFi definition given in the previous section, obstructions such as concrete floors and walls reduce signal strength.
How Do Wireless Security Cameras Get Power?
A wireless home security camera, also known as a WiFi camera, broadcasts video over WiFi and is powered by an AC power source and a wireless transmitter. Every action in a residence must be traceable, necessitating the constant deployment of a security camera.
People can use a wireless transmitter in their homes or offices, and as long as the camera is within range of the transmitter the security tool will get a signal. The camera can also be connected to a battery using an adaptor. Most latest versions on the market may not require an adaptor because this feature is already incorporated into the system. The most common battery used in security cameras is a lithium-ion battery because of its extended lifespan and good quality.
How Can You Hide an Outdoor Security Camera?
An outdoor home security camera is useful for monitoring activities and events outside the home. However, it is critical to secure the security camera to get the most out of the security tool. If it is about motives, hidden cameras can reveal a person’s true intentions. Users will be able to protect the technology while capturing the recordings by concealing the security camera. There are numerous methods for concealing your security camera, some of which are listed below.
- Wrap your camera with a decorative case cover.
- Hide security cameras in commonplace items.
- Use PVC pipe to conceal security camera wires.
- Place the camera inside the mailbox.
- Install the security camera in a higher location.
- Set up a false camera.
- Place the camera in front of any glass window.
- Hide security cameras in trees or shrubs.
- Disguise an outdoor camera as a birdhouse or bird feeder.
- Install security cameras under the eaves or in the ceiling.
- Purchase security cameras that are small in size.
- Cover the camera with a plant.
How to Protect an Outdoor Security Camera From Hackers
Although no system is resistant to attack, taking basic steps can help reduce the chances of being hacked. If you understand the definition of hacking, it will be relatively easy to implement the necessary safeguards to secure all internet-connected devices. These are the procedures that users may take to keep their outdoor security cameras safe from intruders.

- Use cameras from well-known companies.
- Use cameras that have high-quality end-to-end encryption.
- Use different passwords for different internet accounts.
- Frequently update the camera’s firmware.
- Use two-factor authentication.
- Turn off any router features that could be a potential threat.
- Regularly keep an eye on your network.
- Use a password manager.
- Set up a separate network for security cameras.