In previous years, to install a new operating system on a laptop or create a backup, the user had to burn the system to CDs or DVDs. Although there is nothing wrong with utilizing a CD or DVD, currently, there are more alternatives thanks to technological advancements. One can now easily backup or install software with a USB flash drive. A USB bootable software aims to provide the user with a different method to boot a system. The software improves, repairs and installs an operating system using a USB drive.
There is the option of installing Windows and Mac using a USB flash drive in today’s domain. A USB drive is convenient to carry and use. To install the operating system on a laptop or PC, one must create a bootable USB. A USB bootable software is a free program used for burning an ISO image file directly to USB drives. When stored in flash drives, the software gives users various benefits, including quickly installing an operating system. Bootable software also facilitates convenience for users, as they can carry a less bulky option of an operating system rather than a computer.
This article lists the best USB bootable software for Windows and Mac, as seen below.
- RMPrepUSB Windows
- Rufus
- YUMI
- WinSetUpFromUSB Windows
- Etcher Mac
- EaseUS
- WinToBootic
- DiskMaker X Mac
- Windows USB/ DVD Tool
- UNetBootin
Table of Contents
1. RMPrepUSB Windows
RMPrepUSB Windows is a free bootable USB software created in 2010 and distributed by RMPrepUSB Developers Team. RMPrepUSB Windows is a complex and feature-rich program software that provides all the options needed to create a bootable USB stick that enables individuals to use image files onto a bootable USB device.
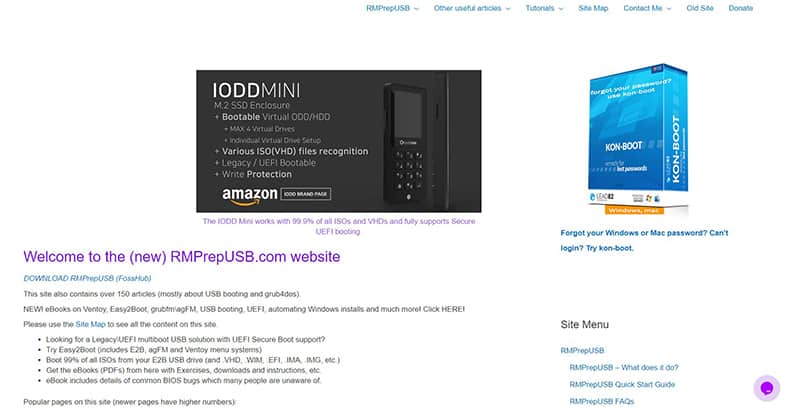
RMPrepUSB Windows is helpful for partition, setup, writing and booting operating system code to a USB drive. The software is easy to install and use on a laptop. RMPrepUSB is one of the best applications to help users create Windows 10 bootable USB. The amazing features that the application has are the major attraction of many users.
For instance, advanced users can set specific limits for the drive if they need to. New users who have little experience with this application wouldn’t have much difficulty handling RMPrepUSB either. An individual can format a USB in several file systems using the app. These systems include NTFS, FAT16 and FAT32 formats.
A RMPrepUSB Windows user can do many other functions, including installing Grub4dos, running a USB speed test and creating an AXT2 Fs on any USB drive. The user can also install SYSLINUX or conduct a size test using the application. These uses make RMPrepUSB much more convenient than developing bootable disks on DVD or CD, which are prone to damage and more difficult to store and maintain.
The application is safe to use because it only lists USB drives less than 128GB in size by default. Therefore, a user can’t accidentally format an internal hard disk or a USB backup drive. Formatting is also swift because of a special FAT32 layout that improves write speeds to an SD card or a USB drive by as much as 10% or higher. Another plus for RMPrepUSB is that one can use the software instead of a Windows DD utility as a less risky option to copy a file into a drive.
The software is compatible with various PCs because of partition arrangements and special boot code patches for various USB drive booting services. This application also gives users a test environment to test whether a USB drive boots using QEMU (32-bit CPU emulator) before booting from an actual system. Users also find RMPrepUSB flexible because it allows them to install various bootloaders and make a bootable USB drive.
As a disadvantage, RMPrepUSB Windows has a cluttered interface, making it difficult for an individual to find features.
This application has a unique feature, allowance for users to take full control when creating a USB bootable drive. Also, a user can monitor the software, famed for its pretty intuitive user interface.
One of the impressive aspects of this application is enabling a user to multiboot a USB drive. This means that users can boot multiple image files on a single USB. Another plus for RMPrepUSB Windows is supporting various image file formats like VHDL, IMA, IMG, DMG, ISO, BIN and WIM. This eliminates any potential compatibility issues while using it.
Users can download RMPrepUSB for free and use it for multibooting a USB drive easily and quickly. A user can also use the application to install a boot manager, format, test, partition, extract or copy files in Windows.Individuals can also use RMPrepUSB to make or restore an image.
2. Rufus
Rufus is a software setting for installing Windows 10 by Rufus Holding AS, located in Oslo, Norway. The software can install multiple operating systems in a single device to enable multiboot USB drives. The user should create an emergency toolkit when working for long hours with the same computer. An emergency toolkit makes it easy to resolve any malfunction while working.
A readily available bootable pen drive in Windows can also save time for Windows re-installment. In this case, Rufus’ software is the best option.
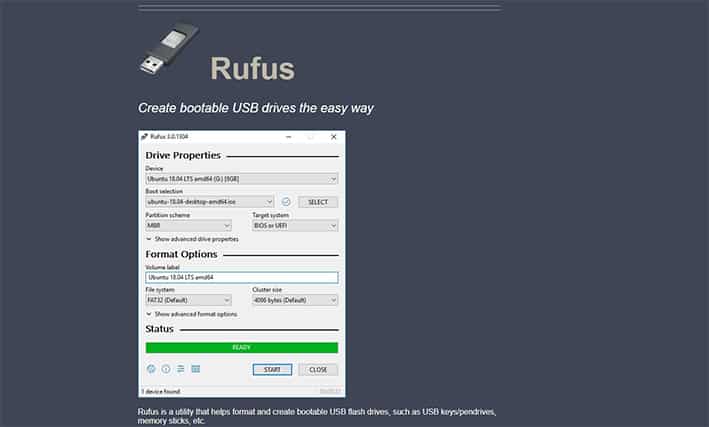
Rufus creates a bootable USB without interfering with the computer’s normal functioning. The software is free and easy to operate, whether experienced or casual user.
Rufus is a powerful Windows program with amazing benefits including the ability of individuals and businesses to use it for free. With Rufus, people can quickly format on USB drives and create FreeDos, bootable and non-bootable drives.
But Rufus allows only one ISO at a time.

Rufus is small but effective. The application is usable for re-installing the operating system so that the user can work without the OS or any firmware.
Rufus includes basic and advanced options for formatting USB drives and adds bootable and non-bootable media. For example, one can use Rufus to generate a Windows 10 UEFI bootable USB stick from an ISO file.
Finally, the boot creator application is available when installing Windows 10 on a second drive.
Rufus marks the best USB bootable software for Windows. This open-source freeware makes it easy to boot the USB to install an OS. The application allows the USB to perform various other purposes, such as operating low-level tools.
Note:
With this free USB bootable software for Windows, the user can alter the partition schemes, cluster size and file system. This portable USB bootable utility permits the USB drive to check for bad blocks to be eliminated.Rufus is safe and risk-free. It’s legitimate and without any ads, third-party offers, banners or malwares. It’s free to use and available for personal and commercial purposes with no hidden costs.

Rufus is compatible with windows 8, 8.1, 10, 7, XP and Vista. To use Rufus, the user should have one of these mentioned Windows versions and a USB drive with a capacity of not less than 8 GB. The good news is that the program doesn’t require any installation; it’s a portable software product and runs automatically after downloading.
To create a bootable USB using Rufus, a user should first connect a USB stick to the computer. Rufus will detect the USB automatically, but the user has to click on “Device” and choose the USB of choice. The “Boot Selection” must be set to “ISO image” or “Disk.” The user should then click “Select,” prompting the software to open a file explorer browser window. Then, the individual should locate the ISO image to burn onto the USB and select it. The user should design a “Standard Windows installation.” This prompts Rufus to detect spontaneously the appropriate “Partition Scheme” based on the device in use. It is good to leave the default settings intact, but Rufus users can change them if necessary. The next step is to assign the “Volume label” a name or leave it intact. Also, don’t change the default settings for “Cluster size” and “File system.” Then, click on the “Start” option. Ignore the warning that pops up notifying the user about the data on the USB being destroyed and then click “Ok.” Then, the software will start generating an ISO image on the USB. When Rufus has finished creating the ISO image on the USB, the user should close it, making this the last step on creating a bootable USB.
3. YUMI
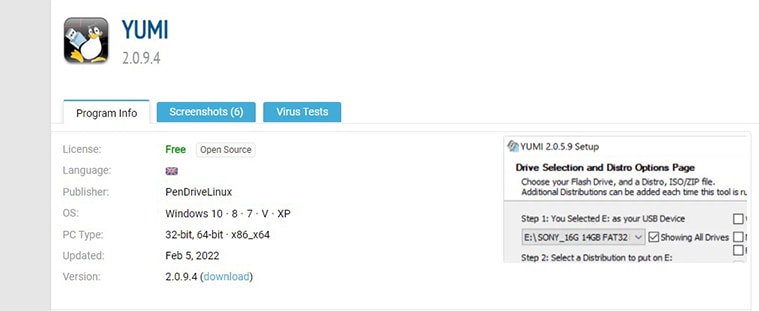
Your Universal Multiboot Installer (YUMI) is a free USB Boot Creator by Lance of Pen Drive Linux. The developer of the Universal USB Installer is the source of this software. YUMI is meant to build multiboot USB devices, whereas the Universal USB Installer makes standard bootable discs.
Multiboot Flash drives allow users to install various operating systems, firmware, antivirus software and other applications on a single device that is only limited by the amount of memory available. Like the Universal USB Installer, YUMI can set up Persistent Storage to save essential files between reboots.
YUMI resembles a Universal USB Installer more. The only difference is that YUMI runs several distributions in a single drive and boots multiple ISO files. YUMI can also uninstall the distributions.
The tools needed to make bootable USB windows 10 with YUMI are a 2GB+ Fat32 or *NTFS Formatted Flash Drive, A device that can boot from a USB, Windows 10 Operating Environment, YUMI (to create a Multiboot Bootable USB) and ISO Files.
YUMI has various advantages for users, including enabling individuals to create bootable USB flash drives. The application is easy to download, install and use, so individuals do not have to struggle to use it on Mac or Windows devices. Another benefit that YUMI avails is its nature as open-source software, enabling users to include new features to improve it. Also, YUMI works with almost every operating system that exists in the market.
A disadvantage is that YUMI doesn’t support multiple Windows OS.
YUMI is hailed as the most reliable single and multiboot solution that every user needs. The program allows users to conduct multiboot installation into internal secondary hard drives, just like on an SSD. The software also allows users to keep persistent changes on live CD ISO environments due to its unlimited-sized ram disk drives for any Linux Operating system.
YUMI is a secure and free-to-use software that enables users to format items onto portable USB devices, replacing optical drives. The application is lightweight and can store multiple platforms and systems into one flash drive.
To create a multiboot USB drive using Windows, the first step is to install YUMI. Then, insert a USB drive into a computer. The second step is to open a web browser and search for the YUMI USB developer download page. Click on the “download” option. Then, find and open the file in the downloads. Click “I Agree” to accept the license agreement terms. Under “Step one” in the drop-down menu, select the USB drive to install the operating systems. The next step is to click the drop-down menu below “Step 2” and choose the distribution of choice to set up. If the user doesn’t have an optical disk image for the distribution, click on the “Download Link“ option. Clicking on the option takes the user to a page to download the image. After waiting for the download to complete, the next step is to click “Browse” below “Step 3”. Select the ISO file for the distribution that the user wants to include. Then, drag the slider to set an area of persistence under “Step 4”. Doing this allows the user to save changes to the operating systems installed on the USB drive. The next step is to click on the “Format Drive” box. Select “Create” to add the distribution and format the drive. Click on “Yes” after reading and understanding the warning that pops up on the screen. The user should wait until the installation is complete and select “Next.” Click on “Yes” to add more operating systems until the user runs out of space or has as many O/S as necessary.
To boot an operating system from the USB drive, ensure that the USB drive is plugged in and then reboot the computer. Press the appropriate function keys to enter the boot menu when the system starts. The function keys one should press depend on the brand of the laptop/computer. The menu should appear, enabling the user to scroll through the options and click on the “Enter” key on the USB drive. A YUMI Boot Menu appears and asks the user whether to view the installed operating systems on the drive or reboot the computer. Choose the O/S of choice and click “Enter” to boot it.
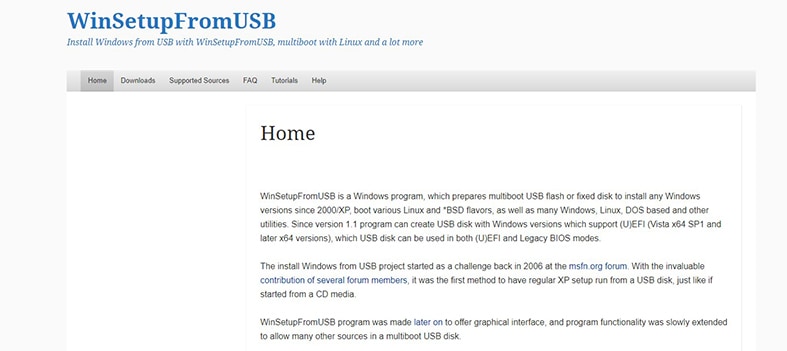
4. WinSetUpFromUSB Windows
WinSetUpFromUSB is another free Windows-based bootable media developer with many features. The software was developed to make Windows 10 bootable USB drives and make bootable Linux distributions using SysLinux or IsoLinux. WinSetUpFromUSB can create bootable discs for WinBuilder, BartPE, UBCD4Win and other programs.
The advanced settings are accessible through the “Advanced Options” checkbox, despite the user interface’s simplicity. WinSetUpFromUSB may also use the QEMU emulator to test bootable media and other essential utilities like 7-Zip, RMPrepUSB and Bootice.
WinSetupFromUSB enables users to create a multiboot USB drive with two or more renditions of Windows operating systems. Simply put, users can create bootable USB with Windows 7, Windows XP, Windows 8, Windows 8.1 and Vista. This means that an individual can install all these Windows operating systems from one USB drive.

WinSetUpFromUSB also lets users make multiboot USB more effective. Users make the application more powerful by adding handy tools, including BartPE, Linux distros and Ultimate Boot CD (UBCD). Individuals also benefit from the software’s cool features to test a multiboot USB using QEMU. Users can also add custom boot menu names to Windows 8.1, Vista and Windows 7 setup sources.
Some pros of using WinSetUpFromUSB include the ease of use over other multi-OS boot projects. Users also appreciate the portability of WinSetUpFromUSB, meaning that a user doesn’t have to install the software to run it.
Another advantage is that WinSetUpFromUSB allows users to create bootable USB disks with WinPE, Windows or Linux recovery environments. Also, the application is free to use, and users can format a disk using three popular tools. Finally, WinSetUpFromUSB has advanced options for tech-savvy individuals to utilize.
Note:
WinSetUpFromUSB does not support SATA/AHCI controllers. Plus, some users find the application rather technical to use.The application can boot from both (U)EFI and BIOS modes. WinSetupFromUSB core components are mainly associated with restoring Windows systems. However, the application can handle many other ISO files users need. For instance, WinSetUpFromUSB can hold Paragon, Acronis and Ultimate Boot CD files. Another unique feature of the software is its ability to transfer Windows installation files onto an extra USB storage device.
The platform can support most versions of Windows developed after Windows XP, making this one of its strongest sides. WinSetupFromUSB can also handle many apps associated with DOS and Linux, with recent updates enabling the software to support both 32 and 64-bit Windows versions.
There have been reports from some antivirus engines about the software having malware agents. However, these are false positives. Therefore, users should be confident about WinSetupFromUSB being free from malware; hence safe to use.
Use the following steps when using WinSetupFromUSB. Insert a USB flash drive into the computer. Then, initiate WinSetupFromUSB and select “Refresh” if the USB drive isn’t visible on the screen. Enable the “Auto format it with FBinst” if the USB drive isn’t formatted and click FAT32. If prompted to “Add to USB disk,” click on the box next to the Operating System that the user prefers. Click on the associated button and then select the OS image. Finally, select “Go” to begin.
5. Etcher Mac
Etcher Mac is also one of the finest bootable USB tools for Mac and Windows users. Using this software requires a few simple steps to turn the USB drive into a bootable disk.
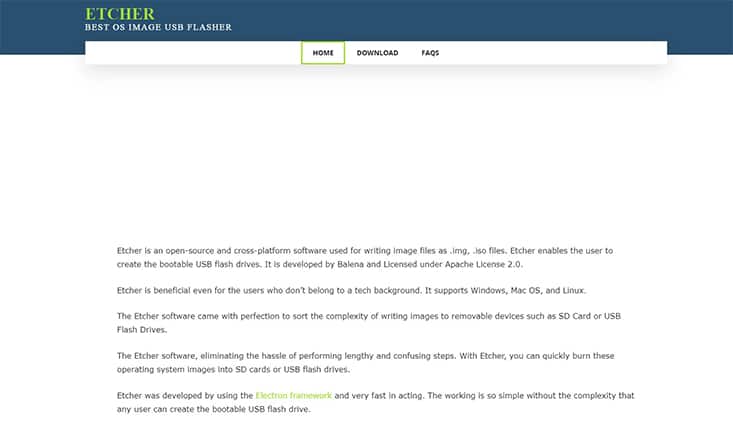
This is an open-source program that simplifies creating a bootable USB device. The free version currently has limited functions, but the developers, Balena, hope to add the capacity to use a live USB drive as a hard disk in future versions.
One of the pros of using Etcher includes its free availability. Plus, the application is reliable and 100% secure from any data loss. Users also appreciate the ease and relatively high speed that Etcher avails.

One downside to using Etcher is the frequent update notifications that some individuals find annoying. Another disadvantage is that the tool is relatively large compared to other available options. Also, a user has to turn the command that enables the software on and off manually, a feature that some individuals would rather not experience.
Etcher has the unique feature of a user-friendly hard drive. The software secures data by following a process that includes selecting a drive, therefore protecting a user from unknowingly formatting a drive. The program has a friendly user interface. Etcher has a simple, colorful and modern appearance that is visually appealing to users. The software’s developers greatly considered giving Etcher a warm and welcoming appeal to attract users. Etcher also doesn’t limit its users to a specific platform, as the platform supports Mac OS, Windows and Linux. The developers regularly update the software, precisely 15 beta upgrades each year. This act ensures that the tool has improved service delivery to its audience. Etcher has a verified burning, therefore protecting the users from failed booting due to distorted SD cards on devices.
Note:
Etcher is very effective in its main mandate of creating USB drives and SD cards that users can boot in simply and quickly.The platform is secure. Etcher verifies an ISO image, preventing a user from accidentally having a corrupt USB image.
To create a Windows 10 bootable USB using Etcher, the first step is to download and install Etcher on Windows 10/7. After downloading, insert a USB flash drive. Open Etcher from the desktop shortcut or the start menus. Then, select a bootable image for Etcher. One can do this by clicking on “Select image” and then choose the image creating the bootable USB flash drive. Then, select a USB flash drive on BalenaEtcher a user wants transformed to bootable. If only one USB storage device connects to a device, the system spontaneously selects it. Otherwise, a user can select “Change” to choose a different USB flash drive to connect to the system. The final step is to select “Flash”, creating a bootable USB flash drive with the default settings.
6. EaseUS
EaseUS OS2Go is a secure program for creating Windows bootable USBs. It’s compatible with both Windows XP and Windows 11. Users may save an operating system on a USB drive and then transfer the system to any device with a single click. Individuals can also play Windows games on a Mac machine.
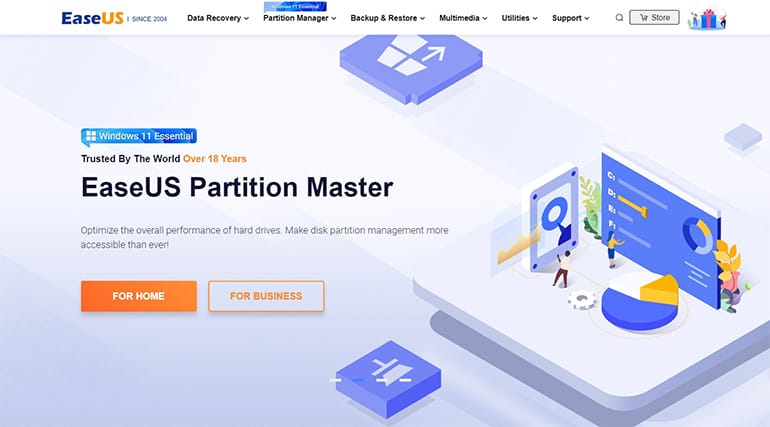
Individuals use EaseUs OS2GO to make Windows 10 bootable USB tools. The software is pocket-friendly and enables users to access an operating system on any hardware.
EaseUS is easy to carry, as users don’t need to carry laptops to access its features. The platform is also more affordable than a hard drive. EaseUS also allows seamless integration, as the apps run whether connected to an Apple Mac or a Windows PC. Plus, users enjoy 24/7 premium email support from EaseUS to solve certain hitches whenever the need arises.
EaseUS is not completely free to use, though.
Users can download EaseUS and enjoy a seven day free trial. After that, one should choose a payment plan for one month, one year or a lifetime. In the “Pro” payment plan, one month of using EaseUS goes for $14.95, one year for $29.95 and lifetime upgrades for $49.95. The “Technician” payment plan has three payment packages. The one-year payment plan under “Technician” goes for $99, two years for $159 and the lifetime EaseUS package for $299.
The software lists all the USB devices connected to a device, prompting the user to select a USB drive of choice. Click “next” after selecting the target USB drive to start making portable Windows using EaseUS. The user should then edit the disk layout and click on “proceed.” The software then automatically starts the clone. The user should wait until the clone completes. Once the clone is complete, the user should use the cloned USB drive as a portable Windows disk.
7. WinToBootic
WinToBootic is a free software by Microsoft Corporation that helps individuals easily create a USB flash drive or Windows hard disk. Users can use an ISO image or a CD/DVD to create a bootable disk. Plus, WinToBootic is compatible with all Windows versions. Individuals love the platform because it is easy and valuable in productivity.
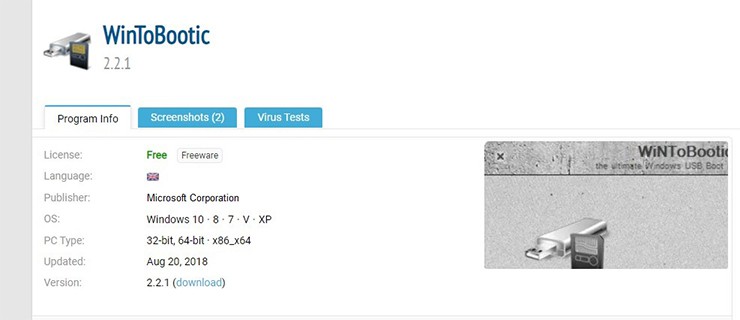
WinToBootic has a simple interface that most individuals find easy to use. The interface enables users to access all the necessary data to put into hard drives. Besides, users don’t have to go through the trouble of adding an extra setup for working if the .NET framework is installed on devices.
All users need to save the files on the hard disk drive and run the software, completing the process. However, if an individual wants to delete any file, it is possible to do so at any time. WinToBootic supports NTFS (New Technology File System). This free-to-use platform also enables users to add files to a device’s operating system.
The platform offers full boot support for most Windows Vista editions up to Windows 8 and includes various server editions. WinToBootic is also hailed for its portable nature, as the application doesn’t rely on any external tools for it to work. Another plus for the software is its capability to create Windows To Go boot disks from various sources, including ISO images.
Note:
WinToBootic doesn’t format FAT32 drives to NTFS, prompting users to do it on Windows Explorer manually.
A feature that stands out is that WinToBootic is a standalone application that can make a bootable hard disk or USB flash disk. The software is a Windows 7/8/10 focused boot disk maker and is focused on quickly creating Microsoft boot disks. WinToBootic is safe to use as its product key activation doesn’t affect a device’s overall performance.
This simple and portable platform helps users to create a bootable USB Windows 7, 8 and 10. All users need to download the tool and install Windows DVD or have an ISO image. The process is short, and once completed, the USB drive is ready to install Windows on another computer.
WinToBootic is a free platform that primarily focuses on creating boot disks based on Windows NT 6.x OS family. This includes Vista, Windows 7,8,10, Server 2008 and Server 2012. If one uses Windows 8, it is possible to create a Windows To Go disk using a non-enterprise Windows Install ISO on a USB disk (non-certified).
8. DiskMaker X Mac
DiskMaker X Mac is a free and secure Windows bootable USB creator by Apple Inc. that helps make bootable USB media. The biggest feature of this program is that, unlike other tools, DiskMaker X Mac allows one to select an operating system from a drop-down menu and generate bootable discs with the proper parameters.

Another useful feature of this program is creating bootable USB sticks and persistent storage. Persistent storage allows the user to backup or store data. Users may access persistence data directly from the bootable USB media, including system settings, bookmarks and application backups. When making the USB bootable device, choosing the quantity of storage needed is advisable.
One of the pros of using this application is its fast download speed. The users also don’t experience much difficulty setting DiskMaker X Mac up. Other advantages include its ability to perform its functions exceptionally well and how people can use the application without needing technical knowledge. Individuals also appreciate how DiskMaker X Mac is free to download and use, and its compatibility with various Mac versions.
The downsides of using DiskMaker X Mac include its incompatibility with macOS Big Sur. The application also has constrained usage, as some users find the features quite limited. Other individuals have reported DiskMaker X Mac experiencing some trouble while working with High Sierra.
Some of the outstanding features of DiskMaker X Mac include its ability to create a Macbook disk on a flash drive. DiskMaker X Mac can also create a Macbook disk on a CD, and the platform is compatible with Mac OS versions up to High Sierra.
Once a user has chosen the desired operating system for which to make a boot disk, the application guides the individual through the process without any technical knowledge. One can easily establish a new disk within a few simple clicks, making this one of DiskMaker X Mac’s strongest sides.
As soon as one launches the DiskMaker X Mac, the software attempts to detect the installation program, OS X. The application then establishes a bootable install disk, making it look as appealing as possible for the user. One can easily build an OS X/ macOS installer on a device within a few clicks. One can use the Install drive to reinstall a newly formatted drive fully. Also, a user can install the application on many Macs without the need to re-download the full installer.
9. Windows USB/ DVD Tool
Windows USB/ DVD Tool windows is another free and excellent Windows bootable USB program by Microsoft Corporation. This program is ideal for Windows users who want tools to generate bootable Windows installation disks. Individuals may use this program to make bootable USBs and DVD drives.

The program is also quite simple to use. It’s impossible to customize the bootable USB devices and modify the file system or partition scheme using this software. The user can’t make extended labels or check for faulty blocks, among other things. This program is designed for people who do not want extensive features and prefer simple, easy-to-use software.
The application can create copies of XP ISO files, Windows 7 or Vista on a DVD or a USB flash drive. With the Windows USB/ DVD Tool, individuals can perform many other functions on a Windows computer, including reformatting the hard drive, data recovery and removing infected files.
Windows USB/ DVD Tool has its pros, starting with the fact that individuals use the platform for free. Windows USB/ DVD Tool is also a reliable application to create a USB disk or boot DVD for Windows Server 2012 and Windows 7 and 8. Users appreciate how simple to use the software is, not to mention its minimum system requirements.
Some users report the program having difficulties working with a high-capacity 64 GB flash drive. Users may also experience bugs while creating a boot image.
This application is secure to use. Windows USB/ DVD Tool is free from cybersecurity threats like malware, worms, spyware and Trojans.
The first step to make a bootable USB using this application involves the user selecting where the .ISO file is stored. After selecting the storage, the next step for the user is to determine whether to make a bootable USB or DVD. Insert the flash drive. Finally, the user should click the button to create the image.
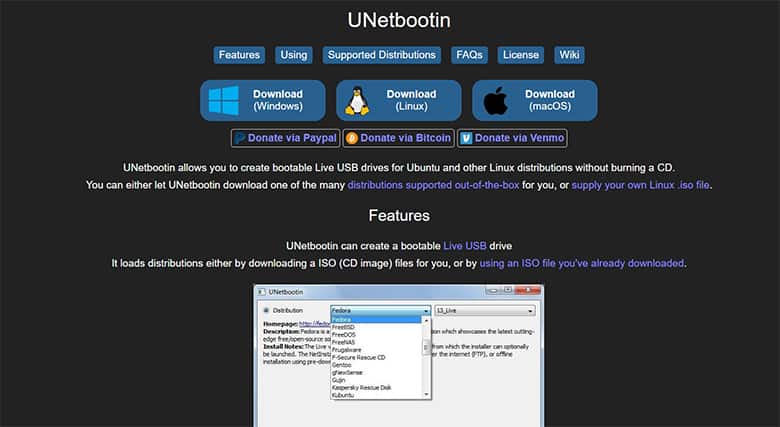
10. UNetBootin
Universal Netboot Installer (UNetBootin) is an open-source and free program that makes it simple to create bootable USB drives for installing OS systems. Developed by Geza Kovacs, UNetBootin is compatible with Windows, Linux and Mac operating systems.
UNetBootin was proposed by Geza Kovacs in April 2017. The platform soon established itself as a must-have tool for computer specialists and Linux users worldwide. However, UNetBootin allows the installation of commercial operating systems (such as Windows), which is practically prohibited unless the user has paid for a license.
As a result, UNetBootin enables the creation of authentic toolkits by providing a complete set of functional operating systems (to attempt software repair without losing data) or systems that are ready to be deployed. The CD’s heyday has passed. Everything is now made easier by compact USB drives with ever-increasing storage capacities.
Kovacs’ UNetBootin has many advantages to those who use the platform. First, the software is fast, dependable and strong. A second advantage is the platform’s availability as a free and safe program to download. UNetBootin also has a simple-to-use interface, is lightweight and has low-resource usage.

Individuals also relish the software’s compatibility with practically every version of Windows, including Windows XP, Vista, Windows 7, Windows 8 and Windows 10. The developers provide privacy and security at no cost. Plus, cleaning and fine-tuning applications are ideal, making UNetBootin top of a PC user’s preference.
Like every application, UNetBootin also has its downsides. This includes the danger that the platform may sabotage a USB drive. Not only does the software work poorly, but UNetBootin also has a high chance of corrupting an individual’s USB in the process.
The software may also stop working at times, including experiencing issues with autorun.inf when one is installing multiple distributions. Other disadvantages include the unavailability of an Uninstaller on the platform and issues with Hiren’s Boot CD ISO file.
The unique features of UNetBootin include availability for Linux, Mac OS X and Windows, although each OS requires a distinct file. The tool can produce bootable Live USB sticks from Linux distributions, including Ubuntu and Fedora. The platform also includes a one-of-a-kind feature to generate a bootable fixed hard disk and a removable USB disk. The procedure also does not necessitate the installation of this program.
One can use an ISO file to generate bootable discs and download the Linux distribution of choice directly from the user interface.
The safety of the files is a unique characteristic of UNetBootin. During the creation of the bootable USB drive, one can save all files to the USB drive. As a result, most Windows PC users strongly advise installing Universal Netboot Installer on devices. Users may now utilize this excellent utility with the most recent updated versions without any difficulty.
The user merely requires the ISO image of the operating system to run (which can be downloaded from the proper website). Then, input the file’s location in UNetBootin and simply click OK. UNetBootin will complete the process and give a notification when it’s finished.
How to Create a Bootable USB Drive
A bootable USB is convenient to have when the need arises to install or repair an operating system on a computer. It’s easy to create a bootable USB for Mac and Windows equipped with the right operating system. Below is the step-by-step process explaining how to create a bootable USB drive for Mac and Windows.An external disk should have at least 12 GB of free memory for an external disk to run macOS. After downloading the installer, the disk is reformatted to fit the operating system in use. For instance, a USB flash drive.

When using an external drive to keep files or have several computers, the user should frequently install the operating system. But when using a single computer, macOS will automatically store files.
With the right installer, one can create a bootable installer for any operating system. In older versions of macOS, it’s better to find all the previous installers in the list of purchased apps in the App Store account in older macOS versions.
Now that the installation files are ready on Mac, the user can move them to a USB drive for future use.
How Long Does It Take to Create a Bootable USB Drive?
Creating a Bootable USB Drive depends on the type of laptop one uses. However, creating a bootable USB with Ubuntu takes approximately 15 minutes. This is because it boosts the laptop’s functionality, making it work faster.
Note:
Factors that affect the time are the type of laptop, internet connection, USB drive, operating system, Windows in use.Which Operating System Can a Bootable USB Drive Be Created For?
Starting a rescue media can vary depending on the operating system one uses. However, a few general guidelines can help get the machine started, regardless of the OS in use.
So if the system is unstable, one needs to run a diagnostic tool on the hard drive or load a Linux desktop just to see what it’s all about.
To boot a Mac from a USB a user needs to load Mac from a USB drive. Insert the boot media into an open USB slot. Then, turn on the Mac by pressing the power button and restart. When startup chime makes a sound, press and hold the Option key to access OS X’s Startup Manager. When the Startup Manager screen appears, release the Option key. Select the USB drive to boot from using either the pointer or arrow keys on the keyboard. After selecting, double-click or hit the Return key. This action enables the machine to start booting from the USB drive.
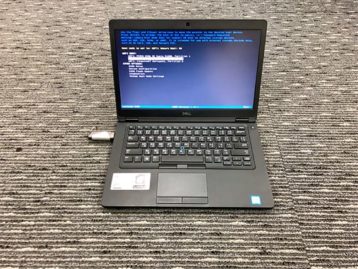
Starting a Windows PC with a USB recovery drive is simple. However, it does need a BIOS (Basic Input Output System) modification first. The BIOS settings include the boot sequence that the system uses when it boots up. The boot order instructs the system on which devices to look for the software required to start the computer and the priority of each device in that search.
Change the BIOS boot order so that the USB device is listed first when booting from USB media. Otherwise, the machine will boot normally from the hard disk. Begin by inserting the thumb drive into a USB port. Then, to modify the BIOS boot sequence, press the computer’s Power button.
Based on an individual’s BIOS, it may be necessary to press any key to boot from an external device, with just a few seconds to comply. If the user doesn’t do anything, the computer will boot to the next device in the boot sequence list, most likely the hard drive.
When the computer boots up, it will first check the USB port for boot media. The system will thereafter always launch from that device. To start Ubuntu via USB media, one should use the same steps as described above for Windows. Confirm that the USB device is listed first in the BIOS startup sequence, or make that adjustment as needed. After inserting the USB flash drive into the USB port, hit the Power button on the PC (or Restart if the computer is running). The installer boot menu will appear, and one will be able to pick Run Ubuntu from this USB. Ubuntu will launch, enabling users to start working with the system. This includes establishing preferences, resetting the system as needed or running diagnostic tools. Then, the user can produce USB boot media.
Regardless of the operating system, booting from USB storage does not have to be complicated. A baseline grasp of how one’s system loads can give the fundamentals required to comprehend what is happening in the boot media.