If you are one of those users who are quick to figure out that some of the web pages that they are trying to visit are loading slightly slower than usual, then you need to read this guide.
The first thing you should know here is that the reason you may be experiencing long load times is that the server that you are operating on is probably having some technical and/or other problems.
Our research shows that most of the time, the server of the user’s internet service provider gets overloaded.
When that happens, the speed of the user’s internet connection goes down.
Of course, now that you have stumbled on this guide you do not need to worry about such problems.
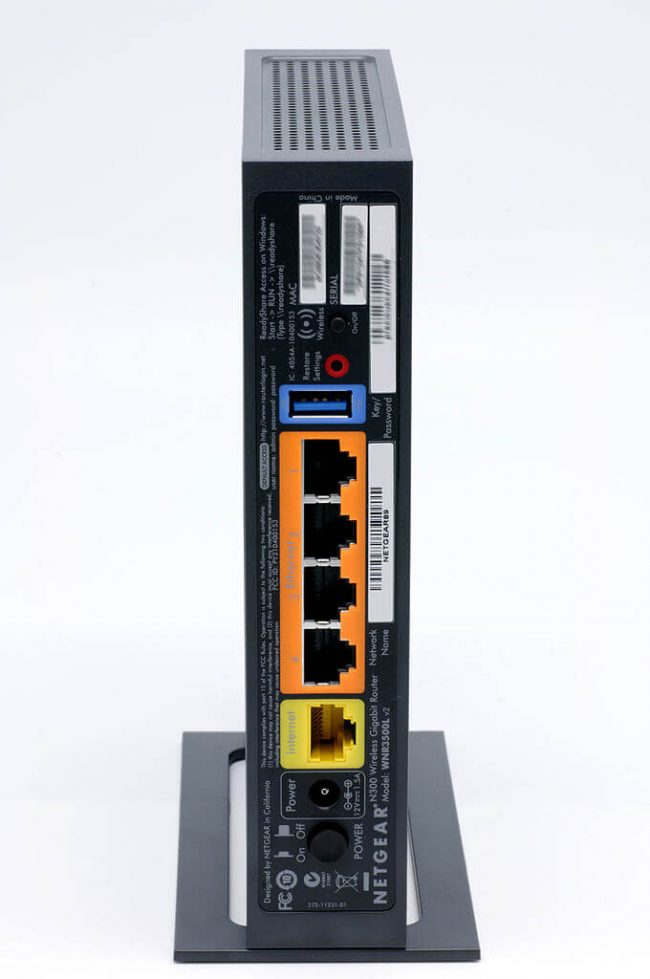
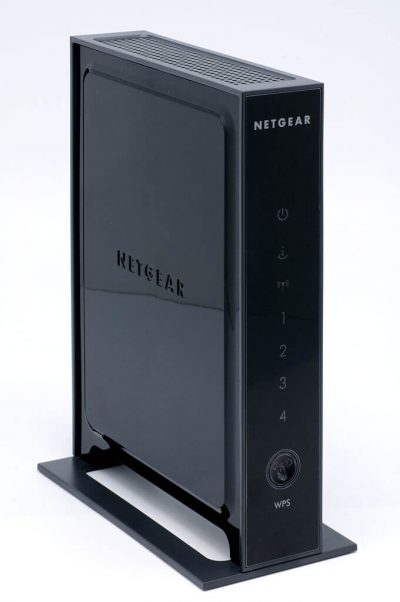
We have a couple of tricks that can help you fix such issues especially if have purchased a NetGear router.
Online users who are suffering from slow load times among a host of other internet-related issues should first familiarize themselves with their DNS server.
In this guide we will also talk about how you should go about configuring your router’s DNS settings.
Table of Contents
Why you should care about your DNS settings and what do they represent.
First off, whenever you actually connect your WiFi NetGear router to the internet, you are actually allowing it to get a small number of settings from your internet service provider.
The router does that automatically so you do not need to worry about doing anything there.
Your router pulls information regarding the DNS servers that it would like to make use of whenever you try to access the world of the internet.
The term DNS stands for Domain Name System.
You should think of it as a place where all of your URLs go for processing whenever you input them in your web browser.
More specifically, without a DNS your URLs would never get translated to a valid IP address and because of that computers would never have the opportunity to comprehend what their users want them to do.
It goes without saying that for all the hype regarding artificial intelligence and machine learning, computers still have a hard time understanding the language that humans use on a daily basis.
Computers make use of IP addresses whenever they want to communicate with other members of their ilk.
Therefore, we have come to know that the data which the user enters always goes directly to the related DNS server.
After that, it comes right back to the user’s machine.
But this time, its form is of numerical digits.
In this way, the web browser that you are making use of is able to comprehend what it is that you want it to do.
Not only that, it also loads the given webpage pretty much instantaneously.
Most of our readers would already know this but it never hurts to learn again how web browsing actually works.
With that said, you should also know that on rare occasions, a user’s internet service provider can make things difficult by having a server that fails in terms of providing appropriate speed to the user.
This, in turn, can negatively affect the user’s experience while the user is browsing the world of the internet.
In such cases, the best thing that the user can do is to alter the DNS settings on his/her NetGear router.
Of course, things just do not end there.
You can always do more.
In fact, almost every internet-enabled device allows you to change DNS settings.
All you have to do make an effort.
Now before we actually get going on that process, you would benefit a lot from another example on how DNS goes about doing its business.
We feel that if you have the will for it, then you will enjoy the process rather than dread it.
What we want you to do right now is to type this ‘172.217.24.238’ in your web browser’s URL section.
After doing that, you should take a look where does your web browser take you.
Now, don’t make any assumptions at this moment in time.
What you need to understand is that when you type those numbers in your web browser, your DNS server changes those numbers and translates them as Google.com.
You are free to try it out and see for yourself what kind of results you get.
With that out of the way, what you should do now is that you should try out some completely free DNS servers.
These are,
- Google
8.8.8.8
8.8.4.4 - OpenDNS
208.67.222.222
208.67.220.220
How do I obtain the IP address of my NetGear router
Now, to begin the process of knowing your NetGear router’s IP address, you first have to log into the WiFi router.
Of course, things do get a bit more complex later on.
But the reason why you need to find out more information about the IP address of your WiFi router is that without it you cannot access it on a given web browser.
In the next couple of sections, we will talk more about all the ways in which you can extract the IP address of your router.
Before moving on to the next sections, we want you to always keep in mind that the steps we have mentioned need to be followed exactly as we have given them and in order.
If you follow these two tips then you should be fine.
How to get NetGear router IP address on an Apple Mac machine
- First, you need to power on your Apple Mac machine. Then you need to click the symbol that appears in the top left section of your screen and is shaped like the official Apple Sign.
- After that, you need to choose the option that says System Preferences.
- While you are admiring the whole list of options that you have available with you, we want you to stop doing that and click on the option that says Network.
- Then, we want you to click on the option that says Advanced.
- With that out of the way, we want you to perform a click on TCP/IP. After that, you should have no problems in seeing your NetGear router’s IP address right next to where it says Router.
This option is usually located below where it says Subnet Mask and slightly above where it says Configure IPv6.
How to find the IP address of your Netgear router on a Windows machine
The actual process is slightly different on a PC than on a Mac.
Hence, you will need just a little bit of that good old focus.
We’re not saying the steps will be more complex, but they will require a bit more care.
Here are the steps.
- First, we want you to turn on your machine running Windows.
Then make your way to the Command Prompt. - After that, we want you to type the text ipconfig there without any quotations or anything like that.
- Once you do that, you should find yourself looking at a ton of info on your Command Prompt screen.
The information is neatly organized, so you should not have to spend too much time in figuring out what information is presented where. - Since you are looking to find the IP address of your NetGear router, the only information that you need to concern yourself with is the one next to where it says Default Gateway.
How to change your DNS settings on your NetGear router
At this point, all that you really need to do is to change the DNS servers of your WiFi router.
Needless to say, things should get a lot easier than before from this point forward.
In the next couple of sections, we will talk more about the things you need to know about in order to have a comprehensive picture of what it is that we’re talking about and what needs to be done.
More specifically, we need you to follow the steps that we have given below in order to change the DNS settings of your NetGear router.
- As before, we want you to first sign in to your NetGear router.
To do that you will need to make use of the IP address that you got by following the previous two sections.
Or you can always take the option of going to this page and moving forward from there. - When that is done, you need to make use of your password and username to log in.
If you never had the time to change your default settings then you should try the word Admin as the username and password of your router.
These are the default values.
But take care, some NetGear routers have Admin as the official username but have ‘password’ as the default password.
Again, if you made some changes to these things then act accordingly. - Once you have finished the previous step, we want you to choose the option that says Internet from the main menu that you see.
- After that, you need to do a bit of scrolling to come across the section that talks about your DNS or Domain Name Server address.
- We want you to enable the option of ‘Use These DNS Servers.’
- Then, we want you to hit the button that says Apply.
- Now, you need to show some patience and wait for a couple of seconds until your router has made all the necessary changes.
This should not be hard since NetGear routers usually show users a bar which fills up as the process nears its completion stage. - If you have followed all the steps that we have mentioned so far in order and carefully then congratulations to you because you have managed to change the DNS settings of your new/old NetGear router.
Advantages of changing the DNS settings of your NetGear router
We have already mentioned the fact that if you are perceptive enough you may not have any trouble in noticing the small difference in the overall speed of your internet connection from time to time.
And there is nothing wrong with that since it happens even to those people who have ultra fast internet connection speeds.
Now, the reason why your internet connection speed varies as much as it does is due to your internet service provider’s inability to come up with the necessary expertise which allows it maintain a consistently high level of performance on which to operate.
There are literally tens and hundreds of factors that can affect a given server.
Problems usually arise when the server is overstacked.
And that happens when there are too many users, making use of the internet at the same given time.
So if you change your DNS settings and hence change your DNS servers, you stand to gain a lot of advantages when compared to people who are making use of their default servers.
The obvious advantages that you might have include good internet speed and more help from the DNS service that you have chosen.
Not only that, but making use of a custom DNS server can also allow you to have access to various types of geo-restricted content in any part of the world.
We do not want to say that impossible things become possible once you change your DNS server, but isn’t that what happens when you are able to access a website that you were not able to access before your DNS settings changed?
Let’s learn more about the advantages that each online user stands to gain by changing his/her DNS settings.
Improve the general speed of your internet connection.
This is especially true for people who live in countries where there is a lack of variety of internet service providers.
If there is only one single big internet service provider in your country or province or even city, then it would not take much to overcrowd its DNS servers.
This is exactly what people have to suffer who are unfortunate enough to live in a country where there is only one internet service provider.
In fact, in such a scenario, you will probably have an unusable internet connection from time to time.
It is sad but it happens.
With the number of internet users increasing on a daily basis, it stands to reason that servers would get overloaded on more and more days.
If you want to avoid all such issues, you need to change your NetGear router DNS server.
Since you have made it so far, we are going to assume that you already know how to do that.
But there are some other things you need to take into consideration while you are manually trying to configure new DNS setting.
Ideally, you should try to opt for a DNS server that is as far away from your original location as possible.
Why do we say that?
We say that because when you connect to such a DNS server, you are guaranteed to not run into rush hours because when it is peak use time in your original country, it is close to 3 am in the country where your DNS server is located.
Of course, only people who are willing to put in the time to search for such DNS servers get to use them.
Such a server will make sure that you never have to worry about internet problems that users have to face during the daytime.
Configuring to a server that is on the opposite side of the world also means that your browsing speeds will increase and no matter what happens, you will always have decent downloading speeds.
We still have not mentioned the fact that a less-burdened DNS server would allow you to stream your favorite show’s episode without the usual buffer messages popping up every other second.
On that note, we hope you are well read on the next generation of routers from Netgear called gaming routers.
No?
Well, these gaming Netgear routers are a different breed of routers.
Just imagine if you had a fast router that is very competent at protecting you from even slight drops in your internet connection speed.
Regardless, DNS servers are the primary cause of low internet speeds that you might suffer on an occasional basis.
Gamers need close to ultrafast internet speeds.
To succeed in tournaments gamers usually have to make sure that they are not only using the best DNS server but are also in possession of a fast gaming router.
That is the way to give yourself the best chance of winning a tournament without suffering from high latency rates and lags.
Bypass the majority of content restrictions
A lot of online users still do not seem to understand that it is entirely possible for them and for anyone else willing to put in the effort and the money, to change one’s online location.
In other words, you can appear as an online user from another country while you are surfing the web.
And all you really need to do is to change some of your DNS settings.
Well, on your own, without much knowledge of how connected networks work, you can’t do that.
But with the help of tools such as VPNs and Smart DNS proxy services you can do so competently.
VPNs and smart DNS proxy services are the kinds of services that have the necessary components to change the related URLs which give away the user’s original and current location.
Our research shows that once the user figures out how to alter these, he/she can easily access all types of geo-restricted websites and channels from all corners of the globe without doing too much work.
We all know that almost all good streaming services try to protect their premium content by making use of geo-restrictions.
With that said, you do not have to worry about such geo-restrictions anymore because you know that you can sign up for a good VPN service or a good Smart DNS proxy service in order to bypass all of them probably within a few seconds.
So invest in a good VPN service today and start changing your location at will with ease.
Again, a change in your DNS settings will also do the trick.
However, you can only get these DNS credentials once you have purchased a package from a reliable Smart DNS proxy service provider.
Do not try to go at it on your own as you might mess up your internet connection really bad.
Smart DNS proxy services along with VPNs often have dedicated servers to change your location to whichever country you want to.
Now, we are aware of the fact that the market is currently filled with a ton of Smart DNS proxy service providers and VPNs.
And because of that, it can become difficult for people to decide which one they should go for.
Allow us to make things easy for you.
It is probably best practise that you stay away from Smart DNS proxy services because even though they change your location, they do not provide you with encryption or protection against hackers like a VPN service does.
That narrows down your options by 50 percent.
Now, there are a lot of VPN services in the market as well.
You probably do not have the time to research them all and then come to a decision.
That is why we have done the grunt work for you via a guide.
Click here to read more about that guide where we talk about the best VPN service providers in the world and how they can help you change your location and guard your privacy.
Some of them even work with Netgear routers so you can just install a VPN on your DD-WRT router and then protect all the devices that have connected to the internet via that router.


