An easy step by step guide will be explained in this article.
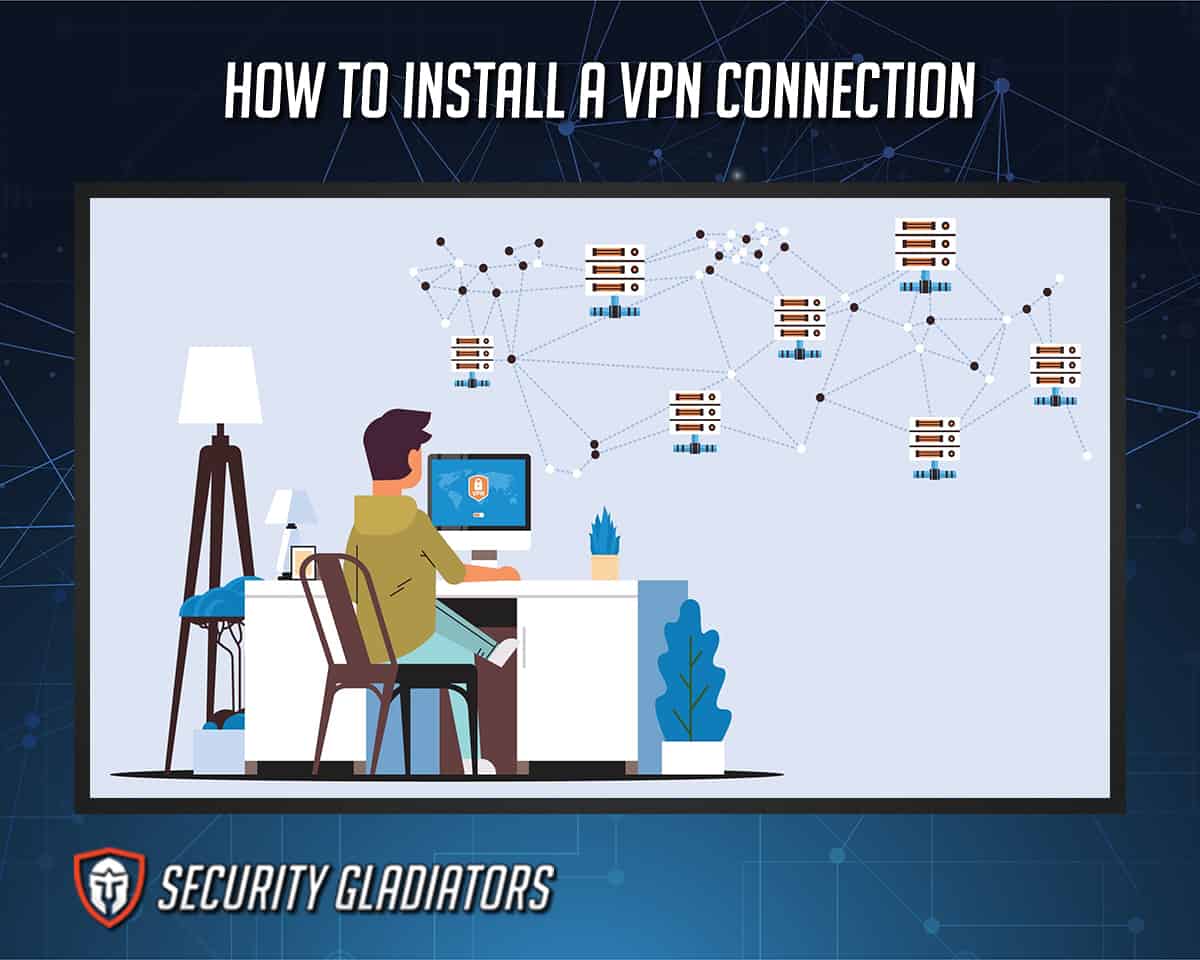
Table of Contents
What is a VPN?
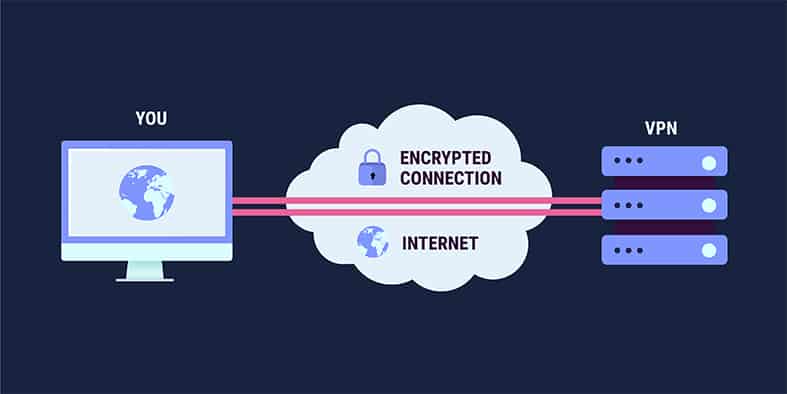
A VPN is an encrypted connection that exists between a device and a network over the internet. Software (or an app) is installed on the users device, when turned on, it connects to a VPN server in the location chosen, then all the internet traffic is routed through that server while being encrypted end to end. This gives the user the IP address of the VPN server while hiding everything they are doing online due to the encryption.
VPNs offer many benefits to internet users. The following are the top benefits of using a VPN service:
- Secure public WiFi networks whenever there is a need to connect to one at a location like a cafe or local library.
- Stream geo-restricted content from various streaming websites such as Amazon Prime Video and Netflix.
- Bypass internet censorship in any country of the world.
- Stop internet service providers from activities such as surveillance and tracking.
- Avoid price discrimination in some regions. Turning on a VPN service to change location to a place with the lowest prices can result in huge savings.
- Secure banking activities that require extra security. A lot of banks still make use of unsecured networks to carry out transactions. The best way to counter that is to use a VPN.
- Stop hackers from stealing payment details while shopping online.
How Do I Install a VPN Connection on Mac using an App?
Users using Mac can follow this simple guide on how to install a VPN on Mac to install a VPN connection on their PC.
1. Download the VPN application from the VPN’s website or the app store.
To get started, Mac users need to choose the VPN service they prefer. Though not all VPNs are compatible for Mac, the following VPN services have apps available for Mac users;
- NordVPN
- Surfshark
- ExpressVPN
- CyberGhost
- IPVanish
- PrivateVPN
Select any of the above VPN services and download via the App Store or go to the VPNs website to download the app.
2. Create a user account.
The next step is to create a user account with username and password. Users will also be requested to choose a payment plan and method to subscribe. Different VPNs have varying payment plans, be sure to check and choose a payment option that best suits your budget and needs.
3. Register on the app.
After creating a user account, the next step is to proceed to register on the app. Users will be required to enter the account information such as the username and password used while creating the user account and confirming the email address used.
Once logged in, allow the VPN to add configurations to your device to begin to use the app.
4. Choose a server and connect to it.
Once you have registered on the app, you will be asked to choose a server before you can use the VPN. This is also very easy, what is required here is to select a server from the list within the app and click on the “connect” button. Users can choose a server within their country or other countries depending on what the VPN is needed for.
For instance, if the VPN is only needed to secure public WiFi networks or protect privacy, a server within the country can be chosen. However, if the user needs to access content or stream geo-restricted content from various streaming websites such as Amazon Prime Video and Netflix, a server location from a country where the content is allowed should be chosen.
And that’s it. Once these steps are followed, users only need to switch on your the and they will be encrypted and even appear to be in another country whose server was chosen.
How Do I Install a VPN Connection on Mac Manually?
Another way to install VPN on Mac is to do it manually. This is also simple like installing VPN using the App. This is a step-by-step guide on how to do it.
1. Open the System Preferences app on your Mac.
The first step when installing a VPN connection manually on Mac is to open the system Preferences app on the Mac. To do this, click the Apple icon in the upper-left corner of the screen. Then, click to open it.
2. Hit Network, Select “plus” by clicking.
Once “system preferences is opened ,Then, click on ‘network’. From there, click on ‘plus’ at the bottom left corner of the window to enable a new VPN connection.
3. Select Interface, Select VPN.
After hitting the “plus” button, select the “Interface” option and then choose “VPN type and service name from.
4. Select the VPN connection that you want to configure.
The next thing is to select the VPN type to be configured.
Select L2TP over IPSec in the VPN Type dropdown.
5. Press Create, Decide on a protocol.
After this is done, the next step is to press click on create. (Protocols contain instructions on how one’s data is handled and carried through the VPN server).
6. Type in your account name and server address.
Enter a connection name for the VPN and also the server address given by the VPN provider.
7. Click Authentication, For Settings
Users will be prompted to enter specific authentication setting information. The username and password should be supplied from the given VPN account sent by the provider. Then, Click“OK” to confirm if the information entered is complete.
Tick the box asking to show the VPN status in the menu bar, then click “Apply.” This option allows the VPN to be featured in the toolbar at the upper-right corner of the screen. Users can easily click on the icon to adjust the settings.
8. Enter the admin’s private network’s information here.
Enter the private network information in the appropriate fields.
9. To add extra details like server options, click the advanced button.
Click the advanced button for additional information such as the DNS servers, proxies, or TCP/IP settings
10. Tap Apply, and Input OK.
Finally, click apply and OK. Your VPN connection has now been successfully installed
This is simply how to install a VPN Connection on Mac manually.
How to Install a VPN Connection on Windows PC Using an App?
The above steps are for Mac users. The step below explains how Windows users can also install VPN on their PC.
1. Register for a VPN
Choose a VPN that has an app available for Windows. Almost all VPN providers today have apps for Window users so that shouldn’t be a problem. Some of the best VPNs for Windows are;
- NordVPN
- Surfshark
- Private Internet Access VPN
- ExpressVPN
- IPVanish
- Windscribe VPN
Once any of the VPNs above have been chosen or other secure VPNs have been chosen, sign up for an account.
2. Install the VPN software
The next step is to download the VPN software from the provider’s website. Then locate it on Downloads and install it on your PC.
3. Execute the setup to finish the installation.
Follow the instructions on your PC to complete the installation process.
4. Use your account to sign in and connect to a server.
Once the VPN is successfully installed, proceed to sign in using the account credentials used during registration. Then, select any server from the locations available on the app, and connect to it by clicking the connect button.
5. Enjoy browsing
Once all the steps above have been completed, users can now enjoy browsing the internet through the VPN. The connections are private and secure.
Users can now browse the internet securely by following this step by step guide on how to install a VPN Connection on Windows PC Using an App.
How to Install a VPN Connection on Windows PC Manually?
Follow the guide below to install a VPN connection on Windows PC.
1. Right-click the Start button and select Settings.
The first step to installing a VPN connection on Windows PC manually is to right click the start button and click on settings.
2. Go to Network & Internet.
Then, navigate to the network and internet section.
3. Select VPN
Then choose the VPN option by the right side of the menu.
4. Add a VPN connection by clicking.
Click on the plus icon to add a new NPN connection.
5. Select a VPN provider from the drop-down menu below.
Choose a VPN provider from the list of available providers shown on the screen
6. Click Windows, then click the Connection name field.
Select the name for the connection in the connection name field.
7. Give the VPN connection a name.
Name the VPN connection for easy identification.
8. Select the Server name or address field by clicking.
Then, proceed to select the server name and address field where users will be prompted to enter the name and address.
9. Enter the address of the server.
Then, enter the server name and address. This will be provided by the VPN provider. It is used to establish a connection between the VPN connection and the VPN server
10. Select your VPN type from the drop-down menu below.
VPN types will drop down the menu, simply select the VPN type connection you want to set up.
11. Pick a connection protocol
Pick a connection protocol. This is provided by the internet provider.
12. Select Type of sign-in info from the dropdown menu below.
Users should select how they want to sign in they prefer such as username and password
13. Save after selecting a sign-in option.
The next step is to click the “save” button after selecting the sign-in option.
14. Connect by clicking the VPN you just set up.
Lastly, click on “connect” to connect to the VPN that has just been set up. Then, enter the sign-in info and wait for the connection to be established.
Simply follow the above step by step guide on How to install a VPN Connection on Windows PC Manually.
How to Install a VPN Connection on Android using an App?
Another way to install a VPN connection on an android device is using an android app. Here is a step-by-step guide on how to do it;
1. Get an Android VPN by going to the Google Play Store.
To get started, go to Google play store on your android device and search for VPN in the search bar. Available VPNs on Google Play store will pop up. Be sure to select the best VPN service for android devices. Some of the best VPN for Android devices are; Nord VPN, Express VPN, IPVanish and Surfshark. After choosing the preferred VPN, tap the install button and install.
2. Sign in after installing the VPN app.
Once the app is installed on the android device, open and sign in with your details. Those who don’t have an account yet should create a new one by simply following the step-by-step instructions on the app. Users can log in after this.
3. Select a server.
Once logged in. Select a server from the list of servers available on the VPN app. Choose a server from any location.
4. Go to Connect.
After choosing the preferred server, tap “Connect” to connect to the VPN’s server.
How to Install a VPN Connection on Android Manually?
Follow this step by step guide to install a VPN on Android.
1. Enter your Android’s settings.
Go to the home screen on your android device, find settings and click on it.
2. Go to Network & Internet.
Simply do this by tapping on Network & Internet and tap ‘select VPN’. This is where all network-related settings on android devices are found.
3. Choose Advanced.
Depending on the version of the android device, users may need to select the “Advanced” option, depending on your Android version and device. This should contain more advanced settings such as “VPN”. If you can’t locate VPN on your android device, search for it by typing it on the search engine on the device’s settings.
4. Pick a VPN.
After locating the VPN settings, select the VPN option. The VPN should be shown here if it has already been set up.
5. Press the plus sign.
Click on the plus sign i.e “Add VPN” to add a new VPN if it hasn’t been set up. This will prompt users to enter the details for the VPN connection.
6. Type in the administrator’s details.
Here, enter the details In the form, such as the server name, account, and password. These details are provided by the VPN service.
7. Select Save.
After typing in all the necessary details, tap “Save” to save the VPN configuration and that is it. The VPN has been successfully installed.
By following these simple steps on How to Install a VPN connection on android manually, everyone should be able to install VPN on an android device.
How do VPNs work?
Before explaining how VPNs work, let’s quickly explain IP addresses.
Internet Protocol (IP) address is a set of unique characters that identifies a device on the internet. Every device connected to the network has an IP address. Now, this is what a VPN does, it masks the IP address by rerouting the device’s traffic. Then, it gives the users an anonymous IP address and helps users encrypt their data. The encryption in turn makes it difficult for third parties such as malicious hackers or spies to use or manipulate the data. In other words, even if unauthorized users get a hold of the data, it will be of no use.
VPN is a great solution for people to change their location; this is done by connecting to a server in another location than theirs. With this, accessing or streaming geo-restricted content on various streaming websites is made possible.
How to choose the right VPN server?
VPNs generally have a wide range of servers in different locations around the globe, but before users connect to any of these servers, it is essential to check if they are connecting to the right server. It is also important to know how to tell if your VPN is legit and trustworthy before even choosing any VPN at all.
First and foremost, understand that there is no best server. The right server will depend on what users need it for and why. The major reasons why users connect to VPN servers are for added security, accessing geo-restricted content, gaming, etc. Each of these uses requires different server connections.
The following ways are how to choose the right server;
To access blocked contents on various streaming services, connect to a server in countries where the content is available. Canada and the US generally have less internet restrictions when it comes to watching content online. Users considering accessing a wide range of content on Netflix can connect to servers in these countries because the Netflix library is bigger than other countries.
Note:
However, if the main reason for connecting to a server is a private connection or for an extra layer of security from spies or malicious hackers, there is no need for connecting to a different country. The general rule is ‘the closer the VPN server, the better the speed’.For gaming, connect to a server that is close to the game’s servers. This is the best way to enjoy fast speed and connectivity that gaming requires. Choosing a server that is far away might result in low speed and buffering.
Users should connect to a server that fits their needs for optimal performance. Following the guide above, choosing the right server should never be a problem again.
Is it difficult to install a VPN Connection?
No, installing a VPN connection is very easy. Users don’t have to be tech savvy to install a VPN connection on either Windows, Mac or Android phones. The steps explained in this article are simple to follow. If there are any questions when connecting to a VPN service, the providers usually have a support team who are ready to answer any questions immediately.