
XBMC or Kodi (Kodi is actually the new name of XBMC) is a free and open source digital media player.
It helps users to stream,
- IPTV channels
- Live sports
- TV shows
- Movies
And a ton of other stuff if you have the time to consume it.
In this Kodi guide though, we will talk about all the things that you need to know in order to update Kodi on various different platforms such as,
- Windows
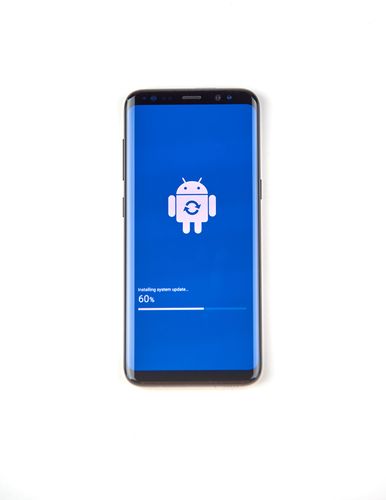
- Android
- FireStick
- And some others
Before we move forward though, keep in mind that watching TV shows and movies on Kodi could potentially land you in some legal trouble.
Moreover, you may compromise your online privacy as well if you are not careful.
Therefore, we recommend that you always make use of a VPN for Kodi.
Click here to read our guide on best VPNs for Kodi.
With that out of the way let’s get to the actual guide.
Table of Contents
How to update Kodi on FireStick
Again, before we start, we would like to mention that if you live in the UK you can get into some serious trouble for streaming content via Kodi.
In order to make sure that you are safe from internet service providers trying to record your every move in the online world, sign up for a good VPN for Kodi today.
With that out of the way, we will talk about four ways in which you can upgrade Kodi on FireStick.
Those four methods are,
- Update Kodi on Amazon FireStick via Downloader App
- Update Kodi on Amazon FireStick via Kodi itself and/or using the Android installer for Kodi
- Update Kodi on Amazon Firestick with the help of ES File Explorer
- Update Kodi on Amazon FireStick via Sideloading
Three of the above-mentioned ways are easy not just to follow but to implement.
If you have the latest version of Amazon FireStick then that can go a long way in you not coming across applications that do not work for your product.
In fact, if you follow the steps that we have mentioned in some of our other guides, you can easily and quickly install Kodi on Amazon FireStick to stream content without breaking a seat.
Amazon FireStick even allows users to install a VPN service on it in order to have more security and safety while streaming Kodi content.
So on we go with the step by step guide for Kodi 17.6 on Amazon FireStick.
How to update Kodi Leia on Amazon FireStick via the Downloader App
Now, before getting started in this section of the guide, you should make sure that the Amazon Firestick device that you have has the option Apps from Unknown Sources enabled.
Do not start the procedure of updating your Kodi on your FireStick device without this.
If you do not know how to do that then simply turn on your Fire TV or FireStick device and then go to Settings.
After that go either to System or Device depending on your version.
Then you need to go to the Developer option.
Once you have managed to get there you need to follow the steps that we have given below down to a tee:
- Click on the search bar (this usually appears near the top of your device’s screen) so that you are able to search.
Then enter the text ‘Downloader’. - Then once you have found the Download app item you need to download it.
After that, install the official Downloader app that you just downloaded. - Then launch the Downloader app
- Input the following URL: https://kodi.tv/download
- After that, you need to scroll down just a little bit till you come across the option that says Android.
Once you do click on it. - Now you should be able to see the box opening up.
Once that happens you need to click the Recommended tab which appears at the top of the screen. - From there you need to click on the option that says ARMV8A (64-bit) or ARMV7A (32-bit).
- Once you have done that you should be able to see your device starting up the actual download.
How to update Kodi to Kodi 17.6 by using Kodi itself.
You can also use the official Android Kodi installer for this purpose.
Here are the steps that you need to take:
- Go to your Amazon FireStick main menu and from there click on the item that takes you to Settings.
- Then you need to choose the option that says Applications.
After that, you need to click on the option that says Manage Installed Applications.
When that is done, you should pick the option that says Select and Open Kodi. - From there, you should first launch Kodi and then click on the menu item that says Add-ons.
And when that is done you should pick the icon near the top of the screen (slightly on the left-hand side) which comes in the shape of an open box called Package Installer. - Once you are finished with the previous step you need to choose the option that says Install from Repository.
From there you need to scroll down a little bit to choose the option that says Kodi Add-on Repository. - Then you should go to the option that says Program Add-ons.
And then scroll a little bit to find the official Kodi Android Installer.
Once found, you should click it.
And then hit the button that says Install. - If you have followed all the steps properly, you should see a notification popping up near the top right corner of the screen.
This is Kodi’s way of notifying the user if it has managed to install the user’s desired Kodi add-on successfully. - In this step, you need to make your way back to the Kodi home screen and then click on Add-ons.
After that, you should click on the option that says Program Add-ons.
And then you should click on the option that says Android Installer. - When that is taken care of you need to open up the Android Installer.
If you have followed all the steps properly sofar you should see the Android installer presenting you with a number of different options.
Some of those options are,- Test-Builds
- Snapshots
- Releases
- Nightly
- We want you to click on Releases.
- Then you need to choose the option that says Arm Kodi Release.
From there you should select Kodi-17.6-Krypton-armeabi-v7a.apk. - Once you do so, Kodi should begin the installation for the better Kodi version 17.6 automatically.
- Once Kodi completes the download process, you should see a dialogue box.
It will appear probably in the center of your screen and it will ask you for permission to go ahead and install the related Kodi update.
Now since you want to update your Kodi version you should click on the button that says Install. - From there you should allow Kodi to finish the download process.
Once it is finished you should open Kodi and then begin to enjoy your Amazon FireStick update.
Now, if you feel that somehow you haven’t managed to get Kodi working on your Amazon FireStick through no fault of your own then your best option is to repeat the steps that we have mentioned above.
Do them slowly, with focus and concentration.
Moving on.
How to update my Kodi 18.2 on Amazon FireStick via the official ES File Explorer app
- Turn on your Amazon FireStick device and then go to the main menu.
From there go to the option that says Search.
When that is done, you need to type the text ES File Explorer. - Once there, open up the ES File Explorer.
- After that click on Tools.
And then choose the Download Manager. This option is usually located on the left side of the screen in the menu. - Then you need to tap the option that says +New which appears near the bottom of the shown menu.
- When you do so, the device will ask you for the Path.
You need to type the following URL to move forward:http://bit.ly/Kodi-17.6-Krypton-APK
After that, click on OK. - Then name the new path Kodi.
After that choose the option that says Download Now. - Once you do so, your download for the Kodi Krypton version 17.6 will begin.
- Now, once that download has reached its completion stage you need to choose the option that says Open File.
With that out of the way, your Amazon FireStick device should start the installation process. - What you need to do now is to make your way back to the Amazon FireStick device main menu on the Home Screen.
- Then you need to launch Kodi Krypton version 17.6.
After that, it is all a matter of enjoying all the benefits that come with Amazon FireStick and an updated Kodi.
How to update Kodi via AppStarter
This is another popular method that you can use to update Kodi.
To start things off you will need the official AppStarter app.
Don’t worry if you do not know how to get that.
Just use the ES File Explorer in order to add the official AppStarter app to your Amazon FireTV and/or FireStick.
Once you have installed the AppStarter application, launch it and then update your Kodi version on Amazon FireStick.
If you follow the on-screen instructions as they are supposed to then you should have no problems in using Kodi Krypton version 17 without any problems.
With that said, keep in mind that you have to make sure your Kodi app has restored your add-on library after you have updated Kodi via this method.
How to update Kodi on Amazon FireStick via Sideloading
- First, open up your Android smartphone.
After that choose the app Google Play Store.
From there you need to install Kodi version Krypton. - But you are not done yet, you also need to install the official Apps2Fire app.
You can get that from Google Play Store as well.
So get that on your Android smartphone and then launch the official Apps2Fire app. - When that is done, you need to open your Amazon FireStick home page and then perform a click on the option that says Settings.
After that, you need to choose the option that says Network.
With that out of the way, you need to note down the IP address of your Amazon FireStick device.
We recommend that you write it down with paper and pencil so you do not have to switch between different apps to get the information you will need later in this guide. - Now you need to go to your Android Phone home screen and click on Apps2Fire application.
From there you need to tap on the tab that says Setup.
Then you need to enter the IP address of your Amazon FireStick that you noted in step 3.
After that, you only need to click the option that says Local Apps. - You will be shown a list. You need to find Kodi on that list.
Once found, tap it. - Then press the button that says Install.
- Everything should go well from here and Kodi should transfer itself directly to your Amazon FireStick internet-enabled device.
- Now you need to go the app list of your Amazon FireStick and click on Kodi.
From there you need to launch the update for Kodi Krypton.
Then you should just enjoy the experience.
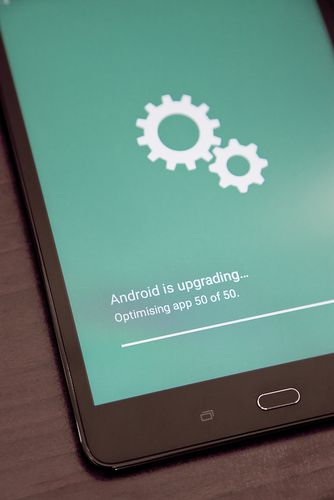
How to update to the latest version of Kodi on any given device running Android.
In this section, we will talk about how you can update Kodi on devices such as,
- Android Phone
- Android Tablet
- Android Box
In the upcoming paragraphs, we will detail all the steps that you need to take in order to update your Kodi on Android devices.
Again, we remind you that when you are using Kodi on an Android device you need to sign up for the best VPN app for Android in order to best protect your privacy and data.
So go do that.
Or you can just move forward from here and not think much about how you are putting your data and your identity at risk.
How to update Kodi to Leia 18.2 on the Android platform
- First, you need to go to the official website of Kodi.
Remember to use your Android device to get there.
Then you should click on the item that says Downloads from the menu. - After that, you should scroll down a little bit to choose the Android icon.
- With that out of the way, you need to tap on the option that says Pre-Release.
This option usually appears near the top of the screen in a menu. - From there scroll down a little bit more to choose the option that says Kodi 18 Leia.
- That is it. You should now have the latest version of Kodi on your Android device.
But hang on.
We’re not done yet.
The process for Android box is a bit different.
So let’s talk about that as well.
How to update Kodi on your Android box
- First, you need to launch to the home screen of your Android Box and then go to the Apps menu.
- From there you need to click on the official Browser App and then you need to type out the following URL: https://kodi.tv/download.
- Once that is done, you need to scroll down a little bit in order to select the option that says Android.
- From there, the device should ask you if you go ahead with the installation of Kodi 17.6 either on ARMV7A or Google Play. You need to select the ARMV7A option here.
- Now, the device will ask you again if you would like to download Kodi using the Browser or ES Downloader.
Here you need to select the option that says ES Downloader and from there the download process should start. - Once your device has downloaded the app and has finished that process you need to close your device’s Browser app and then make your way to the Android Box main menu on the home screen. From there you should click on the option that says Apps and then select the option that says AppInstalle app.
- If you have done everything right, you should see a box opening up with will ask the user for his/her permission to install in either ScanDisk SD Card or local Disk.
You need to select the option that says Local Disk here. - Now you should have no problem in finding the Kodi Android app in your list of apps. Find it and click it.
- Then the device should show you a brand new page which would inform you that proceeding with the installation process of the new version would effectively replace the current Kodi version.
It will also inform the user that the data on the device will stay intact and safe.
You need to click the All option here and then press the button that says Install. - Once you have managed to install the app you should click on Open and then see for yourself that you have the latest version of Kodi.
That could be 17.6 or Leia 18.2 depending on where you were at first.
All that is left, is for you to enjoy your content.
One tip that we would like to mention here is that you should always use a VPN service even with your Android box because there is nothing like anonymous streaming on the internet.
When you have cheap tools available to bypass various streaming errors and government surveillance then why not take the opportunity?
For Android tablet
There is a good chance that you would already have Kodi on your Android tablet but if you don’t refer to some of our other guides on how to get Kodi on an Android tablet.
Assuming you have Kodi on your tablet, all you really need to do is follow the four steps that we have given below.
- First, you need to go to the main menu of your Android tablet.
Then you need to choose the option that says Google Play Store. - Then you need to click on the Search Box and type Kodi in it.
- The Kodi app should appear on your screen.
Once it does, you should click on the button that says Update. - Your Kodi app should update itself to the latest version of Kodi.
Again, depending on where you are coming from you may get updated either to Kodi 17.6 or Kodi 18.2.
In the end, all you have to do is to enjoy.
How to update Kodi on your phone running Android.
Our research shows that there are a total of two methods with which you can update Kodi.
Let’s discuss them.
Update Kodi via an APK File from the official website of Kodi.
- First, you need to open the web browser app on your Android smartphone device.
- Then you need to type the text Kodi.tv.
After that, you need to scroll down a little bit and choose the option that says Android. - Once that is done, you should scroll down one more time and then press the text that says Android.
- Now is the time to choose the item ARMV7A 32-bit.
- Your device should automatically start the download process.
- Once your device completes the download process you should click the file that you have downloaded.
- From there, your device will probably ask you if you wish to overwrite your current Kodi app. It will then explain that your data will remain safe.
Click on the install button. - And that is it.
Update Kodi on Android via Google Play Store.
This is the simplest method of them all.
- Take your smartphone device and then tap on the option that says Google Play Store.
- Then you need to search for the option that says Kodi.
- After that, the device will show you Kodi version 18.2.
Click on Update. - Now, your device will overwrite the current edition of Kodi on your system.
- That is it.