In this step-by-step guide, we’ll walk you through the process of removing sponsored advertisements from uTorrent for good.
uTorrent is one of the oldest torrent clients available in the market today, and that has given us a bunch of time to really get to know the software from the inside out. So let’s get into it:
Table of Contents
Removing Ads in uTorrent
uTorrent (also written as μTorrent) is one of the most popular torrent clients in the world for a host of reasons.
It’s lightweight and reliable (which is more than what we can say for other torrent clients). First built in the early-2000s, uTorrent remains the top choice for the vast majority of torrent users, though newer torrent clients like Transmission and qBittorrent have started to catch up.
The reason for that is simple as well. μTorrent got complacent. Not only that, but it also started to show ads when BitTorrent Inc. acquired uTorrent in 2006.
And since companies need revenue to sustain and grow their operations, BitTorrent Inc. incorporated ads into the torrent client after buying it. The truth is, no one likes torrent clients forcing ads users.
Luckily, the company did start to give users options to disable ads in uTorrent. But in reality, they’re only optional for people who know how to disable them.
μTorrent has done pretty much everything it could do to make sure the option to disable ads remains out of reach of common online users.
There are no easy-to-access checkboxes or buttons to disable or enable ads with just a few clicks. Instead, you have to do a bit of digging in the settings menu to find the right buttons to push.
We would like to mention here that uTorrent has gone through the trouble of offering users an ad-free version of its μTorrent classic torrent client. As you can probably imagine, the catch is that you have to pay for it.
uTorrent Pro is currently priced at $19.95 per year, which is a decent price to pay for a better torrenting experience. It also offers some bonus features that the free edition doesn’t have. Read our full uTorrent Pro review here.
Whether or not you pay for μTorrent, you should pay for a VPN service. Without a VPN service, you’re leaving your IP address and personal information open to hackers and other parties who have an interest in gaining access to your data and doing whatever they want with it.
Pro Tip:
Download your Torrents with blazing fast speeds by using a SeedBox.In addition to providing you with the tools needed to encrypt your data, VPN services are also a great way to secure your torrent downloads. Many VPN services on the market say they take good care of your data and know how to protect it against third parties, but very few actually deliver on their promises.
Note:
One VPN service that’s great at doing what it claims to do is NordVPN. It comes with a 30-day money-back guarantee so you don’t have to take any risks while signing up for it.Combine that with NordVPN’s advanced encryption capabilities, and you have yourself a powerful online security tool. (Read our complete NordVPN review here.)
Of course, there are many other VPN services that provide good protection to torrent users as well. Click here to learn more about the best VPNs for torrenting.
Warning
To start the process of disabling ads on μTorrent, you’ll have to change advanced settings.
This is important:
You don’t want to mess this up. If you’re new to torrenting and torrent clients, we suggest following this guide with someone who has experience.In any case, if there’s a setting you don’t understand or don’t know how to access, then leave it as it is. Otherwise, you run the risk of breaking μTorrent and not being able to download anything, with or without ads. It may also have an impact on your computer. So, proceed with caution.
Step-By-Step Guide: How to Remove Ads From uTorrent
Step 1: Launch uTorrent
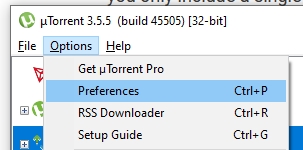
After downloading the uTorrent client from the company’s website, open up the app and have a look at the top-left corner of the screen. Then click the button that says Options. After that, select Preferences.
Step 2: Go to Advanced Options
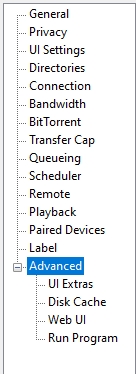
On the Preferences page, you’ll see a sidebar with different options on the left-hand side of the interface.
Click Advanced. Based on the uTorrent version you’re using, it may be close to the end of the given options list.
Step 3: Modify Option Values
Once you click Advanced, you should see a host of gibberish (at least for now) on the right-hand side.
Here, you’ll need to change some of these values. Again, don’t worry if you don’t know what some or all of these options mean.
The way we’ll move forward is to show you how to change the value of the strings.
Once you’ve managed that, we’ll list out all the string values that you need to change. At that point, you will just have to repeat the process.
You may have noticed already that there is a Filter bar in the top-right corner of the screen.
To find all the strings that we’ll mention, you’ll have to use this filter function. It will save you a lot of time.
Step 4: Change the Value of bt.enable_pulse
To do that, just type bt.enable_pulse in the field beside Filter. You can also copy/paste the text that we have mentioned here.
Once you’ve managed to find the required string, you should change its value from True to False. Simply double-click on True and it will automatically change to False.
Another way to do the same process is to look at the radio buttons given near the bottom of the screen. If you want to use them to change values, then first click on the string you want to change and then click on the desired radio button.
Since you want to disable bt.enable_pulse, you will first click it from the list and then click the radio button marked False. And that’s it for this part.
As mentioned before, now we want you to repeat the same step for five more strings and you are done.
Let’s take a look at the strings that you need to set to False. Again, search for these via the filter option and you should save a lot of time.
- Gui.show_plus_upsell
- offers.content_offer_autoexec
- gui.show_notorrents_node
- offers.sponsored_torrent_offer_enabled
- offers.left_rail_offer_enabled
Here’s an additional setting that you might want to disable if it’s available on your version of the uTorrent client:
- bt.enable_plus
Step 5: Restart uTorrent to Disable Ads
Assuming you’ve modified the string values of the options we mentioned above and have actually set them to FALSE, you’re almost done.
All you need to do now is to close the window by clicking the OK button. After that, close μTorrent and restart the application.
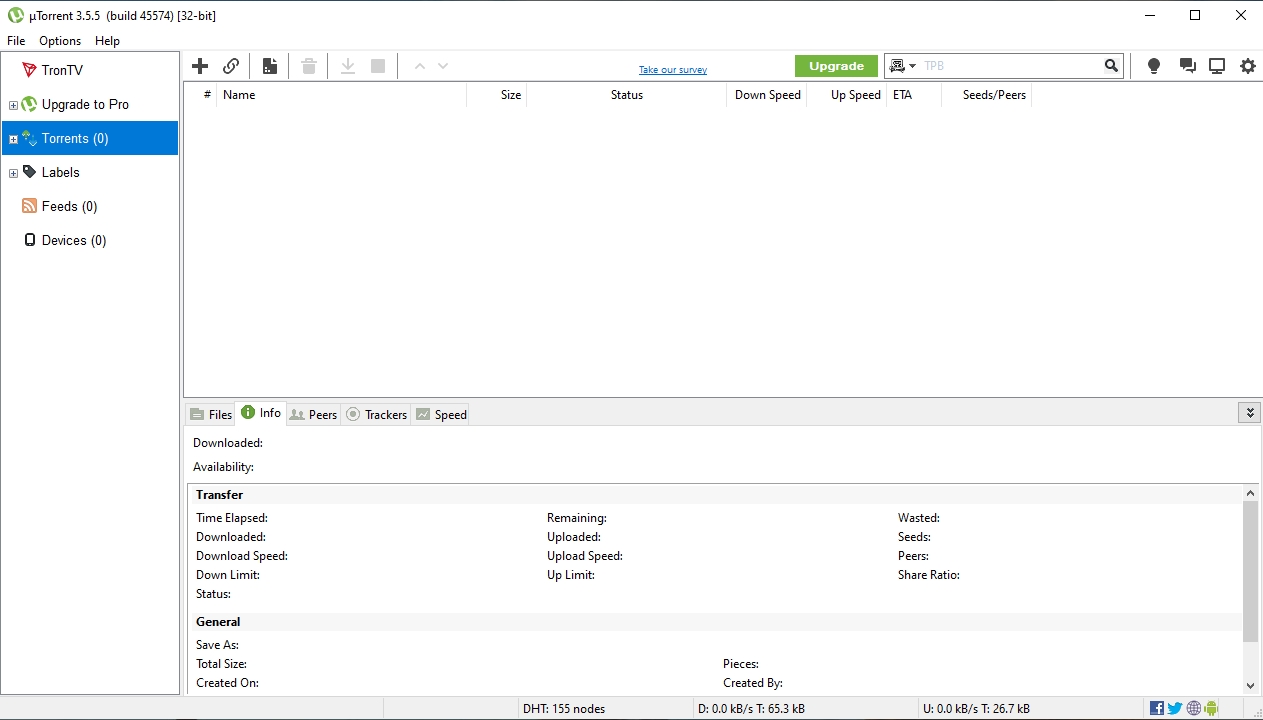
The next time you turn on μTorrent you should see no ads in the client.
There you have it: An ad-free μTorrent that did not cost you anything just because you were willing to put in 10 minutes of work.
DISCLAIMER:
Security Gladiators in no way encourages or condones any kind of copyright violation or circumvention of restrictions. That includes torrenting or downloading illegal content. Torrenting is a great way to access and share all kinds of content on the internet and there are plenty of opportunities there to engage in legal and safe online torrenting. You need to do your own research to see if these services and torrents are legal in your own country. We suggest to always use a VPN while torrenting.Conclusion
Once you’ve followed the steps above, you can enjoy downloading torrents without the hassle of dealing with ads.
uTorrent is a tremendously useful torrent client in the sense that it is lightweight and gets the job done.
But it has weak points, and showing advertisements is just one of them. With this guide though, you’ve managed to overcome this issue.
Feel free to use the comments section below to let us know if you have any trouble removing ads on uTorrent. Also, if this guide helped you, please share it with others who are interested in getting rid of ads on uTorrent once and for all.


Awesome!!!